


UNPACKING
•Remove the lawn mower and all parts from
the carton. Make certain all parts and litera-
ture have been removed from the carton
before the carton is discarded.
CAUTION: Disconnect spark plug
wire. if the wire is not equipped with
a rubber boot, see separate engine
manual for grounding procedure.
CAUTION: DO NOT BEND OR KINK
CONTROL WIRE.
•
Refer to “Contents of Hardware Pack” for
hardware identification.
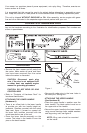
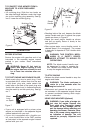
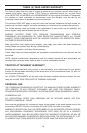
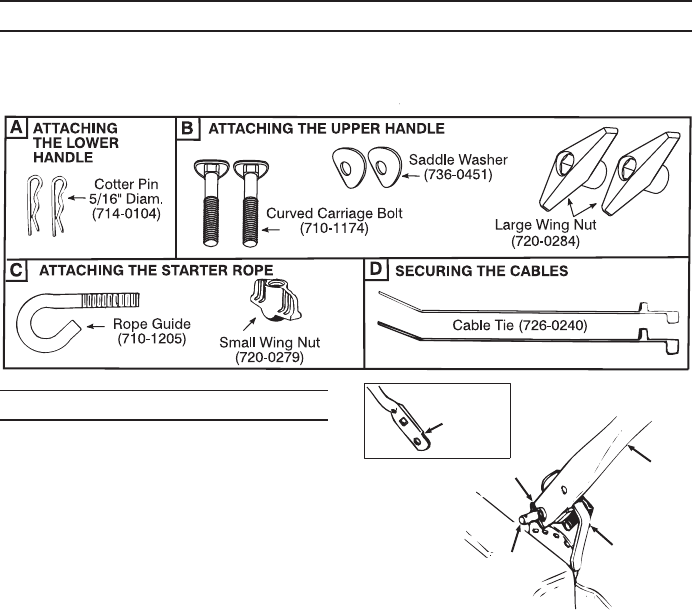
ATTACHING THE LOWER HANDLE
(Hardware A)
•
There is an off-set hole in the lower handle
to provide you with two handle height ad
-
justments. Handles mounted with the notch
(see inset, figure 1) forward or upward will
be lower then handles mounted with the
notch towards the rear of the unit.
•
Place the lower handle assembly on the
mower. The holes in the handle fit over the
pins on the deck bracket.
•
Secure with cotter pins in the inner holes in
the weld pins. See figure 1.
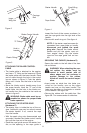
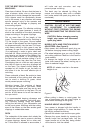
ATTACHING THE UPPER HANDLE
(See Hardware B)
•
Place the upper handle in position over the
lower handle. The blade control must be on
the upper side of the handle.
•
Secure the upper handle to the lower handle
using curved carriage bolts, saddle washers
and large wing nuts, see figure 2.
NOTE: Wing nuts should be mounted
on the inside.
7
Your mower is a precision piece of power equipment, not a play thing. Therefore, exercise ex
-
treme caution at all times.
It is suggested that this manual be read in its entirety before attempting to assemble or oper
-
ate. Keep this manual in a safe place for future reference and for ordering replacement parts.
This unit is shipped WITHOUT GASOLINE or OIL. After assembly, service engine with gaso
-
line and oil as instructed in the separate engine manual packed with your unit.
CONTENTS OF HARDWARE PACK
Lay out the hardware according to the illustration for identification purposes. Part numbers are
shown in parentheses.
Figure 1
Lower
Handle
Cotter Pin
Notch
Deck
Bracket
Weld Pin