


9
4
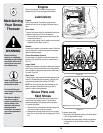
Operating
Your Snow
Thrower
WARNING
The operation of any
snow thrower can result
in foreign objects being
thrown into the eyes,
which can damage your
eyes severely. Always
wear safety glasses
while operating the snow
thrower, or while perform-
ing any adjustments or
repairs on it.
Be sure no one other than
the operator is standing
near the snow thrower
while starting engine or
operating snow thrower.
Never run engine indoors
or in enclosed, poorly
ventilated areas. Engine
exhaust contains carbon
monoxide, an odorless
and deadly gas. Keep
hands, feet, hair and loose
clothing away from any
moving parts on engine
and snow thrower.
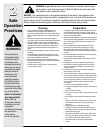
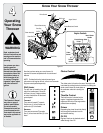
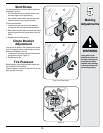
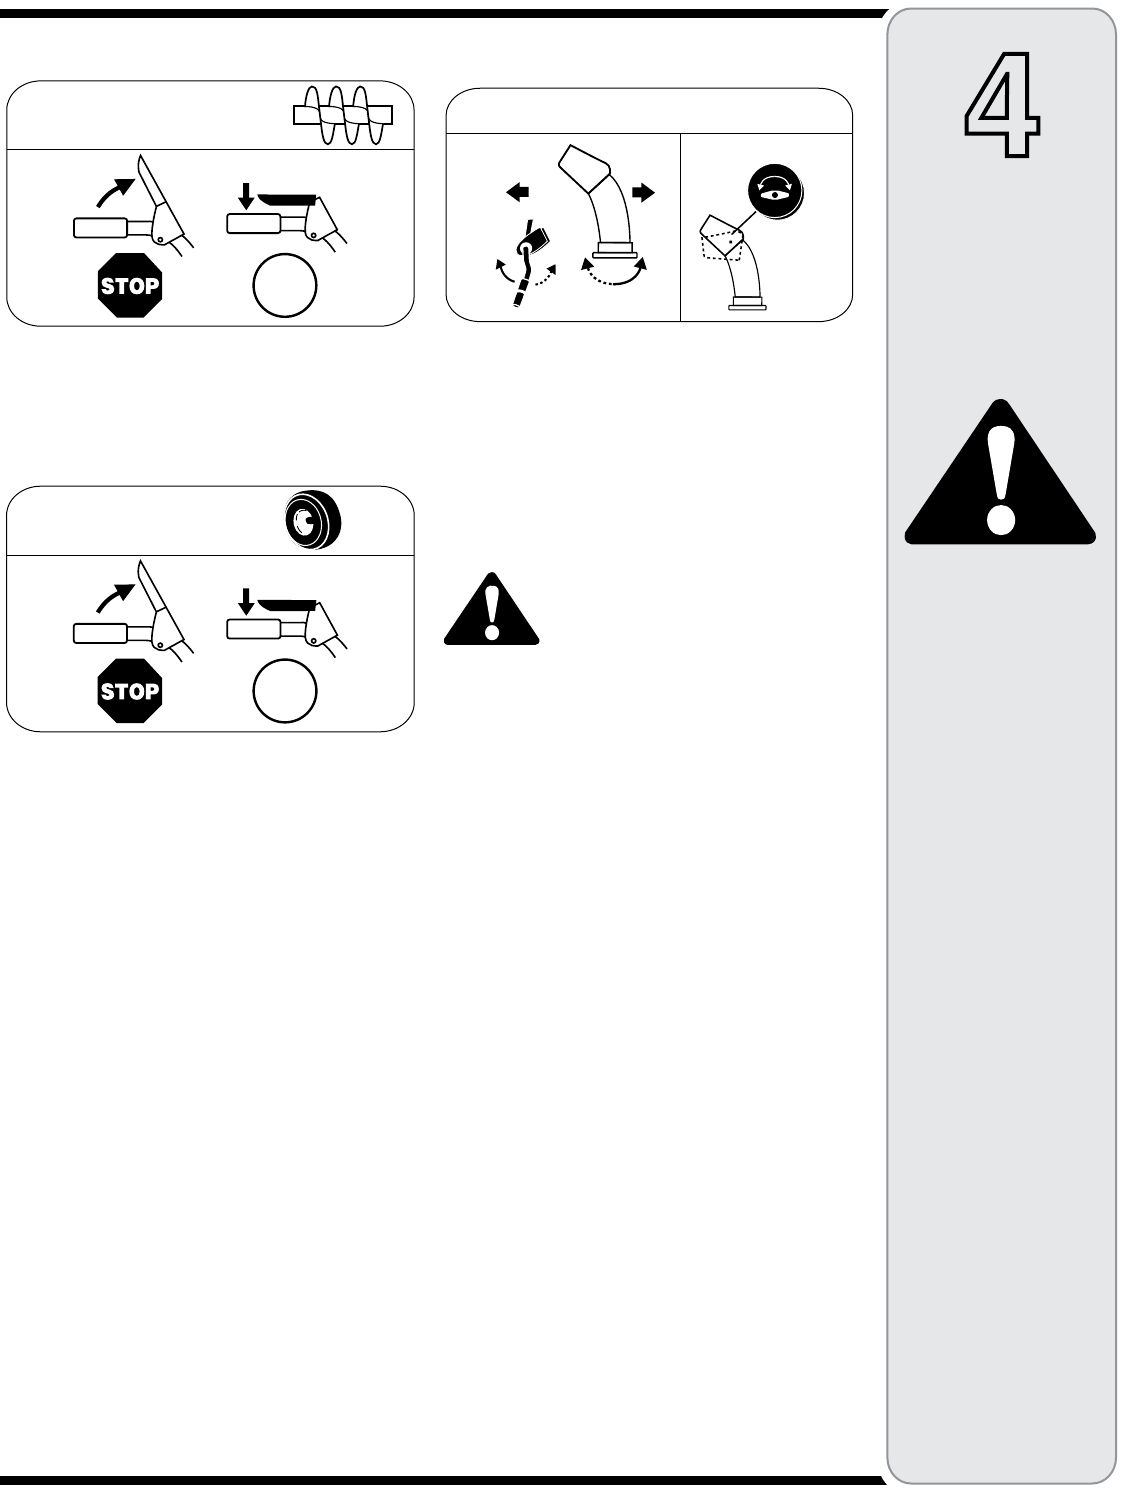
Auger Control
The auger control is located on the left handle. Squeeze
the control grip against the handle to engage the augers
and start snow throwing action. Release to stop.
Drive Control / Auger Clutch Lock*
The drive control is located on the right handle. Squeeze
the control grip against the handle to engage the wheel
drive. Release to stop.
*On select models, the drive control also locks the auger
control so that you can operate the chute directional
control without interrupting the snow throwing process.
If the auger control is engaged simultaneously with the
drive control, the operator can release the auger control
(on the left handle) and the augers will remain engaged.
Release both controls to stop the augers and wheel
drive.
IMPORTANT: Always release the drive control before
changing speeds.
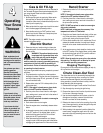
Ignition Key
The ignition key is a safety devise. It must be fully
inserted in order for the engine to start. Remove the
ignition key when the snow thrower is not in use.
Do not turn the ignition key in an attempt to start the
engine. Doing so may cause it to break.
Recoil Starter Handle
This handle is used to manually start the engine.
Electric Starter Button
Pressing the electric starter button engages the engine’s
electric starter when plugged into a 120V power source.
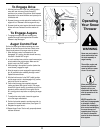
Chute Directional Control
The chute directional control is located on left side of the
snow thrower.
To change the direction in which snow is thrown, turn
chute directional control as follows:
• Crank clockwise to discharge to the left.
• Crank counterclockwise to discharge to the right.
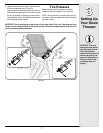
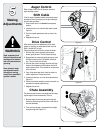
Clean-Out Tool
WARNING: Never use your
hands to clear a clogged chute
assembly. Shut off engine and
remain behind handles until
all moving parts have stopped
before unclogging.
The chute clean-out tool is fastened to the top of the
auger housing with a mounting clip. The tool is designed
to clear a clogged chute assembly.
NOTE: This item is fastened with a cable tie to the rear
of the auger housing at the factory. Cut the cable tie
before operating the snow thrower.
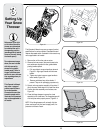
Skid Shoes
Position the skid shoes based on surface conditions.
Adjust upward for hard-packed snow. Adjust downward
when operating on gravel or crushed rock surfaces.
Electric Starter Outlet
Requires the use of a three-prong outdoor extension cord
and a 120V power source/wall outlet.
Augers
When engaged, the augers rotate and draw snow into the
auger housing.
Chute Assembly
Snow drawn into the auger housing is discharged out the
chute assembly.
Gas Cap
Unthread the gas cap to add gasoline to the fuel tank.
!5'%2
#/.42/,
'/
$2)6%
#/.42/,
'/
#(54%$)2%#4)/.!,#/.42/,
$)3#(!2'%
,%&4
$)3#(!2'%
2)'(4
!$*534!",%
#(54%4),4