


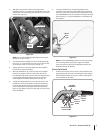
Insert the cable into the slot on the control panel and fit
the threaded assembly into the hole in the slot. Be sure
that the flat side of the threaded assembly is aligned with
the flat side of the hole. Slide the hex nut up the cable and
tighten it securely.
Test the function of the reverse clutch control cable by
pulling the knob out and releasing it. The knob should
return to its neutral position against the tapered bushing.
If it does not, contact your local dealer or the factory for
technical assistance.
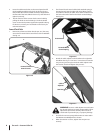
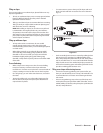
Forward Clutch Cable
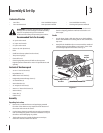
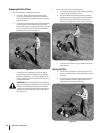
Remove any fasteners (rubber bands, tape, etc.) that may
secure the Forward Clutch Control levers to the handlebar.
See Fig. 3-5.
2.
3.
1.
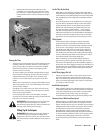
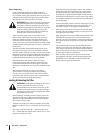
The forward clutch control cable (with attached spring) is
hanging loosely near the right-side wheel. Being careful
not to kink or stretch the cable, insert the Z-connector into
the hole at the end of the forward clutch control linkage.
See Fig. 3-6.
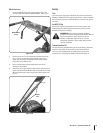
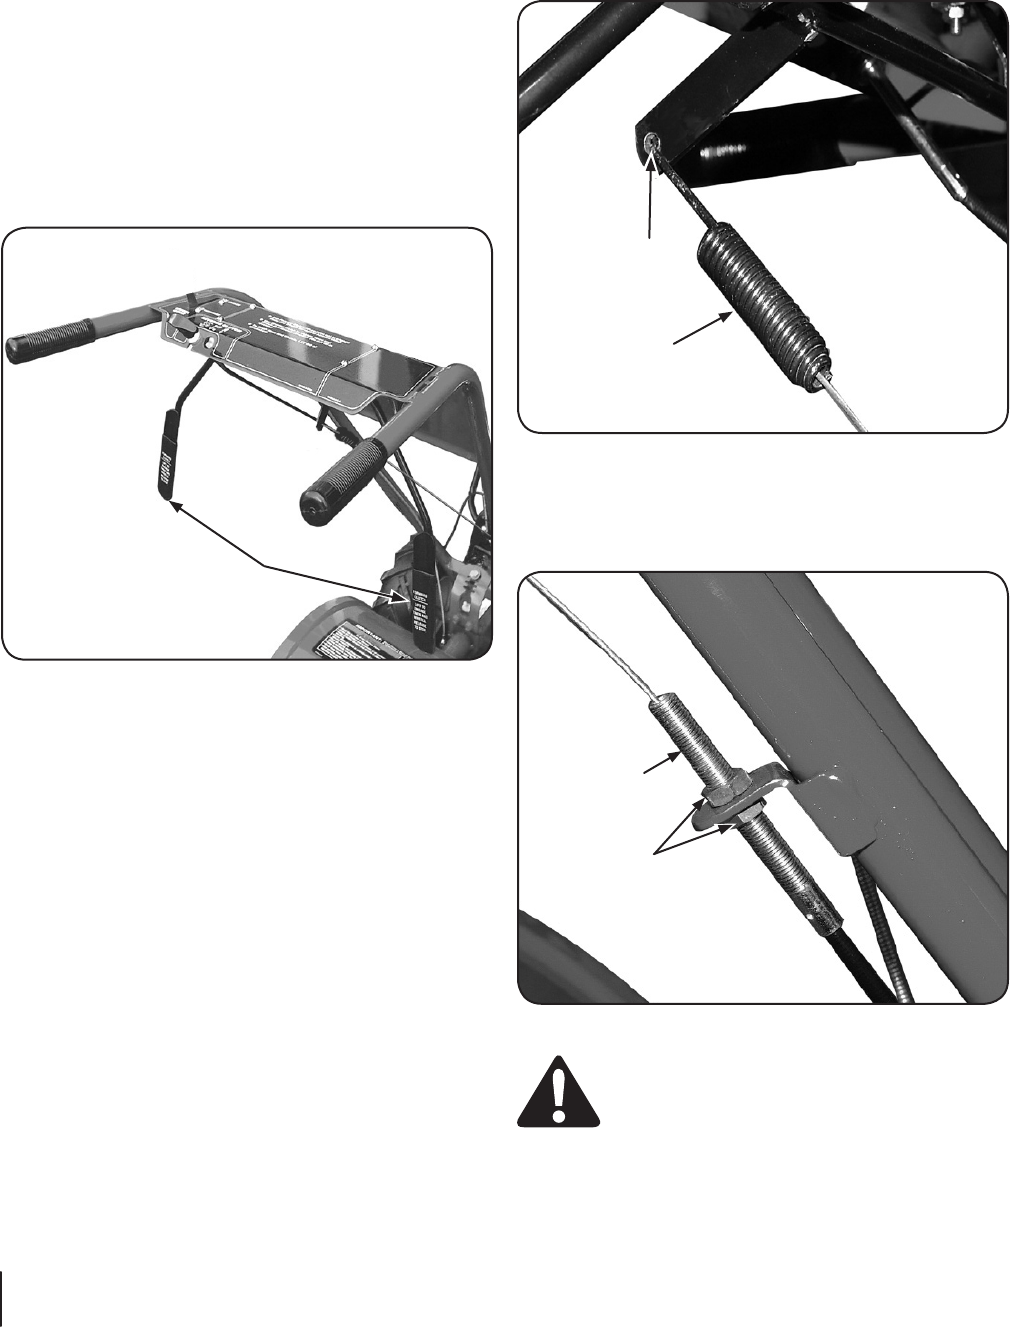
Attach the cable adjuster to the bracket on the right-side
handlebar. See Fig. 3-7. Use two ⁄” wrenches to loosen the
two jam nuts just enough to slide the cable adjuster onto
the bracket. Then hand tighten the jam nuts.
WARNING! Incorrect cable adjustment could cause
the wheels and tines to rotate unexpectedly. Follow
adjustment procedures carefully. Failure to do so
could result in personal injury or property damage.
Check for the correct spring/cable tension as instructed in
the Maintenance & Adjustments Section.
When the tension is correct, tighten the two jam nuts
securely.
2.
3.
4.
5.
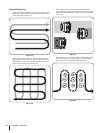
Forward Clutch
Control Levers
Figure 3-5
Z-Connector
Forward Clutch
Control Spring
Figure 3-6
Cable
Adjuster
Jam Nuts
Figure 3-7
8 sectiOn 2— asseMbly & set-up