


20
• All belts on the tractor are subject to wear and should be replaced if cracking, shredding or rotting occurs. To
change or replace the deck belts on your tractor, proceed as follows:
1. Lower the deck by moving the deck lift lever into the bottom notch on the right fender.
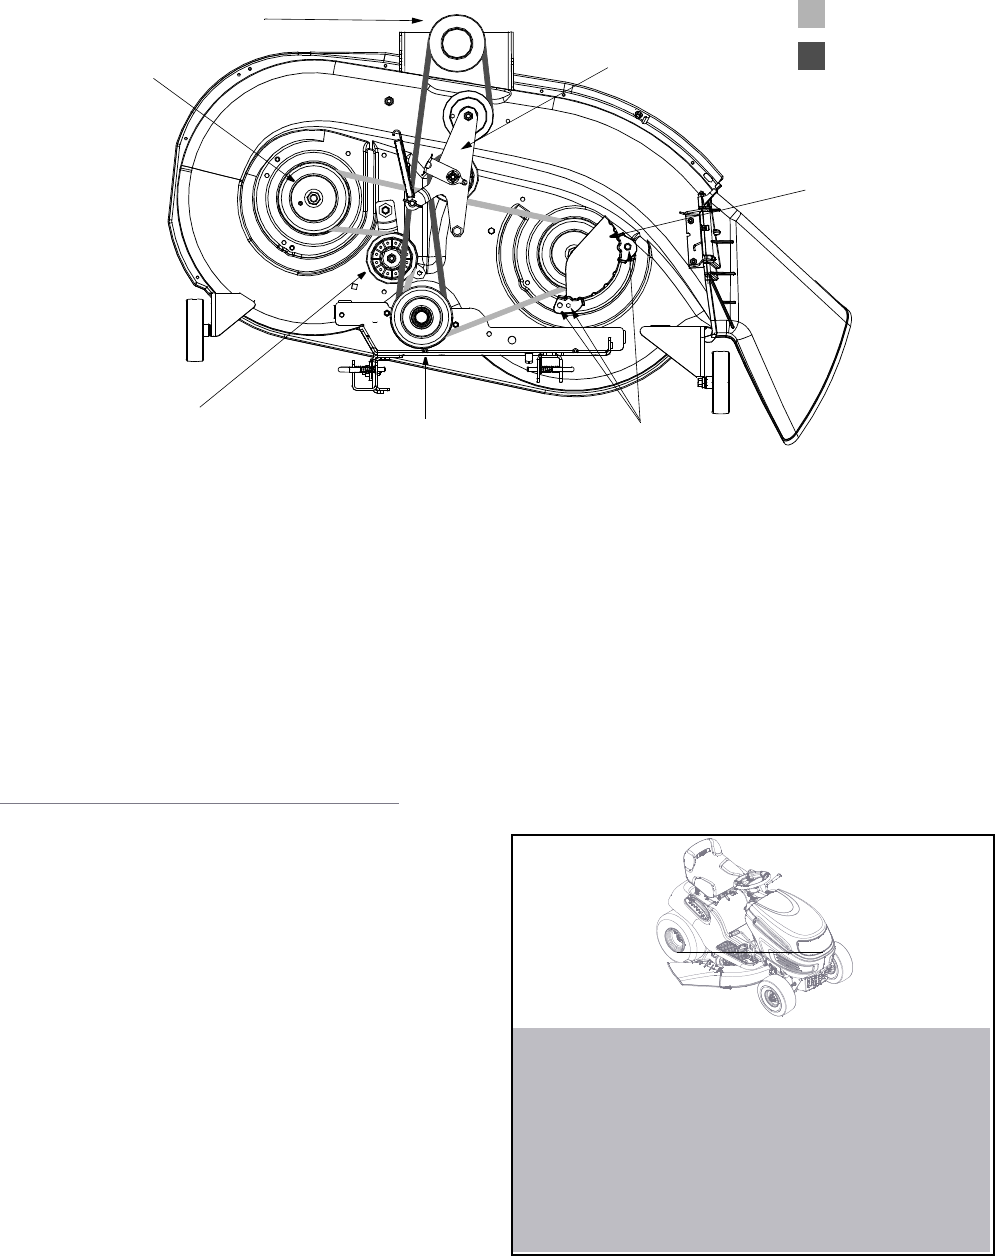
2. Remove the belt guards by removing the self-tapping screws that fasten them to the deck surface. See Figure
15 for location of the screws.
3. Grasp the PTO idler bracket and pivot it toward the discharge chute to relieve tension on the PTO belt.
4. Remove the PTO belt from the electric PTO clutch and from around the PTO idler pulley.
5. Grasp the deck idler pulley and pivot it toward the left side of the deck to relieve tension on the deck belt.
6. Remove the belt from around all pulleys, including the deck idler pulley.
7. Route the new belts as shown in Figure 15. Remount the belt guards removed earlier.
Changing Transmission Drive Belt
NOTE: It is recommended that both drive belts be
replaced at the same time.
1. Remove the cutting deck as instructed earlier in this
section.
2. After disconnecting the battery cables, remove the
battery and battery tray from beneath the seat.
IMPORTANT:
When removing the battery, disconnect the
NEGATIVE (Black) wire from its terminal first, followed
by the POSITIVE (Red) wire. Re-install in reverse order.
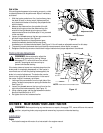
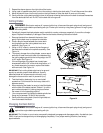
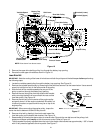
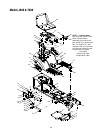
Upper Drive Belt
1. Locate the transmission idler pulley on the upper
drive belt by looking through the battery tray
opening. See Figure 16.
2. Grasp the bracket and pivot the transmission idler
pulley toward the rear of the tractor to release
tension on the upper drive belt.
3. Remove the belt from around the transmission idler
pulley.
4. Remove the upper drive belt from around the transmission pulley and the variable-speed pulley. Slowly rotate
the pulley counterclockwise to roll the belt off it.
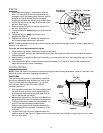
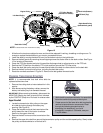
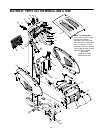
Deck belt (Bottom)
PTO belt (Top)
Engine Pulley
PTO Idler Bracket
Left Hand Pulley
Right Hand Pulley
(beneath belt guard)
Center Pulley
Deck Idler Pulley
Self-Tapping Screws
(mounted on tractor)
NOTE: Left hand belt cover not shown for clarity.
Figure 15
1. While installing replacement belts, it is essential to
follow the same routing map as the original.
2. Proper removal of the lower drive belt requires the
removal of several tractor components. Read
through the following procedure prior to
attempting it to determine if you could
successfully complete it. Otherwise, see your
Troy-Bilt dealer .
IMPORTANT