


8
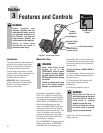
Section 2: Assembly
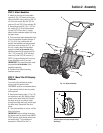
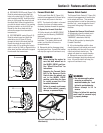
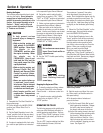
STEP 4: Install Forward Clutch Cable
1. Carefully unwrap the forward clutch
cable (the cable without a knob attached to
it) from its shipping position and slide the
thin cable wire (T, Fig. 2-4) into the slot in
the cable bracket. Push the cable connector
(U, Fig. 2-4) up through the hole in the
bracket until the groove in the connector
snaps into place on the bracket.
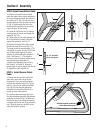
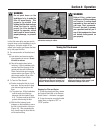
2. Thread the #10-24 hex nut (Z) halfway
onto the screw (V) which runs through the
spring (W, Fig. 2-5).
3. Thread screw (V) into cable adjuster (X).
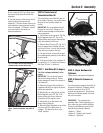
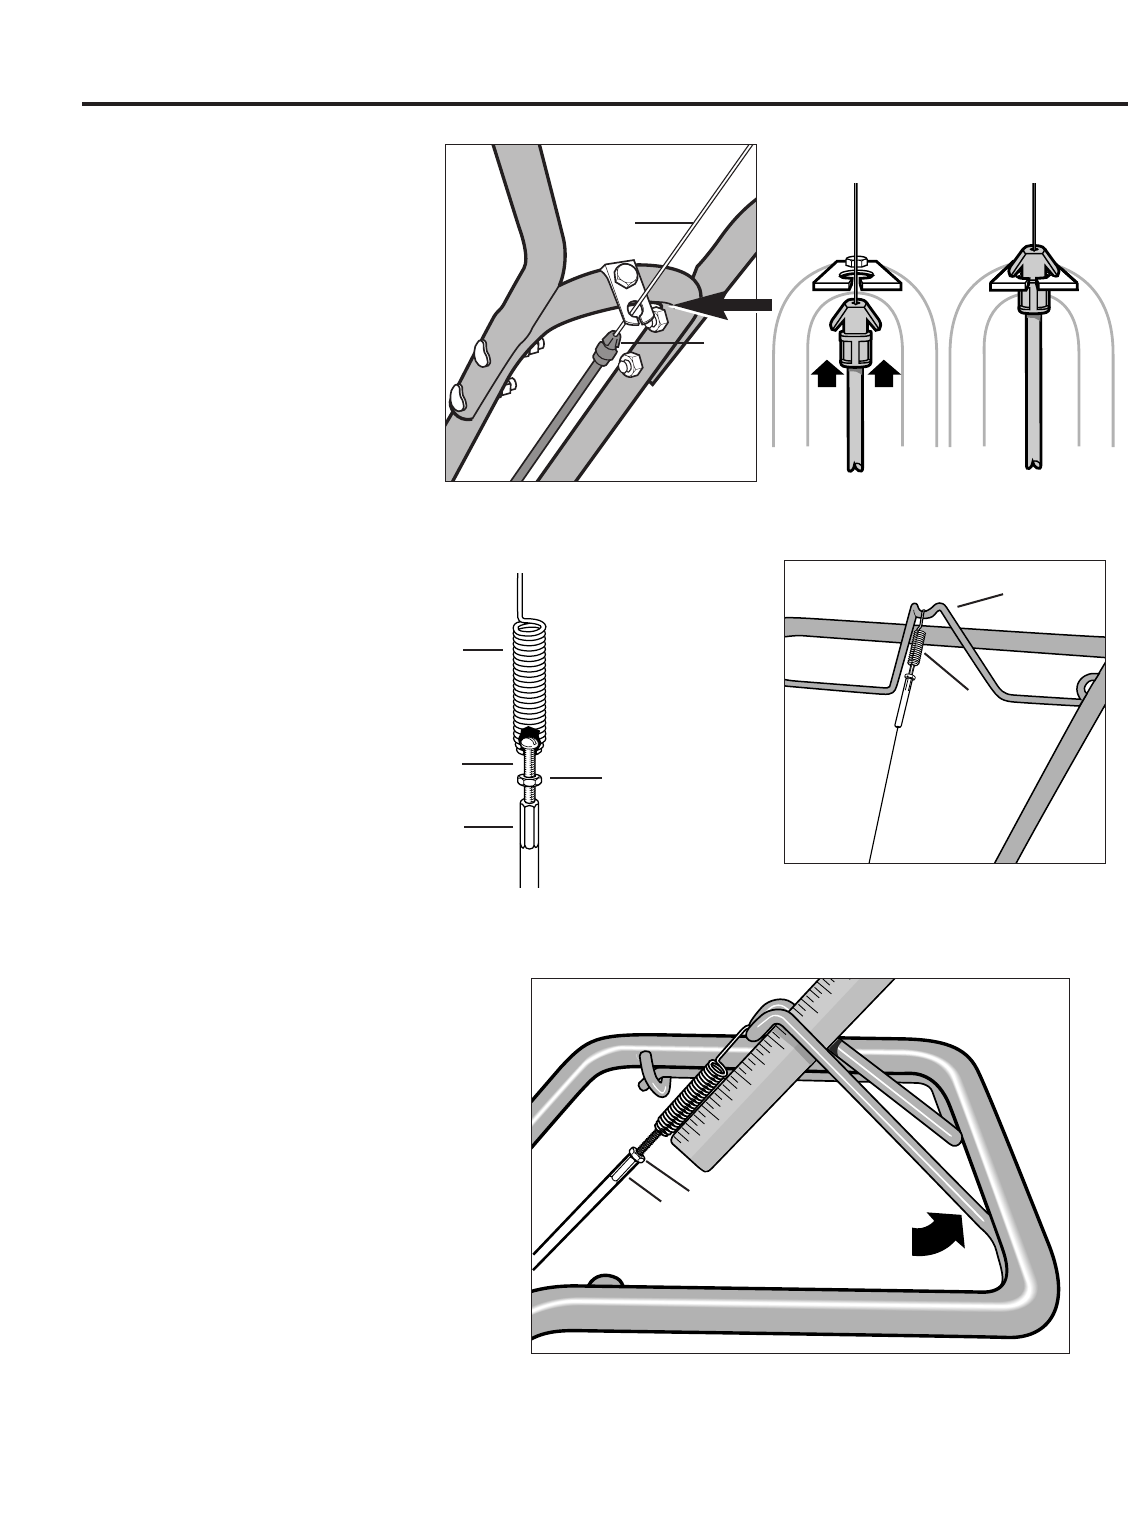
4. Lift and hold the Forward Clutch bail
against the handlebar. See Fig. 2-7.
5. Measure the length of the cable spring
between the ends of the coils (Fig. 2-7).
The length should be approximately 1-7/8".
If the length is correct, turn the #10-24 hex
nut (Z) down tightly against the cable
adjuster (X) while holding the adjuster in
place. See Figure 2-7. If the length is
incorrect, you must make an adjustment to
the cable tension as described in
“Checking and Adjusting Forward Drive
Belt Tension” in Section 5. When the
spring length is correct, tighten the hex nut
(Z) against the cable adjuster (X).
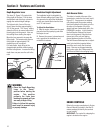
STEP 5: Install Reverse Clutch
Cable
1. Unwrap the reverse clutch cable (the
cable with a knob and a large hex nut
attached to it) from around its shipping
position and route the cable (CC, Fig. 2-8
and Fig. 2-9) up to the cable bracket (BB,
Fig. 2-8). Be sure that the cable goes
beneath the Forward Clutch Bail as it is
routed up to the cable bracket.
2. Insert the cable up through the slot in
the cable bracket and position the threaded
assembly as shown in Fig. 2-8. Make sure
that the flat side of the threaded assembly
is aligned with the flat side of the mounting
hole. Slide the large hex nut (DD) up the
cable and tighten it securely.
Fig. 2-5: Assemble
spring and adjuster.
V
Z
X
W
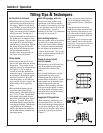
Fig. 2-6: Install forward clutch cable.
Fig. 2-4: Installing forward clutch cable bracket and cable.
Fig. 2-7: Measure cable spring.
1
2
3
4
5
T
Y
W
U
Hold bail against handlebar
while measuring spring
Z
X