


E
Assembly
_Read entire operator's manual before youattempt
to assemble or operateyour new pressurewasher.
Your pressure washer requires some assembly and is ready
for use after it has been properly serviced with the
recommended oil and fuel.
If you haveany problems with the assembly ofyour pressure
washer, pleasecall the pressure washer helplineat
(888) 611-6708. If calling for assistance, please havethe
model, revision, and serial number from the data tag
available.
UnpackPressureWasher
1. Removethe parts bag, accessories,and inserts
included with pressurewasher.
2. Opencarton completely by cutting each corner from
top to bottom.
3. Ensureyou have all included items prior to assembly.
Items in the cartoninclude:
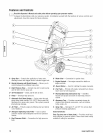
= Main Unit
• Handle
• High PressureHose
• Spray Gun
• Nozzle Extensionwith Quick Connect Fitting
• Plastic Accessory Tray
• Oil Bottle
• Parts Bag(which includesthe following):
• Safety Goggles
• Operator's Manual
• EngineOperator's Manual
• Owner's Registration Card
• Bagcontaining 3 Multi-Colored Spray Tips
• Spray Gun Holder Wireform
• HandleFasteningHardwareKit(which includes):
• Carriage Bolts (2)
• Plastic Knobs (3)
• Tree Clips (4)
To prepareyour pressurewasher for operation,youwill
needto performthese tasks:
1. Fill out and send in registration card.
2. Attach handleto main unit.
3. Add oil to engine crankcase.
4. Add fuel to fuel tank.
5. Connecthigh pressure hose to spray gun and pump.
6. Connectwater supply to pump.
7. Attach nozzleextension to spray gun.
8. Select!attachquick connect spray tip to nozzle
extension.
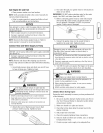
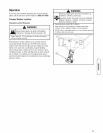
Attach Handleand AccessoryTray
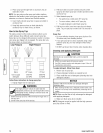
1. Placehandle (A) onto handle supports (B) connectedto
main unit. Makesure holes (C) in handle align with
holes (C) on handlesupports.
NOTE:It may be necessaryto movethe handlesupports
from side to side in order to align the handleso it will slide
over the handle supports.
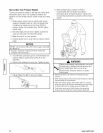
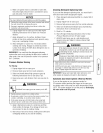
2. Insert carriage bolts (A) through holes from back of
unit and attach a plastic knob (B) from front of unit.
Tighten by hand.
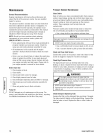
3. Placeaccessory tray (A) over holes (C) on handle
(viewing from front of unit). Push the tree clips (B) into
the holes until they sit flat against the accessorytray.
J
J
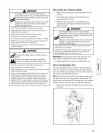
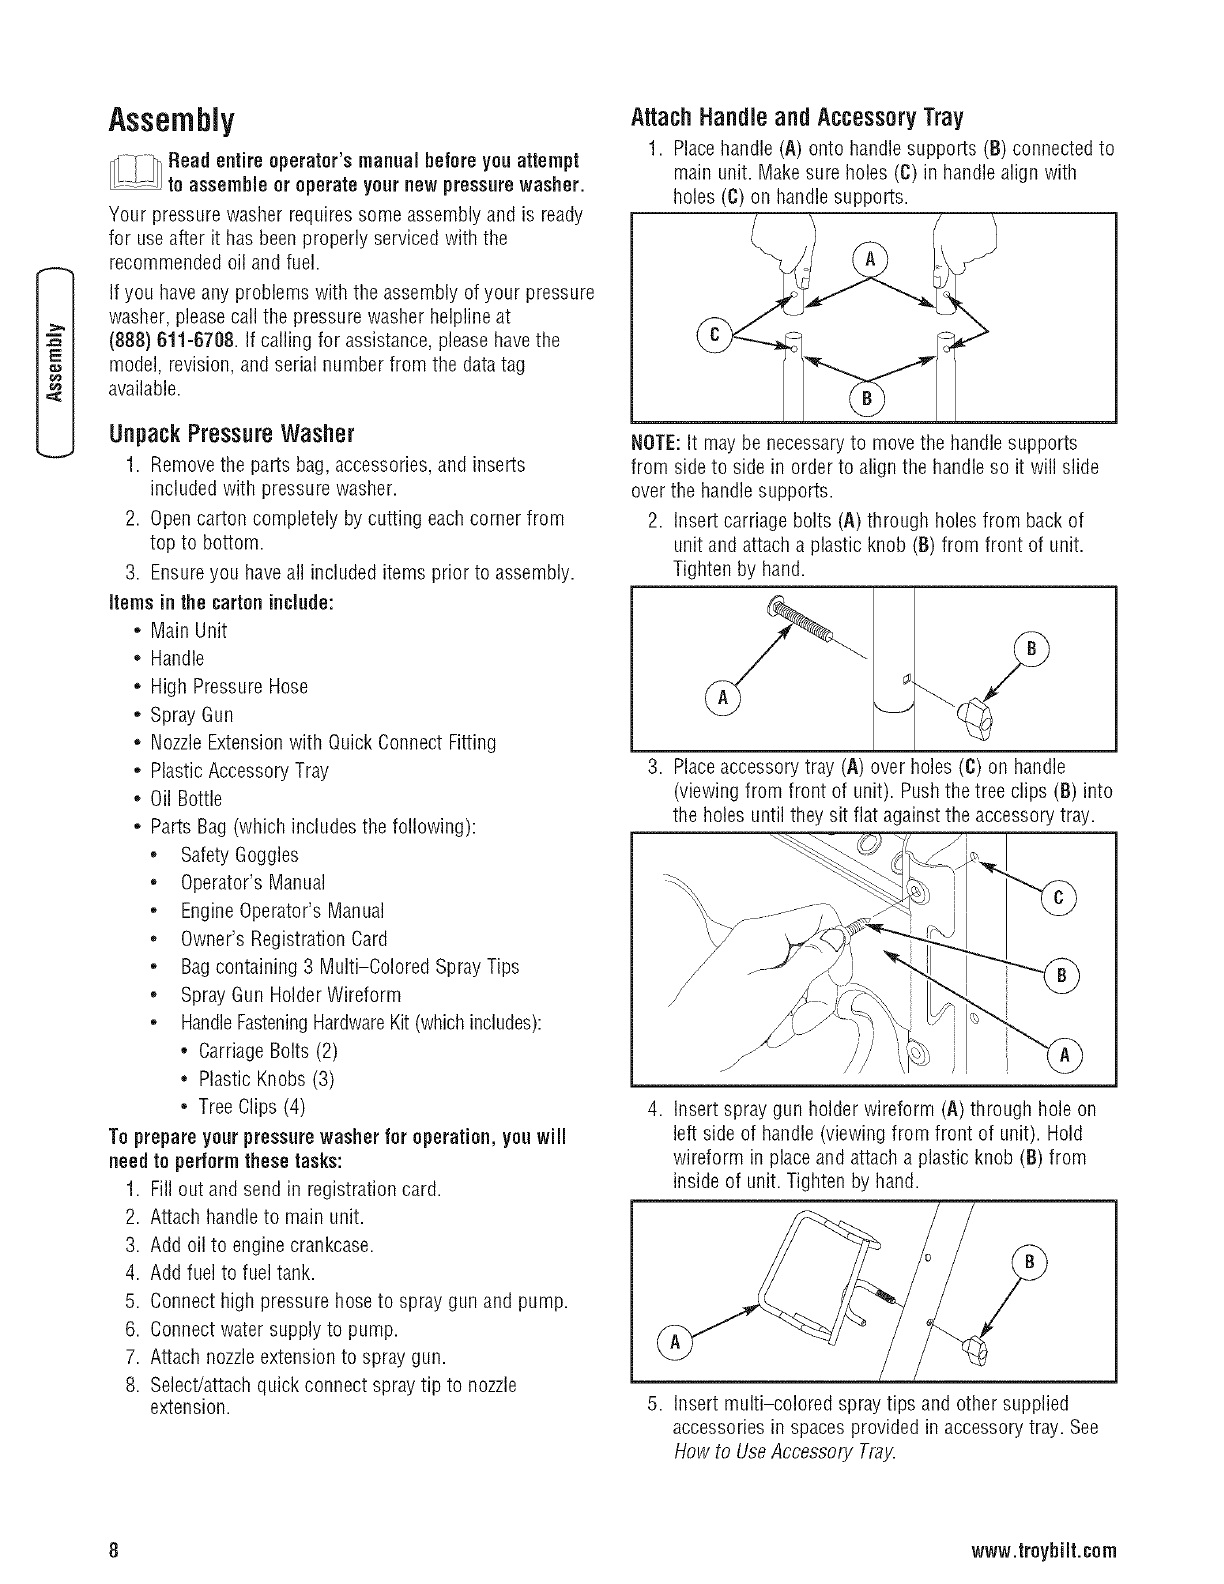
4. Insert spray gun holder wireform (A) through hole on
left side of handle (viewing from front of unit). Hold
wireform in place and attach a plastic knob (B) from
inside of unit. Tighten by hand.
5. Insert multi-colored spraytips and other supplied
accessories in spaces provided in accessory tray. See
How to UseAccessory Tray.
8 www.troybilt.cem