


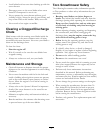
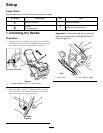

2. Installing the Discharge
Chute
3
Screws
1
Chute assembly
Procedure
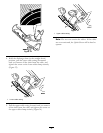
Install the discharge chute as shown (Figure 6).
Figure 6
1. Discharge chute
2. Screw (3)
Note: For easier installation, use a small ratchet wrench
to tighten the screws.
Important: Do not overtighten the screws;
otherwise you may damage the discharge chute and
prevent it from turning freely.
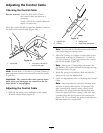
3. Adjusting the Control Cable
Procedure
Refer to Adjusting the Control Cable in Maintenance.
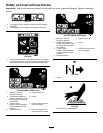
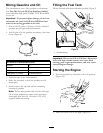
Product Overview
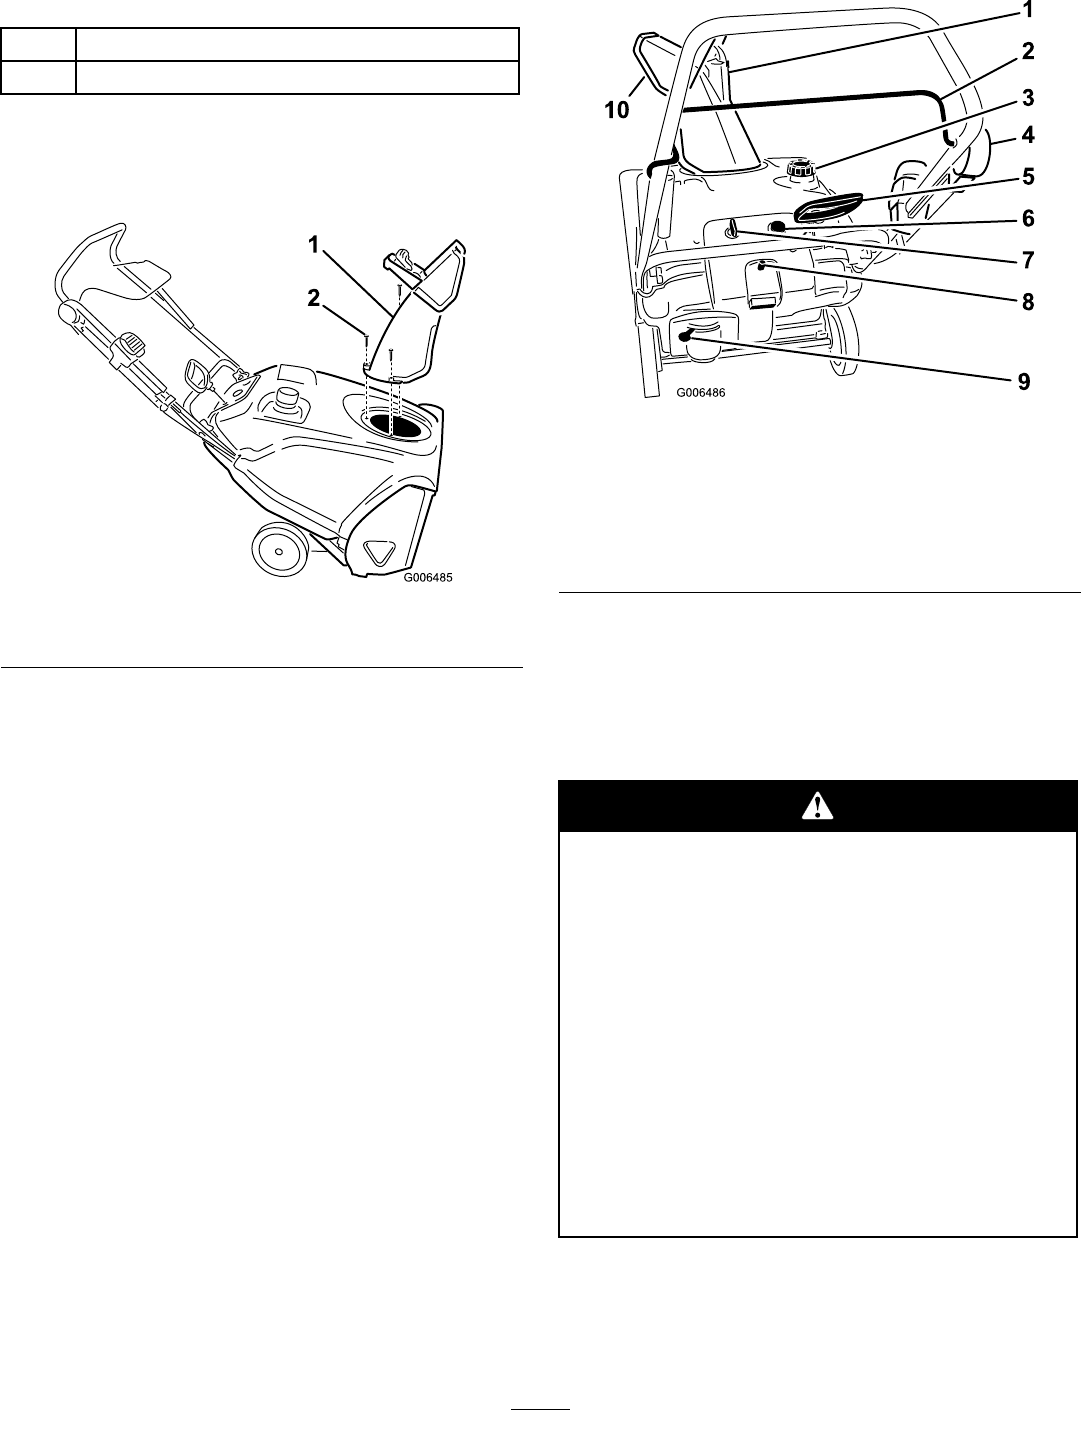
Figure 7
1. Chute deector trigger
6. Primer
2. Control bar
7. Ignition key
3. Fuel tank cap 8. Electric-start button
(model 38584 only)
4. Quick Shoot™ control 9. Choke lever
5. Recoil start handle
10. Chute deector
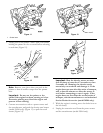
Operation
Note: Determine the left and right sides of the machine
from the normal operating position.
Gasoline is extremely ammable and explosive.
A re or explosion from gasoline can burn you
and others.
• To prevent a static charge from igniting
the gasoline, place the container and/or
snowthrower on the ground before lling,
not in a vehicle or on an object.
• Fill the tank outdoors when the engine is
cold. Wipe up spills.
• Do not handle gasoline when smoking or
around an open ame or sparks.
• Store gasoline in an approved fuel container,
out of the reach of children.
6