


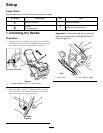

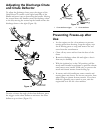
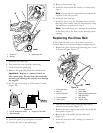


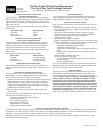
Figure 25
1. Screw (4) 3. Spark-plug wire
2. Shroud
7. Install the fuel tank cap.
8. Disconnect the wire from the spark plug.
9. Clean around the spark plug.
10. Remove the spark plug from the cylinder head.
Important: Replace a cracked, fouled, or
dirty spark plug. Do not clean the electrodes
because grit entering the cylinder can damage
the engine.
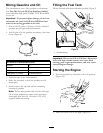
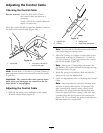
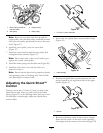
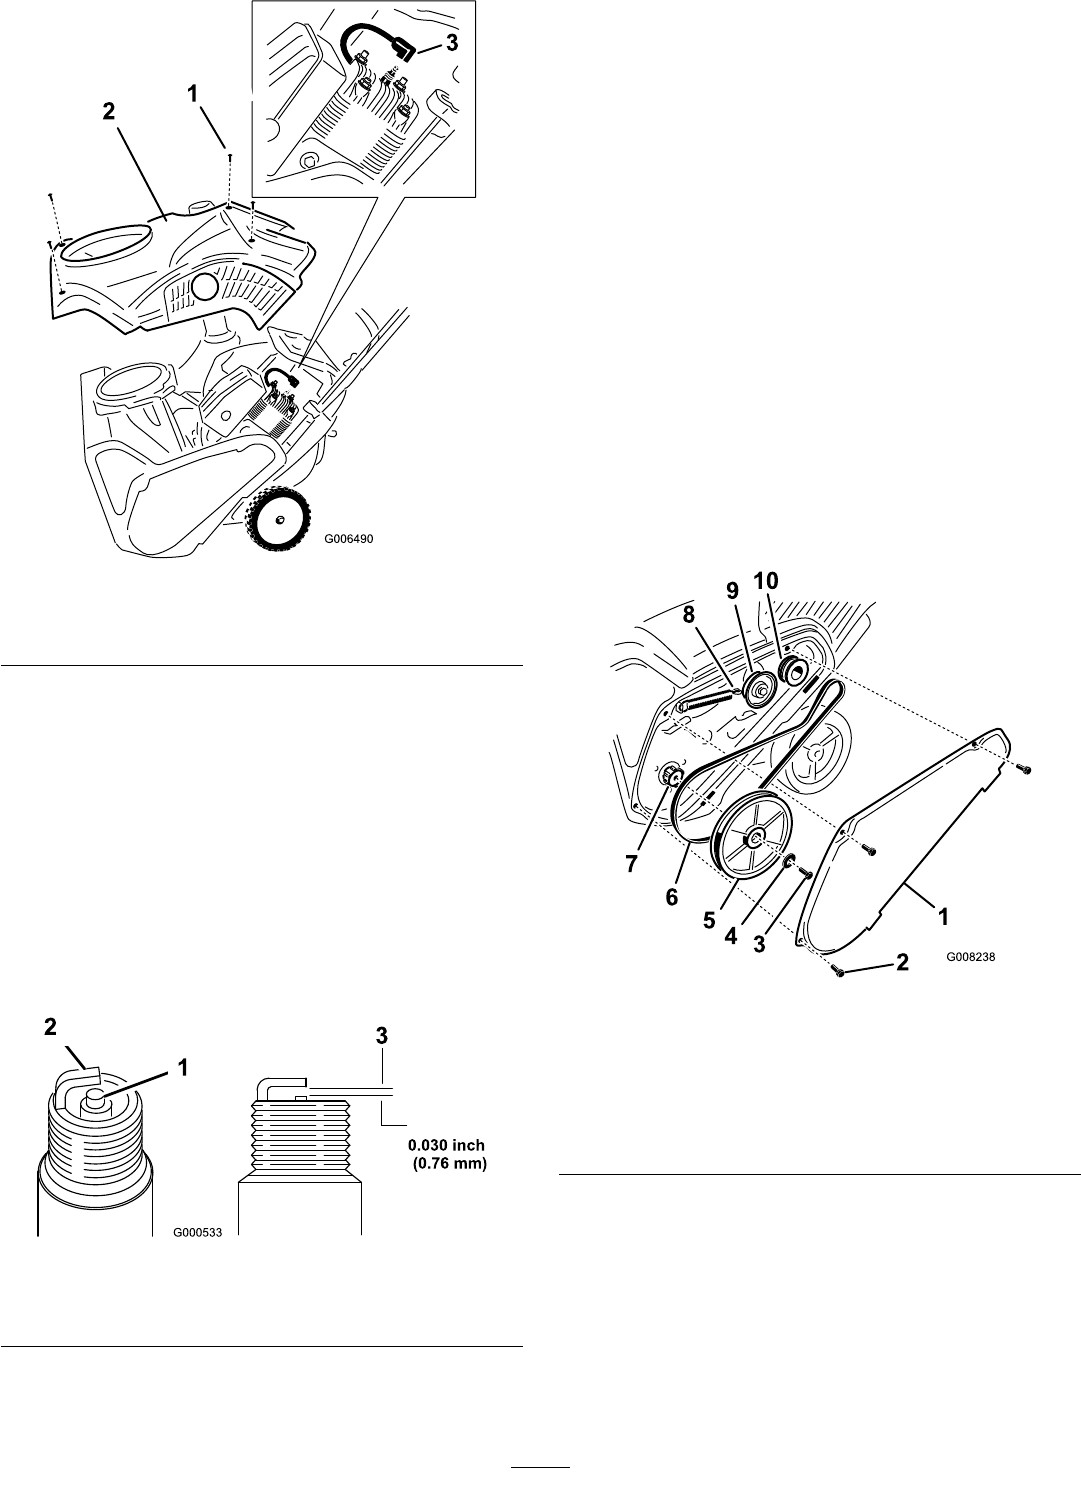
11. Set the gap on the plug to 0.030 inch (0.76 mm)
(Figure 26).
Figure 26
1. Center electrode insulator 3. Air gap (not to scale)
2. Side electrode
12. Install the spark plug and tighten it securely.
13. Connect the wire to the spark plug.
14. Remove the fuel tank cap.
15. Install the shroud with the screws you removed in
step 4.
Note: Ensure that the upper and lower shrouds t
together in the side grooves.
16. Install the fuel tank cap.
17. Install the chute seal, the discharge chute, and the
discharge chute handle onto the snowthrower using
the hardware you removed in step 3.
Note: The small screw goes through the small hole
in the chute seal at the front of the discharge chute
opening.
Replacing the Drive Belt
If drive belt becomes worn, oil-soaked, excessively
cracked, frayed, or otherwise damaged, replace the belt.
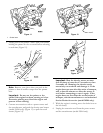
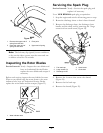
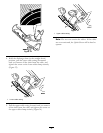
1. Remove the drive belt cover by removing the 3 bolts
as shown in Figure Figure 27.
Figure 27
1. Drive belt cover 6. Drive belt
2. Bolt (3) 7. Rotor shaft
3. Rotor pulley bolt
8. Brake spring (unhook from
idler arm here)
4. Curved washer
9. Idler pulley
5. Rotor pulley 10. Engine pulley
2. Unhook the brake spring from the idler arm to
release the belt tension (Figure 27).
3. Remove the screw and curved washer that holds the
rotor pulley (Figure 27).
4. Remove the rotor pulley and the drive belt
(Figure 27).
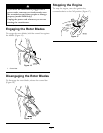
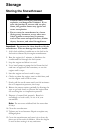
5. Install the new drive belt, routing it as shown in
(Figure 28).
14