5
INTRODUCTION
Uncrating & Assembly
¾ Dispose of top and side panels of the crate.
¾ Remove loose parts and packing material
¾ Cut any banding or strapping that may be holding the mower to the crate.
¾ Disengage spark plug wire and place where it cannot make a connection.
¾ Raise the mower deck to its highest position..
¾ Disengage the parking brakes by placing the handle controls in the upright position.
¾ Open the transmission valves at the rear of the unit by pulling the release rods and
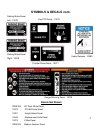
locking them in place. SEE INSTRUCTION DECAL AT THE REAR OF THE UNIT.
¾ Carefully push the mower off the crate to a safe and level area.
¾ Check engine oil. All engines are filled with oil and tested at the factory. Verify oil level
and add if necessary before starting engine. SEE ENGINE OWNER’S MANUAL
¾ Check the battery. If the battery is put into service after the “month & year” of the date
on the battery, then it may need to be charged with a 12 volt charger for a minimum of 1
hour, but no more than 2 hours at a rate of 6 to 10 amps.
¾ Attach battery cables to battery. Always attach the positive terminal first.
¾ Install steering levers. Remove the bolts from the control arms on the mower. Align
the holes in the lever with the holes in the control arms and attach with the bolts provided.
Make sure both bolts on both handles are tight.
¾ Close the transmission valves at the rear of the unit. SEE INSTRUCTION DECAL AT
THE REAR OF THE UNIT.
¾ Reconnect spark plug wire.
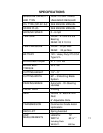
¾ Check tire pressure on all four wheels. REFER TO UNIT SPECIFICATIONS TABLE
TOOLS REQUIRED:
9 2 - ½” Wrenches or ½” Socket with drive ratchet
9 Tire pressure gauge
9 Nail bar or claw hammer
9 Wire snips
To Remove The Mower From The Crate


