


4
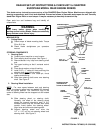
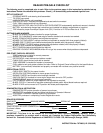
3. Seat Installation
A. Position operator’s seat onto seat pedestal.
B. Install two 5/16-18 hex head flange lock nuts
into rear holes of seat. Tighten nuts securely
and loosen 1/4 to 1/2 turn.
C. Install two washers onto the forward bolts
protruding through seat pedestal.
D. Install adjusting knobs onto forward bolts
protruding through seat pedestal.
E. Adjust seat to desired position. Partially
tighten rear screws, allowing seat to slide front
to back. Tighten adjusting knobs to secure
seat in position. See Figure 12.
FIGURE 12
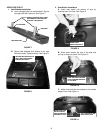
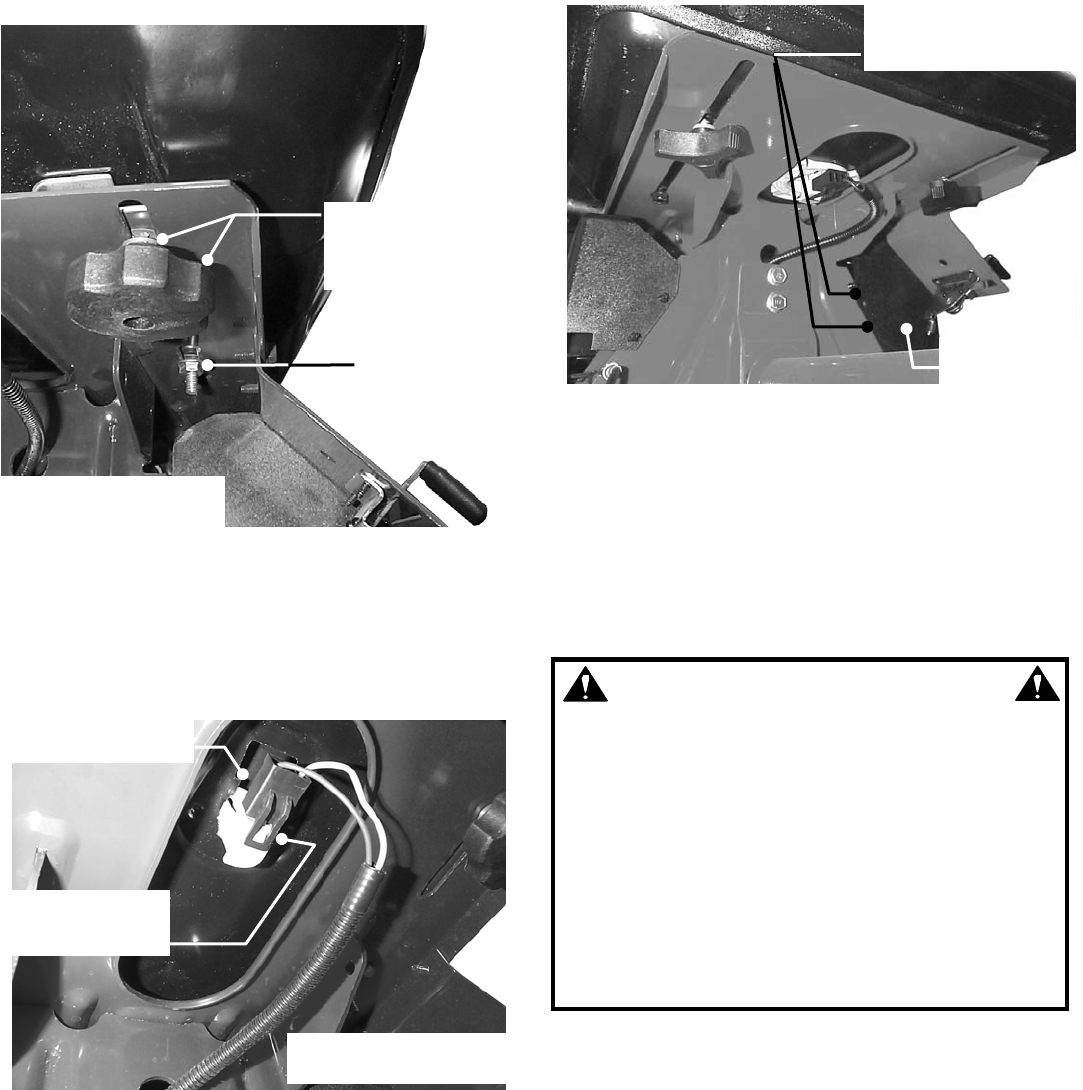
F. Connect switch wiring harness to male tabs of
seat switch (under seat). Make sure locking
tab locks into place on switch. See Figure 13.
FIGURE 13
BATTERY ACTIVATION and INSTALLATION
Snapper riders with a model prefix “W” are supplied with
wet batteries and do not require the addition of
electrolyte. All batteries require a slow charge before
being placed into service.
1. BATTERY REMOVAL
A. Remove battery cover by pulling each side away
from ratchet fasteners. See Figure 14.
B. Remove the hair pin and swivel from the deck
support to allow clearance for battery removal.
C. Remove battery from battery compartment.
FIGURE 14
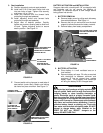
2. BATTERY ACTIVATION
A. Place battery in a well ventilated area on a
level surface.
B. Remove battery cell caps. Fill cells as required
with electrolyte to between minimum and
maximum fill line as viewed from outside
battery case. Filling battery with electrolyte
will bring the battery to 80% charged state.
WARNING
The electrolyte (acid) produces a highly explosive gas.
Keep all sparks, flame and fire away from area when
charging battery or when handling electrolyte or
battery. Electrolyte (acid) is a highly corrosive liquid.
Wear eye protection. Wash affected areas immediately
after having eye or skin contact with electrolyte (acid).
Battery acid is corrosive. Rinse empty acid containers
with water and mutilate before discarding. If acid is
spilled on battery, bench, or clothing, etc., Flush with
clear water and neutralize with baking soda. DO NOT
attempt to charge battery while installed on the
RIDER. DO NOT use “BOOST” chargers on the
battery. DO NOT OVER FILL!
PULL COVER AWAY FROM
RATCHET FASTENERS ON
BOTH SIDES
BATTERY
COMPARTMENT
INSTALL WASHERS ONTO
KNOBS AND INSTALL
KNOBS ONTO FORWARD
POSITION BOLTS
INSTALL LOCK NUTS
TO THE REAR
POSITION BOLTS
THAT SECURE SEAT
CONNECT WIRE
HARNESS TO SWITCH
LOCKING TAB
MUST BE LOCKED
ONTO SWITCH
UNDERSIDE VIEW OF SEAT
AND SEAT PEDESTAL
UNDERSIDE VIEW OF SEAT
AND SEAT PEDESTAL