


19
Section 4 - ADJUSTMENTS & REPAIR
4.3 MOWER BLADE DRIVE BELTS – ADJUSTMENT /
REPLACEMENT (continued from previous page)
WARNING
The following procedure requires the engine and
blades to be operated. Exercise extreme caution. Clear
area of loose parts & tools first. Only operate blades
when seated in the operator’s seat.
9. Check blade drive for proper function. Start
engine. Engage blades. Blades should engage
smoothly. Disengage blades. Blades should stop
rotating in 3 seconds or less. If blade drive does not
function properly recheck adjustments or contact your
SNAPPER dealer for assistance.
10. Install cover to seat pedestal. Tighten screws
securely.
4.3.2. Engine To Deck Belt Replacement
Replace belt if worn, damaged or if belt adjustment
does not restore proper function.
1. Stop engine. Stop blades. Engage parking brake.
Remove key.
2. Remove cover to gain access to belt area. The
cover is retained to the seat pedestal with four
screws. See Figure 3.4.
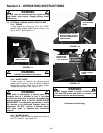
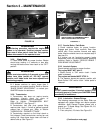
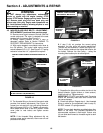
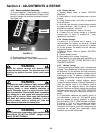
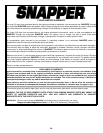
3. Remove belt guide at deck jackshaft pulley.
See Figure 4.6.
FIGURE 4.6
4. Make sure blade control lever is “OFF”. Route
belt off of jackshaft pulley and idler pulley.
5. Place deck in low cut.
6. Route belt down off of engine pulley and
between belt guides. See Figure 4.3.
7. Reverse procedure to install new belt.
8. Check belt tension and adjust as required.
Refer to Section “ENGINE TO DECK BELT
ADJUSTMENT”.
9. Install cover to seat pedestal. Tighten screws
securely.
4.3.3. Deck Belt Replacement
The deck belt requires no adjustments. Replace
belt if it becomes worn or damaged.
1. Stop engine. Stop blades. Engine parking
brake. Remove key.
2. Remove cover to gain access to belt area. The
cover is retained to the seat pedestal with four
screws.
3. Remove engine to deck belt from jackshaft
pulley. Refer to Section “ENGINE TO DECK BELT
REPLACEMENT”.
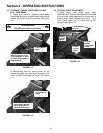
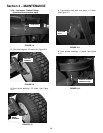
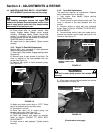
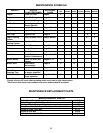
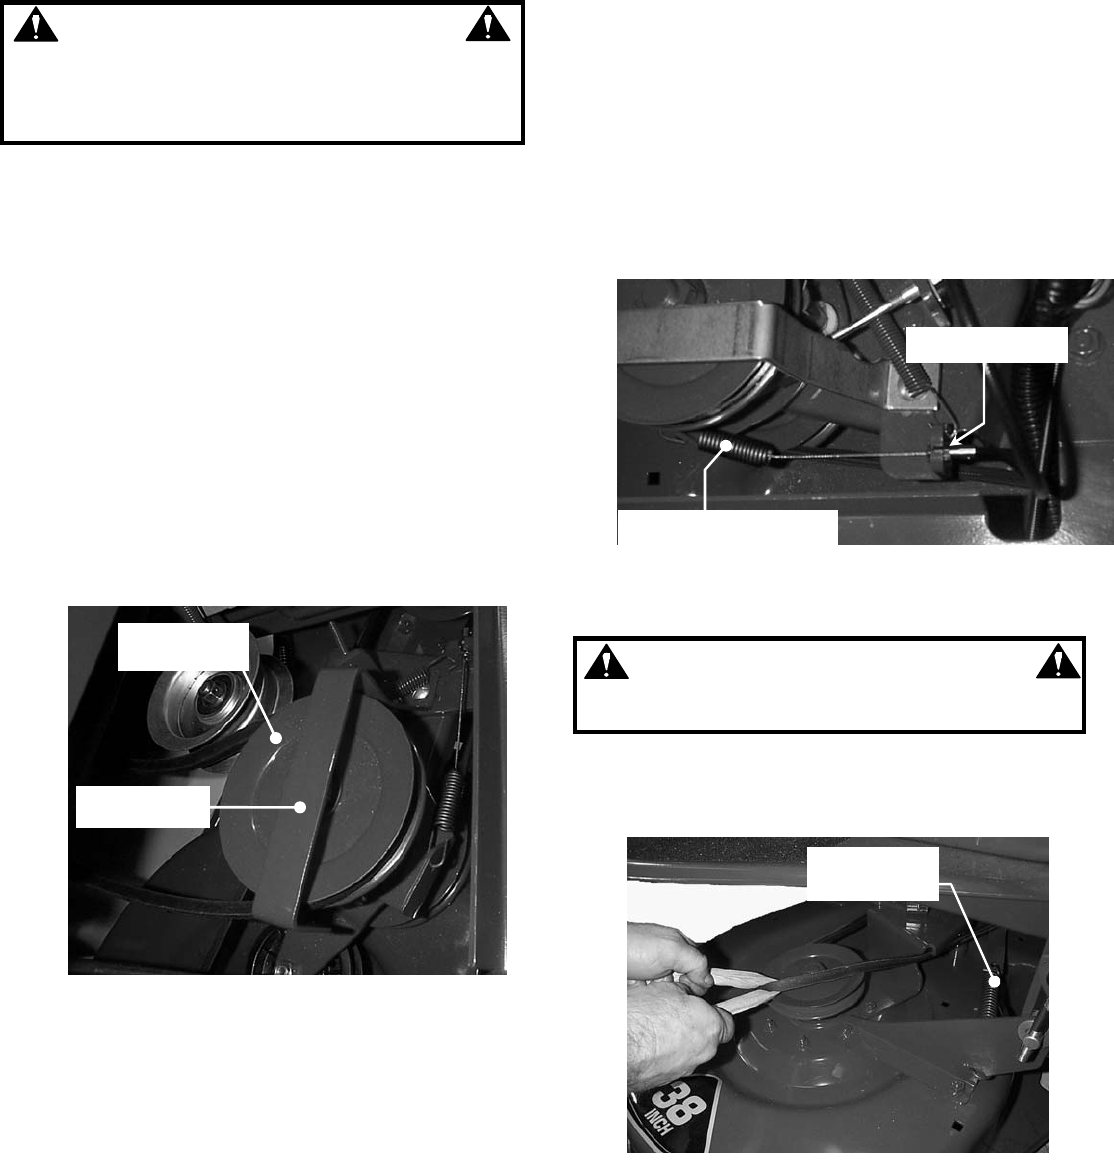
4. Remove blade control cable from cable anchor
bracket and unhook control cable spring from the
idler arm. See Figure 4.7.
FIGURE 4.7
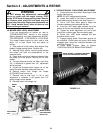
WARNING
Deck belt is under spring tension. Use caution when
removing.
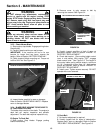
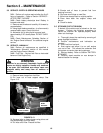
5. Wrap heavy rag around belt behind left spindle
pulley as shown in Figure 4.8.
FIGURE 4.8
(Continued on next page)
BELT GUIDE
JACKSHAFT
PU
LLEY
CABLE ANCHOR
UNHOOK SPRING AND
REMOVE CABLE FROM
ANCHOR
DECK BELT
SPRING