


Intermediate Frame Snowthrowers
09/2007 17 TP 300-4681-01-IW-SN
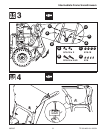
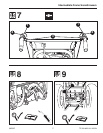
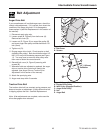
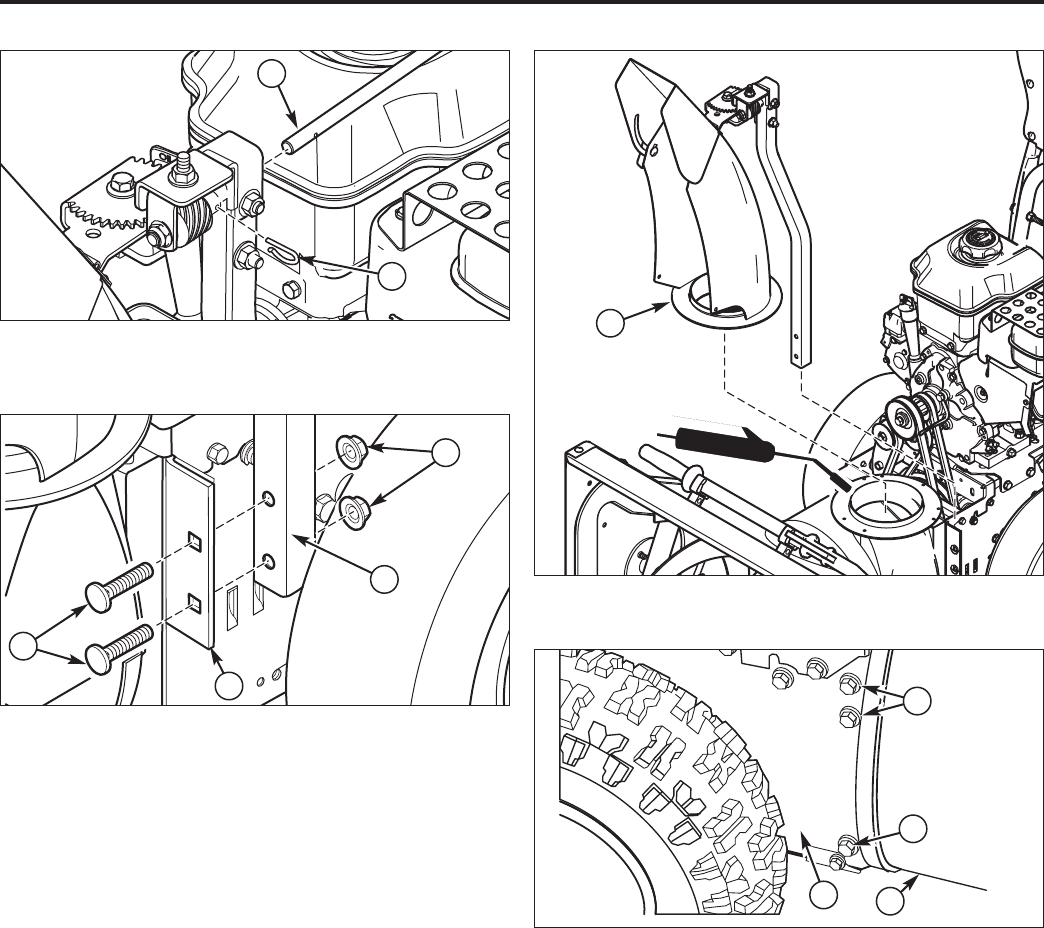
Figure 17. Frame and Axle Housing Splitting
A. Upper Capscrews
B. Lower Capscrews
C. Auger Housing
D. Frame
C
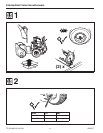
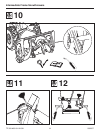
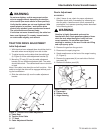
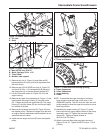
9. Remove hair pin (A, Figure 14) and slide rod (B)
backward about 3 inches (until shaft separates from
the worm drive).
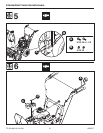
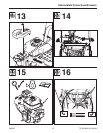
10. Remove two 5/16-18 KEPS hex nuts (A, Figure 15),
and two 5/16-18 x 1-1/2 carriage bolts (B) securing
the offset tube (C) to the tube support bracket (D).
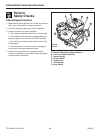
11. Lift the Chute and rotator (A, Figure 16) off of the
auger housing.
12. Remove the upper four capscrews (A, Figure 17) that
hold together the auger housing (C) and the frame
(D). Loosen the lower two capscrews (B). The auger
housing (C) and the frame (D) can now be split apart
for removal of the belt.
13. Remove the old auger drive belt (D, Figure 12) from
the impeller pulley . Replace the auger drive belt with
an original factory replacement belt available from an
authorized service center.
14. Install the new auger drive belt (D) onto the impeller
pulley.
B
A
Figure 14. Rotator Shaft Removal
A. Pin, Hair
B. Shaft
Figure 16. Chute and Rotator Removal
A. Chute and Rotator
Figure 15. Offset Tube (Lower) Removal
A. Nuts, KEPS, hex, 5/16-18
B. Bolts, Carriage, 5/16 x 1-1/2
C. Tube, Offset
D. Bracket, tube support
D
B
A
A
C
A
D
B
NOTE: To assemble the auger housing to the frame,
have someone hold the auger clutch lever in the
ENGAGED position. This will move the idler arm and
pulley enough to allow the auger drive pulley to move
back into position.
15. Assemble the auger housing (C, Figure 17) to the
frame with the four upper taptite screws (A) that were
removed in step 12. Tighten the two lower taptite
screws (B). Tighten all taptite screws to
40-50 lb-in (4,5-5,6 Nm).
16. Attach chute and offset tube previously removed
(Figure 15 and 16. Tighten all KEPS nuts to 11 lb-ft
(15 Nm).