


26
Regular Maintenance
SERVICING THE MOWER BLADES
1. Remove mower from the tractor. See Mower
Installation & Removal.
2. Blades should be sharp and free of nicks and dents.
If not, sharpen blades as described in following steps.
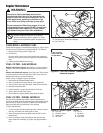
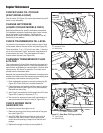
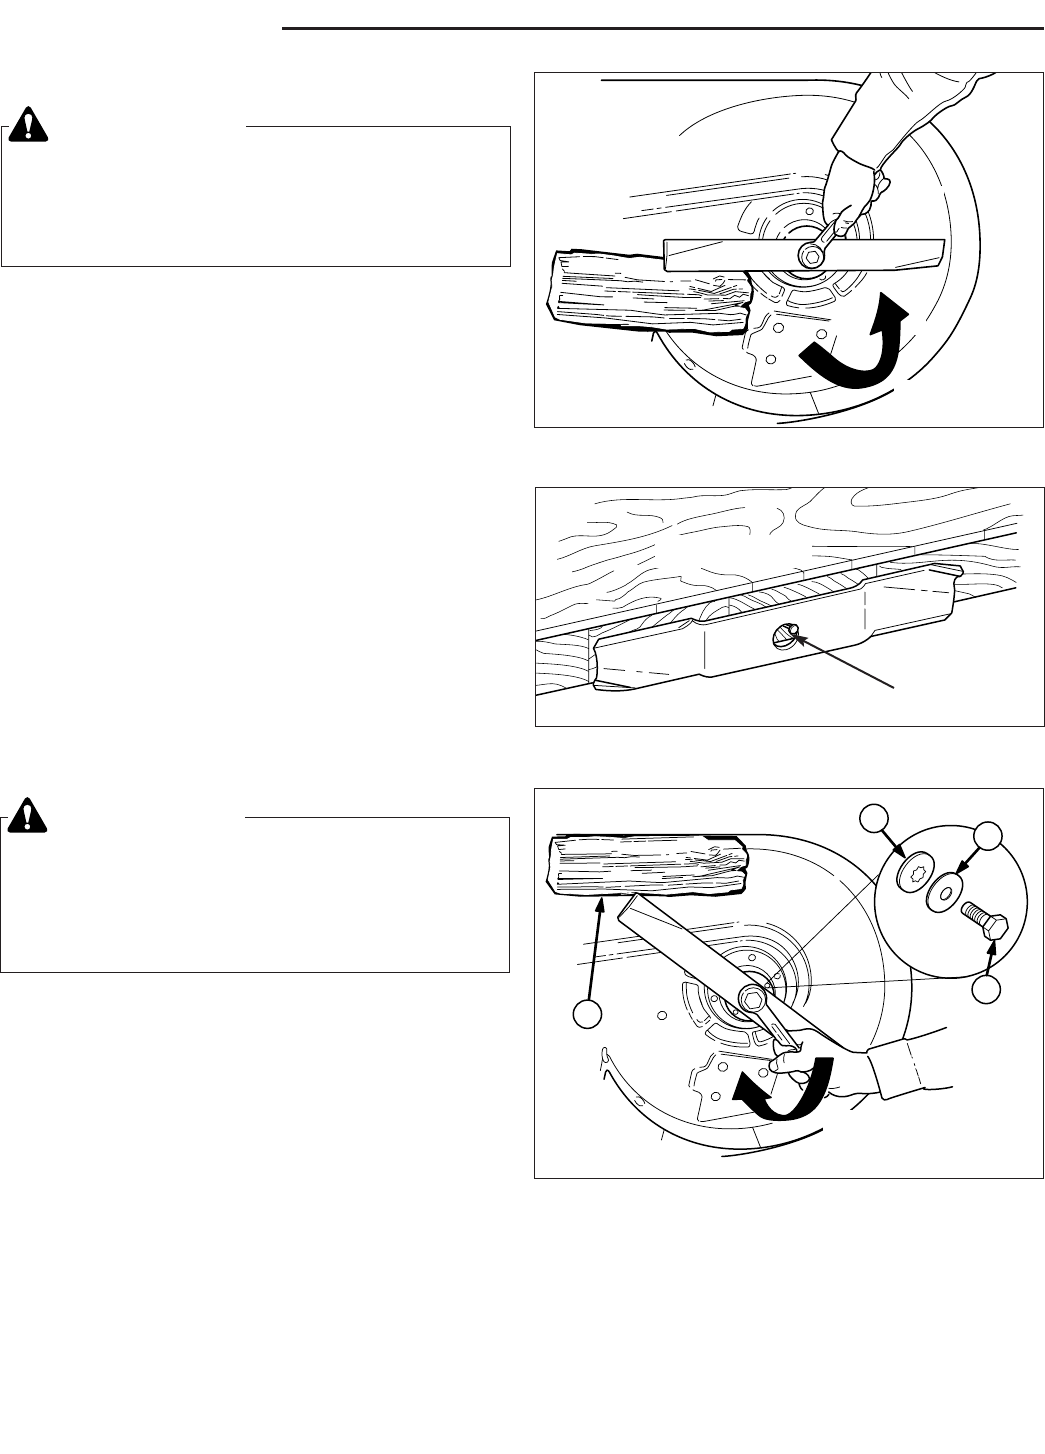
3. To remove blade for sharpening, use a wood block to
hold blade while removing the blade mounting cap-
screw (Figure 36).
4. Use a file to sharpen blade to fine edge. Remove all
nicks and dents in blade edge. If blade is severely
damaged, it should be replaced.
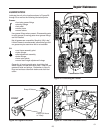
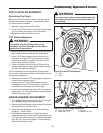
5. Balance the blade as shown in Figure 37. Center the
blade’s hole on a nail lubricated with a drop of oil. A
balanced blade will remain level.
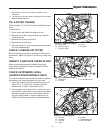
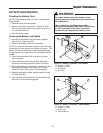
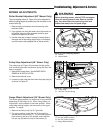
6. Reinstall each blade with the tabs pointing up toward
deck as shown in Figure 40. Secure with a capscrew
(D, Figure 38), spring washer (B), and spline washer
(B). Be certain the spline washer is aligned with the
shaft splines. Use a wooden block to prevent blade
rotation and torque capscrews to 45-55 ft.lbs. (61-75
N.m.).
Figure 38. Installing The Blade
A. Wood Block C. Spring Washer
B. Spline Washer D. Capscrew
WARNING
For your personal safety, do not handle the sharp
mower blades with bare hands. Careless or
improper handling of blades may result in serious
injury.
WARNING
For your personal safety, blade mounting
capscrews must each be installed with a hex
washer and spring washer, then securely
tightened. Torque blade mounting capscrew to
45-55 ft. lbs. (61-75 N.m.)
Figure 36. Removing the Blade
Figure 37. Balancing The Blade
Workbench
Nail
LOOSEN
A
D
C
B
TIGHTEN
BLADE BRAKE CHECK
Mower blades and mower drive belt should come to a
complete stop within five seconds after electric PTO
switch is turned off.
1. With tractor in neutral, PTO disengaged and operator
in seat, start the engine.
2. Engage the PTO and wait several seconds.
Disengage the PTO and check the amount of time it
takes for the mower drive belt to stop.
3. If mower drive belt does not stop within five seconds,
see your dealer.