


11
HT231_25
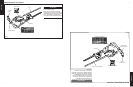
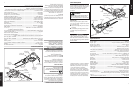
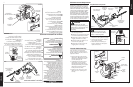
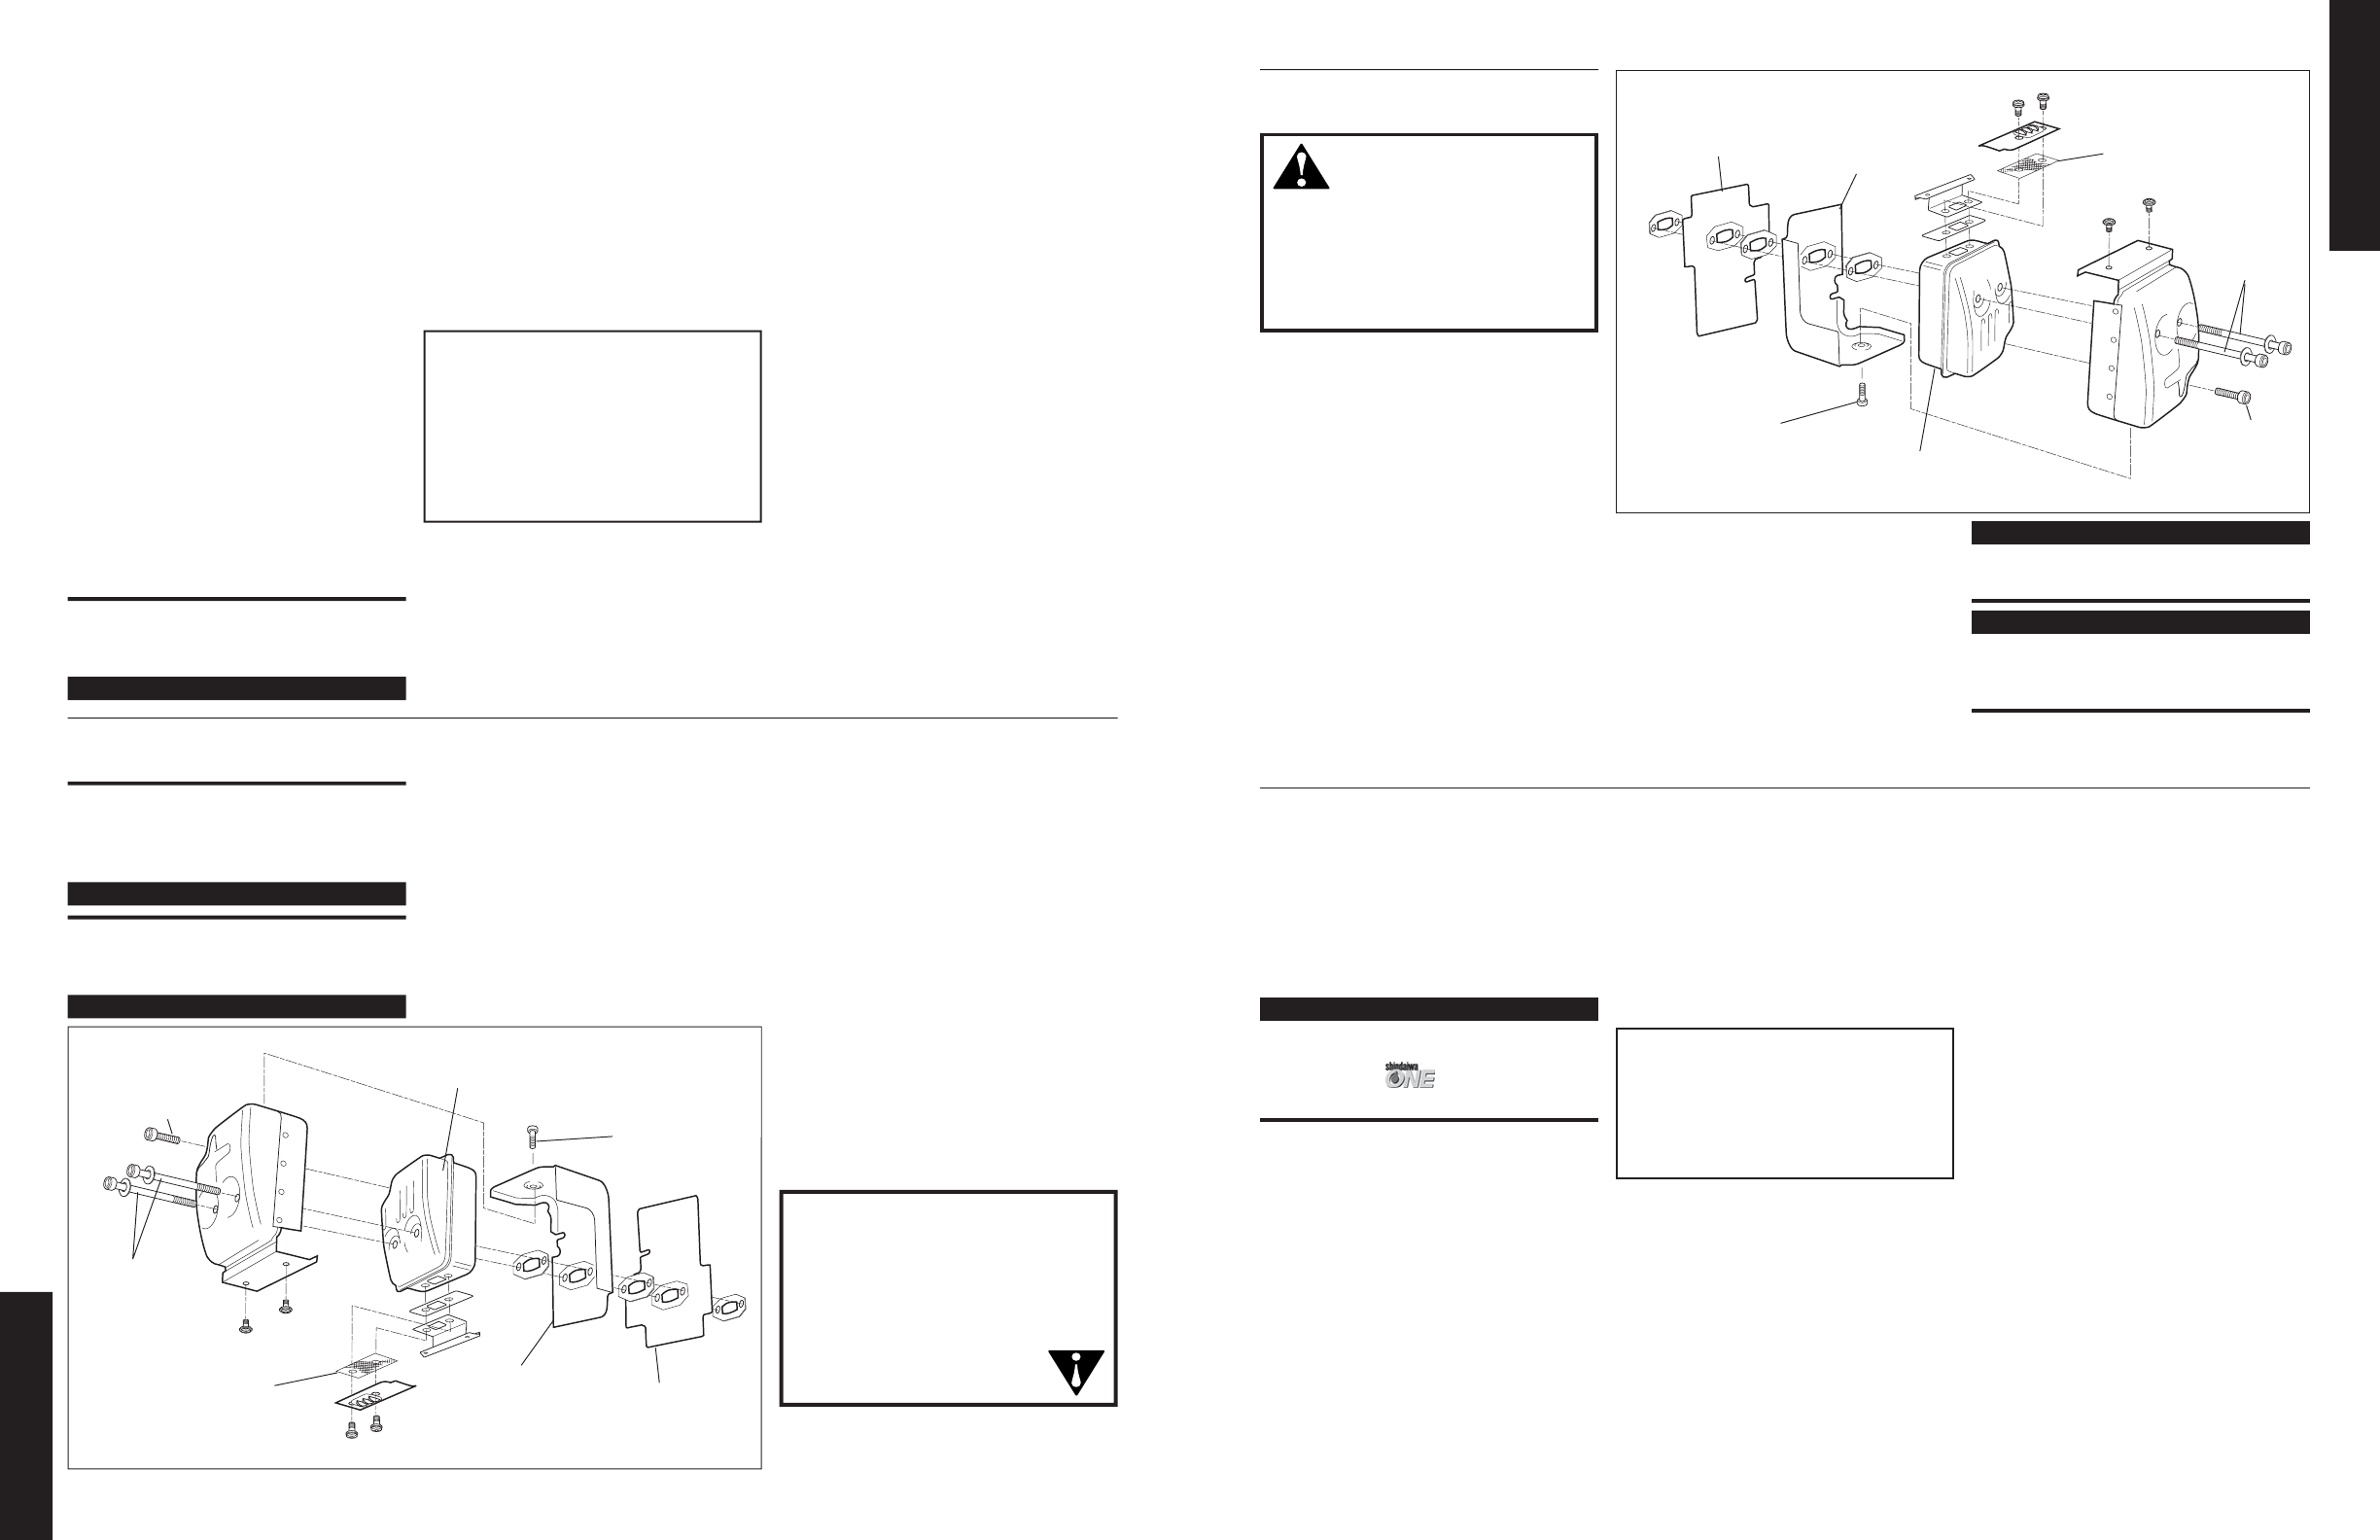
5 mm Muffler
Screws
Lower Muffler
Screw
Forward
Muffler
Shield
Spark
Arrester
Screen
Rear Muffler
Shield
Catalyst Muffler
Rear Muffler
Shield Bolt
135-hour Maintnenace
Every 135 hours of operation, remove
and clean the muffler.
IMPORTANT!
Please use screw lock material such as
ThreeBond 1360 in the muffler bolt
threads at reassembly.
IMPORTANT!
If you note excessive carbon buildup,
consult your servicing dealer.
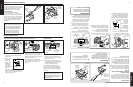
1. Loosen the knob located at the top
cover and remove the cover.
2. Remove the spark plug lead from the
spark plug.
3. Loosen the four 5 mm bolts located at
the top of the recoil housing and
remove the cover.
4. Loosen one 5 mm bolt located at the
top of the cylinder cover and two 4 mm
bolts located at the bottom of the
cylinder cover and remove cover.
5. Loosen two 5 mm muffler bolts and
remove the muffler.
6. Loosen two 4 mm bolts at top of the
muffler and remove the tail plate.
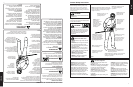
WARNING!
Never operate the unit with a dam-
aged or missing muffler or spark
arrester! Operating with missing or
damaged exhaust components is a
fire hazard and could also damage
your hearing.
Figure 21
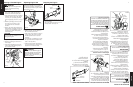
7. Remove the spark arrester screen and
clean with a stiff bristle brush.
8. Remove the muffler from the engine
and inspect the cylinder exhaust port
for carbon buildup.
9. Reassemble the muffler in the reverse
order of disassembly.
Long Term Storage
Whenever the unit will not be used for 30
days or longer, use the following proce-
dures to prepare it for storage:
■ Clean external parts thoroughly and
apply a light coating of oil to all metal
surfaces.
■ Drain all the fuel from the carburetor
and the fuel tank.
IMPORTANT!
All stored fuels should be stabilized with
a fuel stabilizer such as
STA-BIL™ , if oil with fuel
stabilizer is not used.
To remove the remaining fuel from the
fuel lines and carburetor and with the fuel
drained from the fuel tank:
1. Prime the primer bulb until no more
fuel is passing through.
2. Start and run the engine until it stops
running.
3. Repeat steps 1 and 2 until the engine
will no longer start.
■ Remove the spark plug and pour about
1/4 ounce of 2-cycle mixing oil into the
cylinder through the spark plug hole.
Slowly pull the recoil starter 2 or 3
times so oil will evenly coat the interior
of the engine. Reinstall the spark plug.
■ Before storing the unit, repair or
replace any worn or damaged parts.
■ Remove the air cleaner element from
the carburetor and clean it thoroughly
with soap and water. Let dry and
reassemble the element.
■ Store the unit in a clean, dust-free area.
CAUTION!
Gasoline stored in the carburetor for
extended periods can cause hard
starting, and could also lead to
increased service and maintenance
costs.
ENGLISH
HT231_25
IMPORTANTE!
Todo combustible almacenado debe
estar estabilizado con un estabilizador
de combustible tal como STA-BIL.
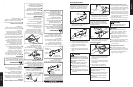
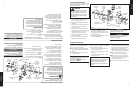
Tornillos de
Silenciador de 5mm
Tornillo del
Silenciador
Inferior
Protector del
Silenciador
Delantero
Malla
guardachispas
Protector del
Silenciador Tracero
Silenciador Catalizador
Perno del
Protector del
Silenciador
Tracero
Mantenimiento Cada 135 Horas
Cada 135 horas de funcionamiento,
retire y limpie el silenciador.
¡IMPORTANTE!
Por favor coloque el material de seguridad
para tornillos “TB1360” en las roscas de
los pernos del silenciador cuando lo
vuelva a armar.
¡IMPORTANTE!
Si observa exceso de carbono
acumulado, consulte con su agente de
servicio.
1. Afloje la perilla ubicada en la cubierta
superior y retire la cubierta.
2. Retire el cable de la bujía.
3. Afloje los cuatro tornillos de 5mm
ubicados encima de la tapa de la polea
de arranque y retire la cubierta.
4. Afloje un tornillo de 5mm ubicado
encima de la cubierta del cilindro y dos
tornillos de 4mm ubicados en la parte
inferior de la cubierta del cilindro.
Luego retire la cubierta.
5. Afloje dos tornillos de 5mm del
silenciador y retire el silenciador.
6. Afloje 4 tornillos de 4mm en la parte
superior del silenciador y retire la
placa del final.
¡ADVERTENCIA!
Nunca opere esta máquina sin
silenciador o guardachispas, o con
alguno de estos componentes dañados.
Si algún componente falta o está
dañado, la operación de la máquina
representará peligro de incendio o
lesiones auditivas al operario.
Figura 21
7. Retire la malla del guardachispas y
limpie con una escobilla de cerdas
rígidas.
8. Inspeccione si hay acumulación de
carbono en el orificio del tubo de
escape del cilindro.
9. Vuelva a armar el silenciador en orden
reverso al desarmar.
Almacenamiento
ESPAÑOL
■ Limpie bien el exterior de la máquina.
■ Limpie todos los residuos de hojas y
cortes de las aletas del cilindro y otros
componentes según se describe en la
sección "Mantenimiento diario".
■ Drene todo el combustible en un
recipiente aprobado para el
almacenamiento de combustible.
Encienda el motor y dejelo funcionar
hasta que combustible en el
carburador, y en la manguera de
alimentación se agoten y la marcha del
motor se detenga.
■ Retire la bujía y vierta
aproximadamente 1/4 de onza de
aceite en el cilindro a través del
agujero de la bujía. Antes de volver a
instalar la bujía, haga girar el motor
con el arrancador para que el aceite
lubrique la pared del cilindro.
■ Limpie el elemento de aire según se
describe en la sección "Mantenimiento
diario".
■ Repare o cambie cualquier pieza
dañada si es necesario.
■ Almacene la máquina en un lugar
limpio, seco y sin polvo.
¡PRECAUCIÓN!
Nunca almacene esta máquina con
combustible en el tanque, en las
mangueras ni en el carburador. La
garantía de esta máquina Shindaiwa
no provee cobertura por daños
causados por combustible rancio o
contaminados.
11