19
Basic Calibration Procedure
(Continued)
Calibration Deviations
Deviations Between the Calibration Test and the
Actual Seed Rate
The most frequent cause for changes between the calibration
test and the seed rate lies in the flowing properties of seed
during sowing. These changes in properties generally result from
reactions of the dressing agents to temperature, humidity or
abrasion. These changes will become even more obvious when
the bottom flaps are incorrectly set. If the setting of these flaps
leaves too large a gap an uncontrollable additional flow of seed
can occur during seeding; especially when assisted by the drill
bouncing, a condition not simulated while conducting the
calibration tests. For this reason the basic setting of the bottom
flaps should be checked at regular intervals.
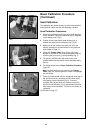
Residues from the seed dressing on the bottom flaps and
metering wheels can also influence the flowing properties of the
seed and thus the seed rate. In such cases a balance will occur
only after a period of time and it is recommended to repeat the
calibration test to confirm the seed rate after 2-3 seedbox fillings,
nominally when the seed box is half empty.
Only then will a balance occur and the seed rate will stabilise.
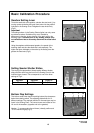
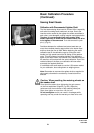
Wheel Slip Deviations
It is always possible with rubber tyred drills in extreme ground
conditions to get wheel slip. Not normally a problem with cleated
type tyres in good condition, but more so in the arable situation
with the less agressive tread patterns. The result: large
differences between the calibration test and the actual sowing
rate, obviously less seed deposited than required. The number
of crank turns indicated in Table 3 is correct in most
circumstances other than those mentioned above.
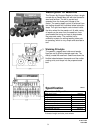
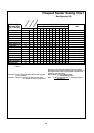
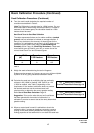
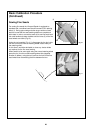
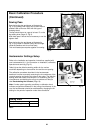
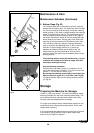
To check number of crank turns for calibration
Should you require to check this in a practical way proceed as
follows:
For an area of 125m
2
(1/80 Hectare), a travel distance of
69.4m, place the crank handle over the hexagonal drive dog
on the gearbox. Move the machine forward over the
measured distance, counting the number of turns of the
crank handle as you go. Using this number of crank turns
repeat the calibration.
Pt. No. 67372
Issue 0806