


16
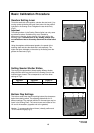
Basic Calibration Procedure
(Continued)
Seed Calibration
The calibration test should be done to confirm the required
seed rate and is done with the drill stationary and level.
Seed Calibration Procedures
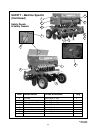
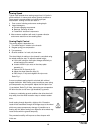
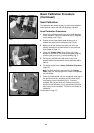
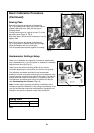
1 Remove the calibration tray from the storage brackets
on the seedbox. Place the calibration tray (1) adjacent
to the seeder units (Fig 6).
2 Position all the clear plastic seed diverters (2) to
redirect the seed into the calibration tray (Fig 6).
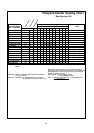
3 Make sure all the shutters are open and set to the
position indicated in the seed charts for the particular
seed (Table 2. Page 14.
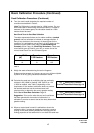
4 Check the Sowing Chart ‘Hints’ (Page 14) to see
whether to connect or disconnect the agitator shaft by
removing the lynch pins (1) during seeding (Fig 7).
5 For the test, half fill the box with seed. If this is not
possible make sure the seed is evenly distributed within
the box.
6 For setting method refer to Basic Calibration Procedure
(Page 15)
.
Note For seeds which are not covered in the Sowing
Chart (Page 14), use the figures for a seed of comparable
size and shape.
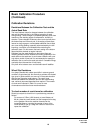
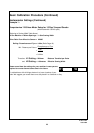
7 Place the crank handle over the hexagonal drive dog on
the gear box and turn clockwise until the seed flows
consistently from the seeders (Fig 8). To ensure
complete filling of the seed unit continue turning the
crank until the calibration tray is approximately half full
then empty into the seedbox. The drill is now ready for
calibration.
(Continued on Page 17)
1
2
Fig 6
Fig 7
Fig 8
1