


4
intended to be grounded. As a result,
your tool is equipped with a two prong
plug which permits you to use extension
cords without concern for maintaining a
ground connection.
NOTE: Double insulation does not take
the place of normal safety precautions
when operating this tool. The insulation
system is for added protection against
injury resulting from a possible electrical
insulation failure within the tool.
Replacement parts: When servicing all
tools, USE IDENTICAL REPLACEMENT
PARTS. Repair or replace damaged
cords.
SAFETY WARNINGS AND INSTRUCTIONS: POLARIZED
PLUGS
To reduce the risk of electric shock, this
equipment has a polarized plug (one
blade is wider than the other). This
equipment must be used with a suitable
polarized 2 wire or 3 wire extension cord.
Polarized connections will fit together
only one way. Make sure that the
receptacle end of the extension cord has
large and small blade slot widths. If the
plug does not fit fully into the extension
cord, reverse the plug. If it still does not
fit, obtain a suitable extension cord. If the
extension cord does not fit fully into the
outlet, contact a qualified electrician to
install the proper outlet. Do not change
the tool plug or extension cord in any way.
SPECIFIC SAFETY WARNING
WARNING: Some dust created when
using lawn and garden power tools
contains chemicals known to cause
cancer, birth defects and other
reproductive harm.
Some examples of these chemicals are:
• crystalline silica from sand, bricks and
other masonry dust
• arsenic and chromium from chemically
treated lumber (CCA)
• compounds in fertilizers
• compounds in insecticides, herbicides
and pesticides
Health risk from these chemical
exposures varies, depending on the
environment in which you are working
and how often you do this type of work.
To reduce your exposure to these
chemicals, follow product label
instructions to apply chemicals such as
fertilizers, insecticides, herbicides or
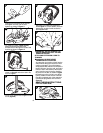
pesticides. When using these tools, wear
safety equipment such as gloves and
dust masks which are especially
designed to filter out microscopic
particles.
SAVE THESE INSTRUCTIONS
FOR FUTURE USE
ASSEMBLY INSTRUCTIONS
1
ASSEMBLY TOOLS REQUIRED (NOT
SUPPLIED):
- Phillips Screwdriver
ATTACHING BAIL HANDLE TO
TRIMMER
The trimmer is shipped with the bail handle
tied to the trimmer. To attach the bail
handle:
• Cut the zip tie which holds the handle to
the trimmer.
• Remove the phillips head screws from
both sides of the trimmer housing or from
the carton.
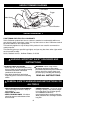
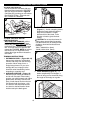
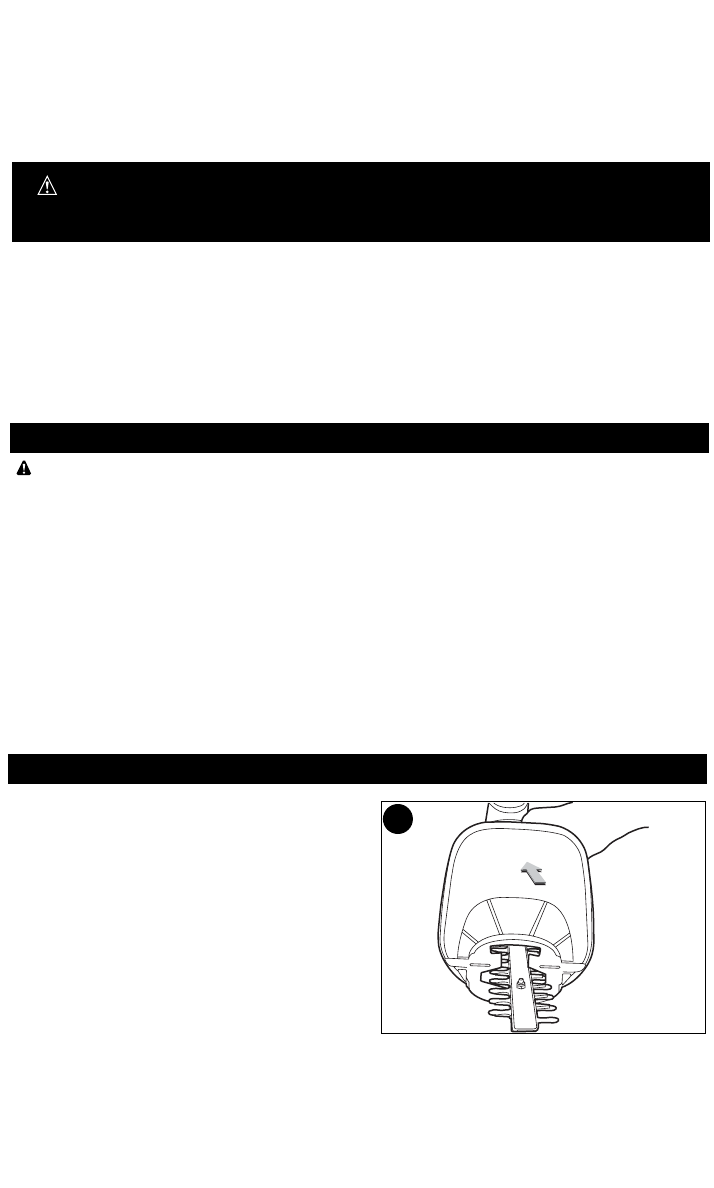
• For catalog numbers (79441, 51890)
position the handle/barrier assembly in
place by sliding it over the blade as
shown in figure 1. Push the handle up
onto the housing and click it into place as
shown in figure 2.