...... i
ASSE BLY
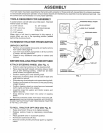
CONNECT BATTERY (See Figs, 2 and 3)
CAUTION: Do not short battery tern}i,
rials. Before connecting battery, re-
move n}etai bracelets, wristwatch
bands, rings, etc.
Positive terminal must be connected
first to prevent sparking from acciden-
tal grounding,
• Remove cardboard packing from seat pan and lift seat
pan to raised position.
Open battery box door.
Remove terminal protective caps and discard.
, If this battery is put into service after month and year
indicated on label (label located between terminals)
charge battery for minimum of one hour at 6-10 amps.
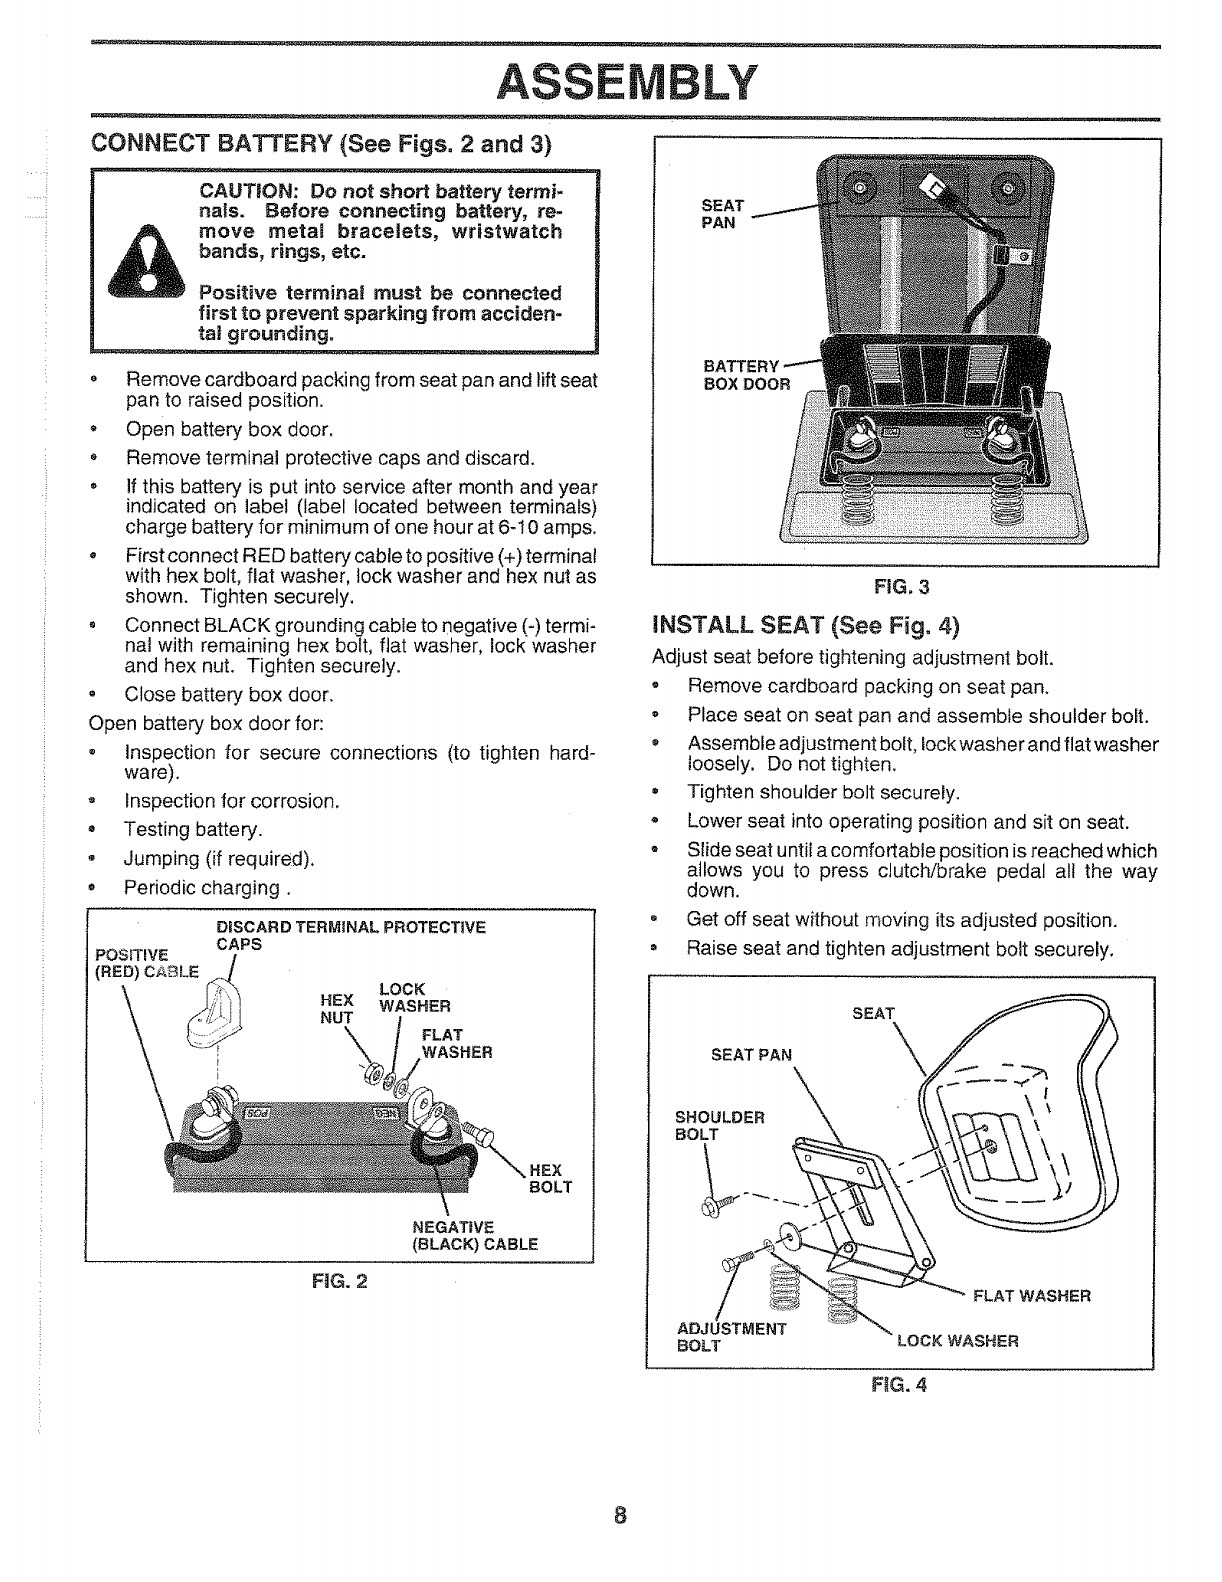
• First con nect RED battery cable to positive (+) terminal
with hex bolt, flat washer, lock washer and hex nut as
shown. Tighten securely.
Connect BLACK grounding cable to negative (-) termi-
nal with remaining hex bolt, flat washer, lock washer
and hex nut. Tighten securely.
, Close battery box door.
Open battery box door for:
• Inspection for secure connections (to tighten hard-
ware).
o Inspection for corrosion.
• Testing battery.
• Jumping (if required).
o Periodic charging.
DISCARD TERMINAL PROTECTIVE
CAPS
HEX
NUT
\\
LOCK
WASHER
FLAT
WASHER
HE×
BOLT
NEGATIVE
(BLACK)CABLE
RG. 2
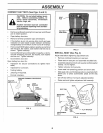
SEAT
PAN
BATTERY
BOX DOOR
FiG, 3
iNSTALL SEAT (See Fig, 4)
Adjust seat before tightening adjustment bolt.
- Remove cardboard packing on seat pan.
- Place seat on seat pan and assemble shoulder bolt.
= Assemble adjustment bolt, lock washer and flat washer
loosely. Do not tighten.
• Tighten shoulder bolt securely.
Lower seat into operating position and sit on seat.
• Slide seat until a comfortable position is reached which
allows you to press clutch/brake pedal all the way
down.
o Get off seat without moving its adjusted position.
= Raise seat and tighten adjustment bolt securely,
SEAT
SEAT PAN
SHOULDER
BOLT
ADJUSTMENT
BOLT
FLAT WASHER
LOCK WASHER
FIG, 4
8


