


5
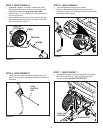
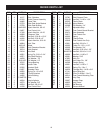
FIGURE 4
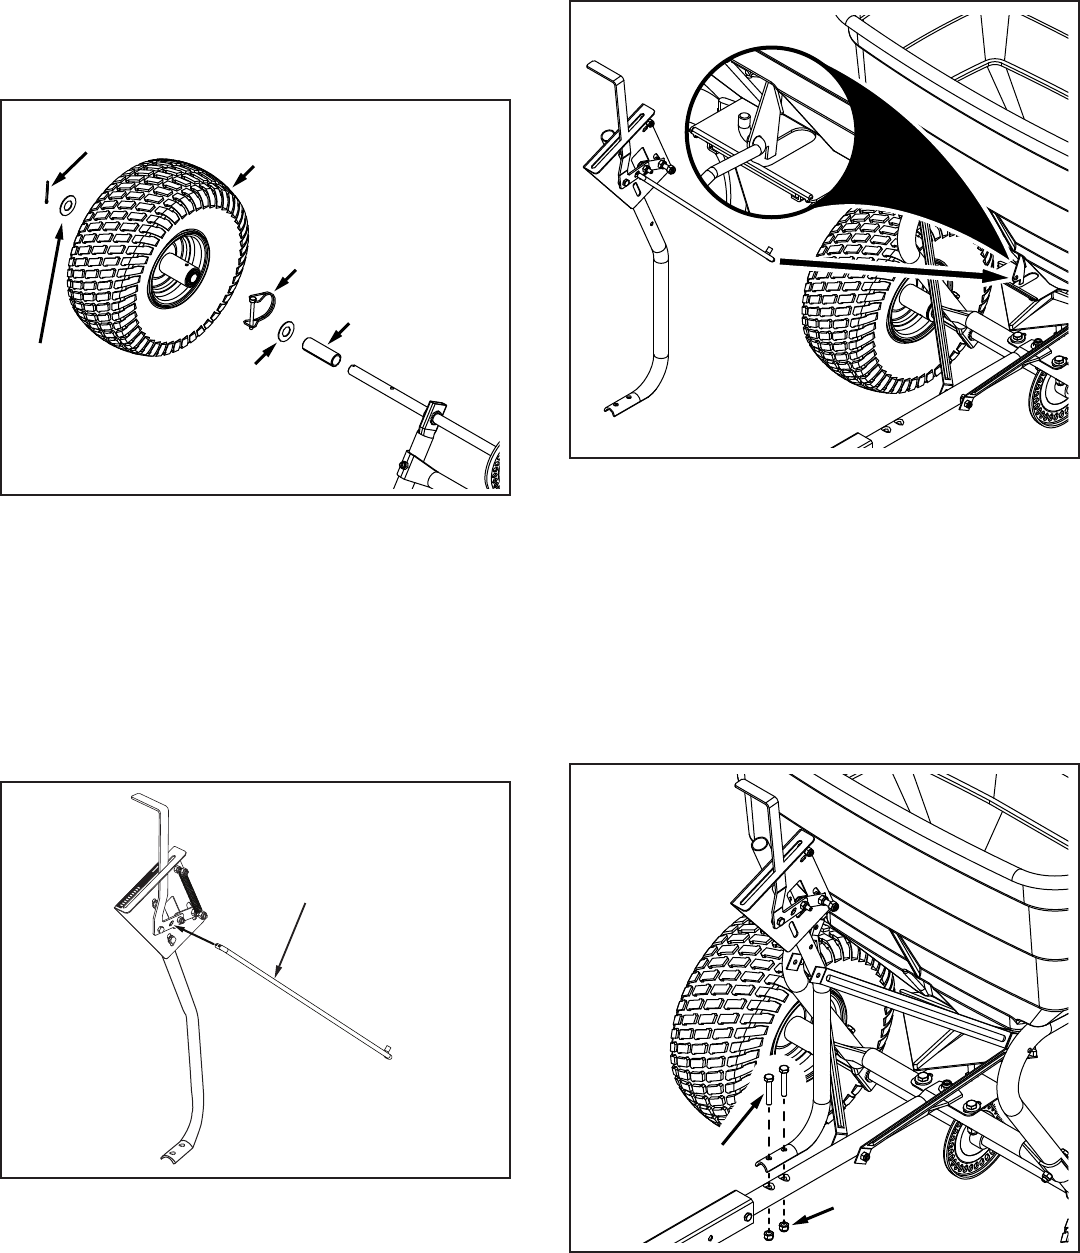
FIGURE 5
SPACER
WASHER
DRIVE PIN
1/8 x 1-1/2
COTTER PIN
WHEEL
WASHER
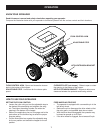
OFF
ON
1
2
3
4
6
7
8
9
10
5
FLOW
CONTROL
ROD
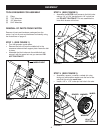
STEP 4: (SEE FIGURE 4)
• Assemble a spacer, a washer, a wheel (air valve
facing out) and another washer onto the end of the
axle that has both the large and small holes.
• Install a 1/8" x 1-1/2" cotter pin into the small hole in
the end of the axle.
• Open the bail on the drive pin and install it through
the wheel and the large hole in the axle. Close the
bail to lock the pin in place.
STEP 5: (SEE FIGURE 5)
• Insert the end of the ow control rod with only one
bend into the hole in the lever on the ow control tube
assembly.
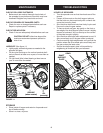
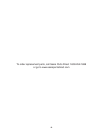
FIGURE 6
STEP 6: (SEE FIGURE 6)
• Turn the spreader upright on its wheels.
• Hook the double bent end of the ow control rod
through the hole in the slide gate bracket located near
the bottom of the hopper.
FIGURE 7
5/16 x 1-3/4
HEX BOLT
5/16 NYLOCK NUT
STEP 7: (SEE FIGURE 7)
• Assemble the ow control mounting tube to the hitch
tube using two 5/16" x 1-3/4" hex bolts and 5/16"
nylock hex nuts. DO NOT TIGHTEN YET.