


USING THE POWER SHARP®SYSTEM (MODEL 358.356100)
, , , , ,,
• Model 358.356100 is equipped with a Power Sharp ®
:System that will perform approximately 80% of the
sharpening necessary for the saw chain. The Power
Sharp® System uses a built-in grinding stone to shar-
pen the cutter top plates and set depth gauges. As
: the built-in sharpener is used, the cutter side plates
.gradually will be altered. Hand filing is required to
correct the cutter side plates.
• Sharpen the saw chain when:
--wood chips become small and powdery.
Wood chips made by the chain should be
about the size of the teeth of the chain.
• Always replace the sharpening stone when
--sparks are no longer seen at full adjust.
ment
--only 1/4 inch of stone is remaining
--stone hasbecome cracked or damaged.
--a new chain is installed. The used stone
wilt be worn to the shape of::the old chain
and can cause excessive wear to a new
chain. Replacement chain comessupplied
with Stone Cartridge Replacement #69099.
Refer to replacement instructions on page
13.
--saw has to be forced through the cut.
JCAUTION:J ALways wear gloves when handling
the chain. The chain can be sharp enough to cut
you, even when it is too dull to cut wood.
ventional chain is substituted for the Power
Sharp'_. Chain. _See instructionsfor removing the
Stone Cartridge on page 13. Use replacement
chain #71-3638. Follow chainsharpening instruc-
tions onpage 18.
A, AUTOMATIC SHARPENING
1. Stop the engine:
.... 2. Place the saw 'on a solid, flat surface and
make sure that the chain will not contact
any object.
3. Adjust the chain with correct tension. Refer to
Chain Tension page8.
: 'IMPORTANT: The chain must be tensioned
correctly for proper sharpening to occur.
4. Start the engine and operate at half to three/
quarters throttle during steps "5", "6", "7",
and "8".
NOTE: Saw must be running at half to three/
quarters throttle before knob is pressed.
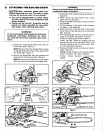
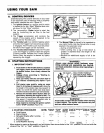
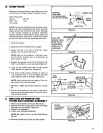
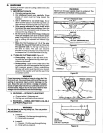
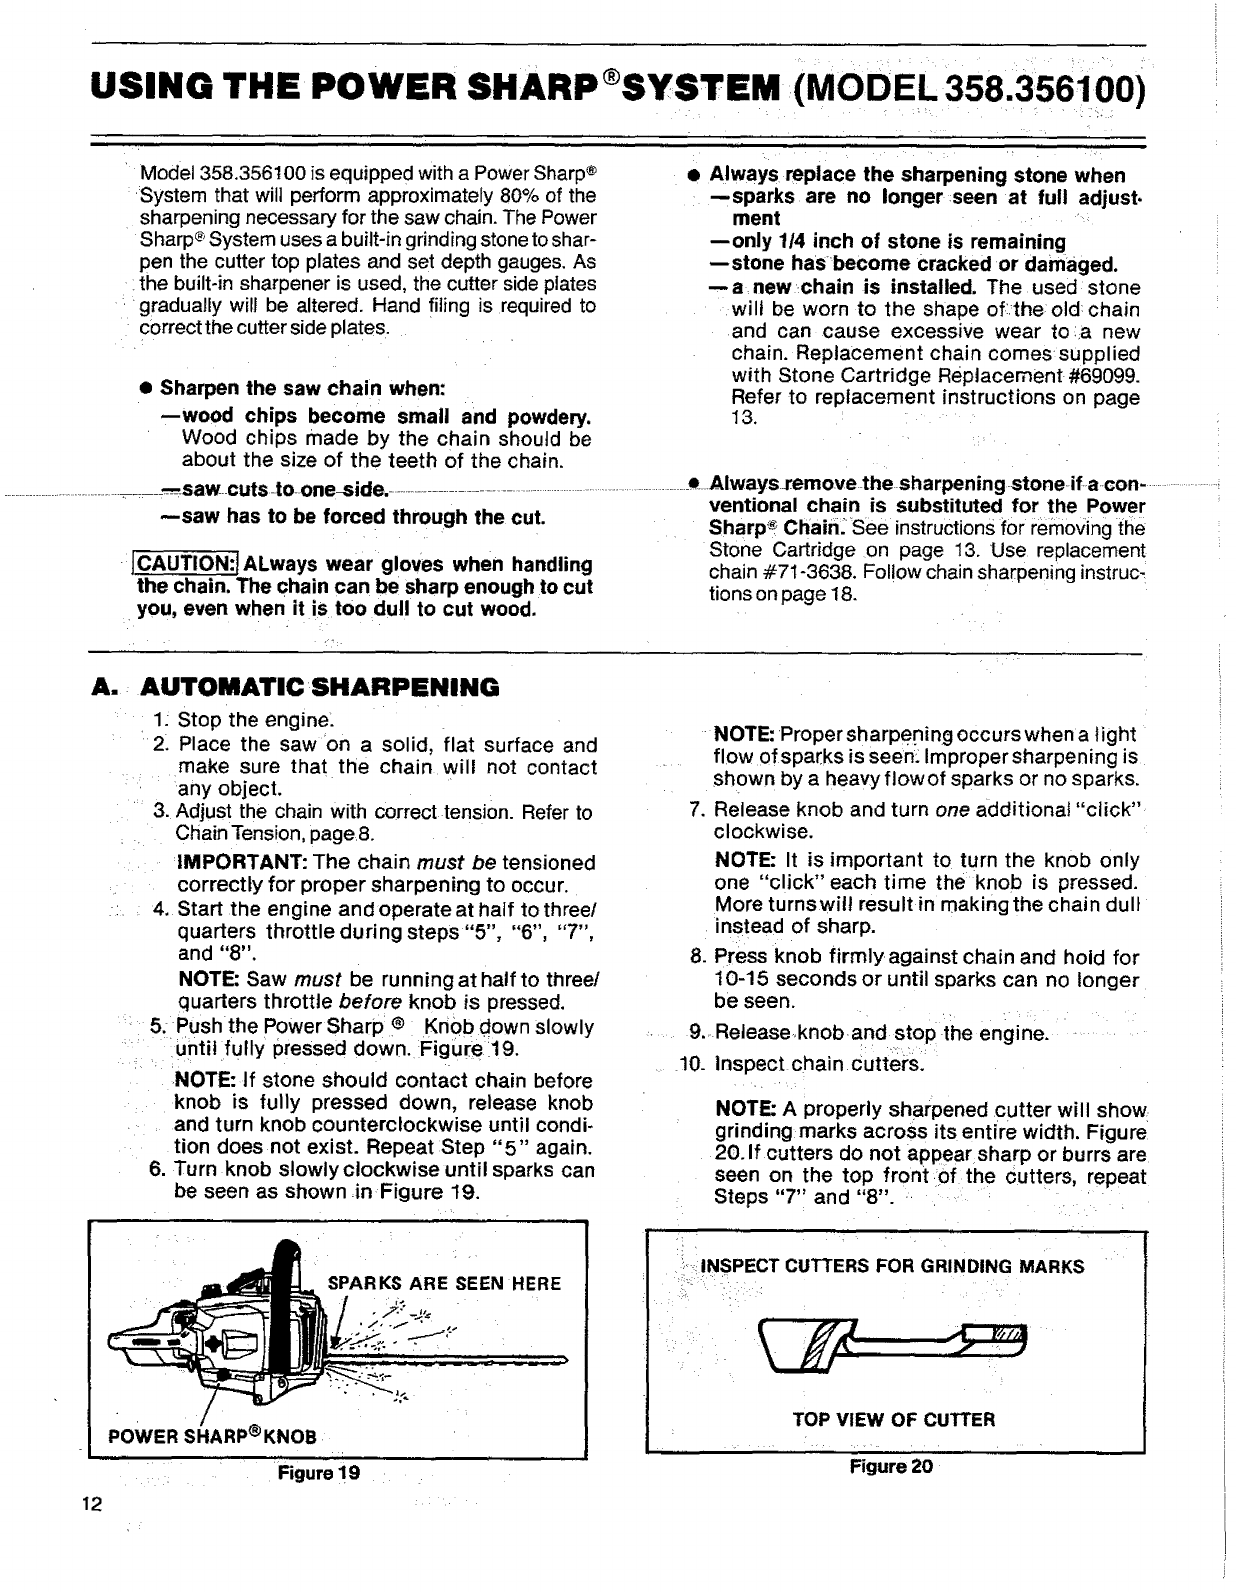
_: 5:Push the Power Sharp ® i Kn0bdown slowly
: Untit fully pressed down. Figure19.
NOTE:If stone should contact chain before
knob is fully pressed down, release knob
and turn knob counterclockwise until condi-
tion does not exist. Repeat :Step "5" again.
6. Turn knob slowly clockwise until sparks can
be seen as shown in Figure 19.
NOTE: Pro per sharPePing occurs when a light
flow of sparks is seen: Im proper sharpening is
shown by a heavy flowof sparks or no sparks.
7. Release knob and turn one additional "click"
clockwise.
NOTE: It is important to turn the knob only
one "click" each time the knob is pressed.
More turnswilt result in making the chain dull
instead of sharp.
8. Press knob firmly against chain and hold for
10-15 seconds or until sparks can no longer
be seen.
9.. Reteaseknoband stop the engine.
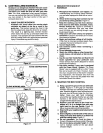
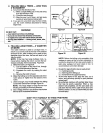
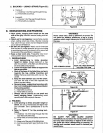
10. Inspect chaincutters.
NOTE: A properly sharpened cutter will show
grinding marks across its entire width. Figure
20. If cutters do not appear sharp or burrs are
seen on the top front of the cutters, repeat
Steps "7" and "8".
SPARKS ARE SEEN HERE
POWER SHARP®KNOB
i Figure i9
: INSPECT CUTTERS FOR GRINDING MARKS
TOP VIEW OF CUTTER
Figure 20
12