


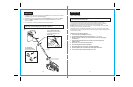

1716
ASSEMBLY & ADJUSTMENTS cont.
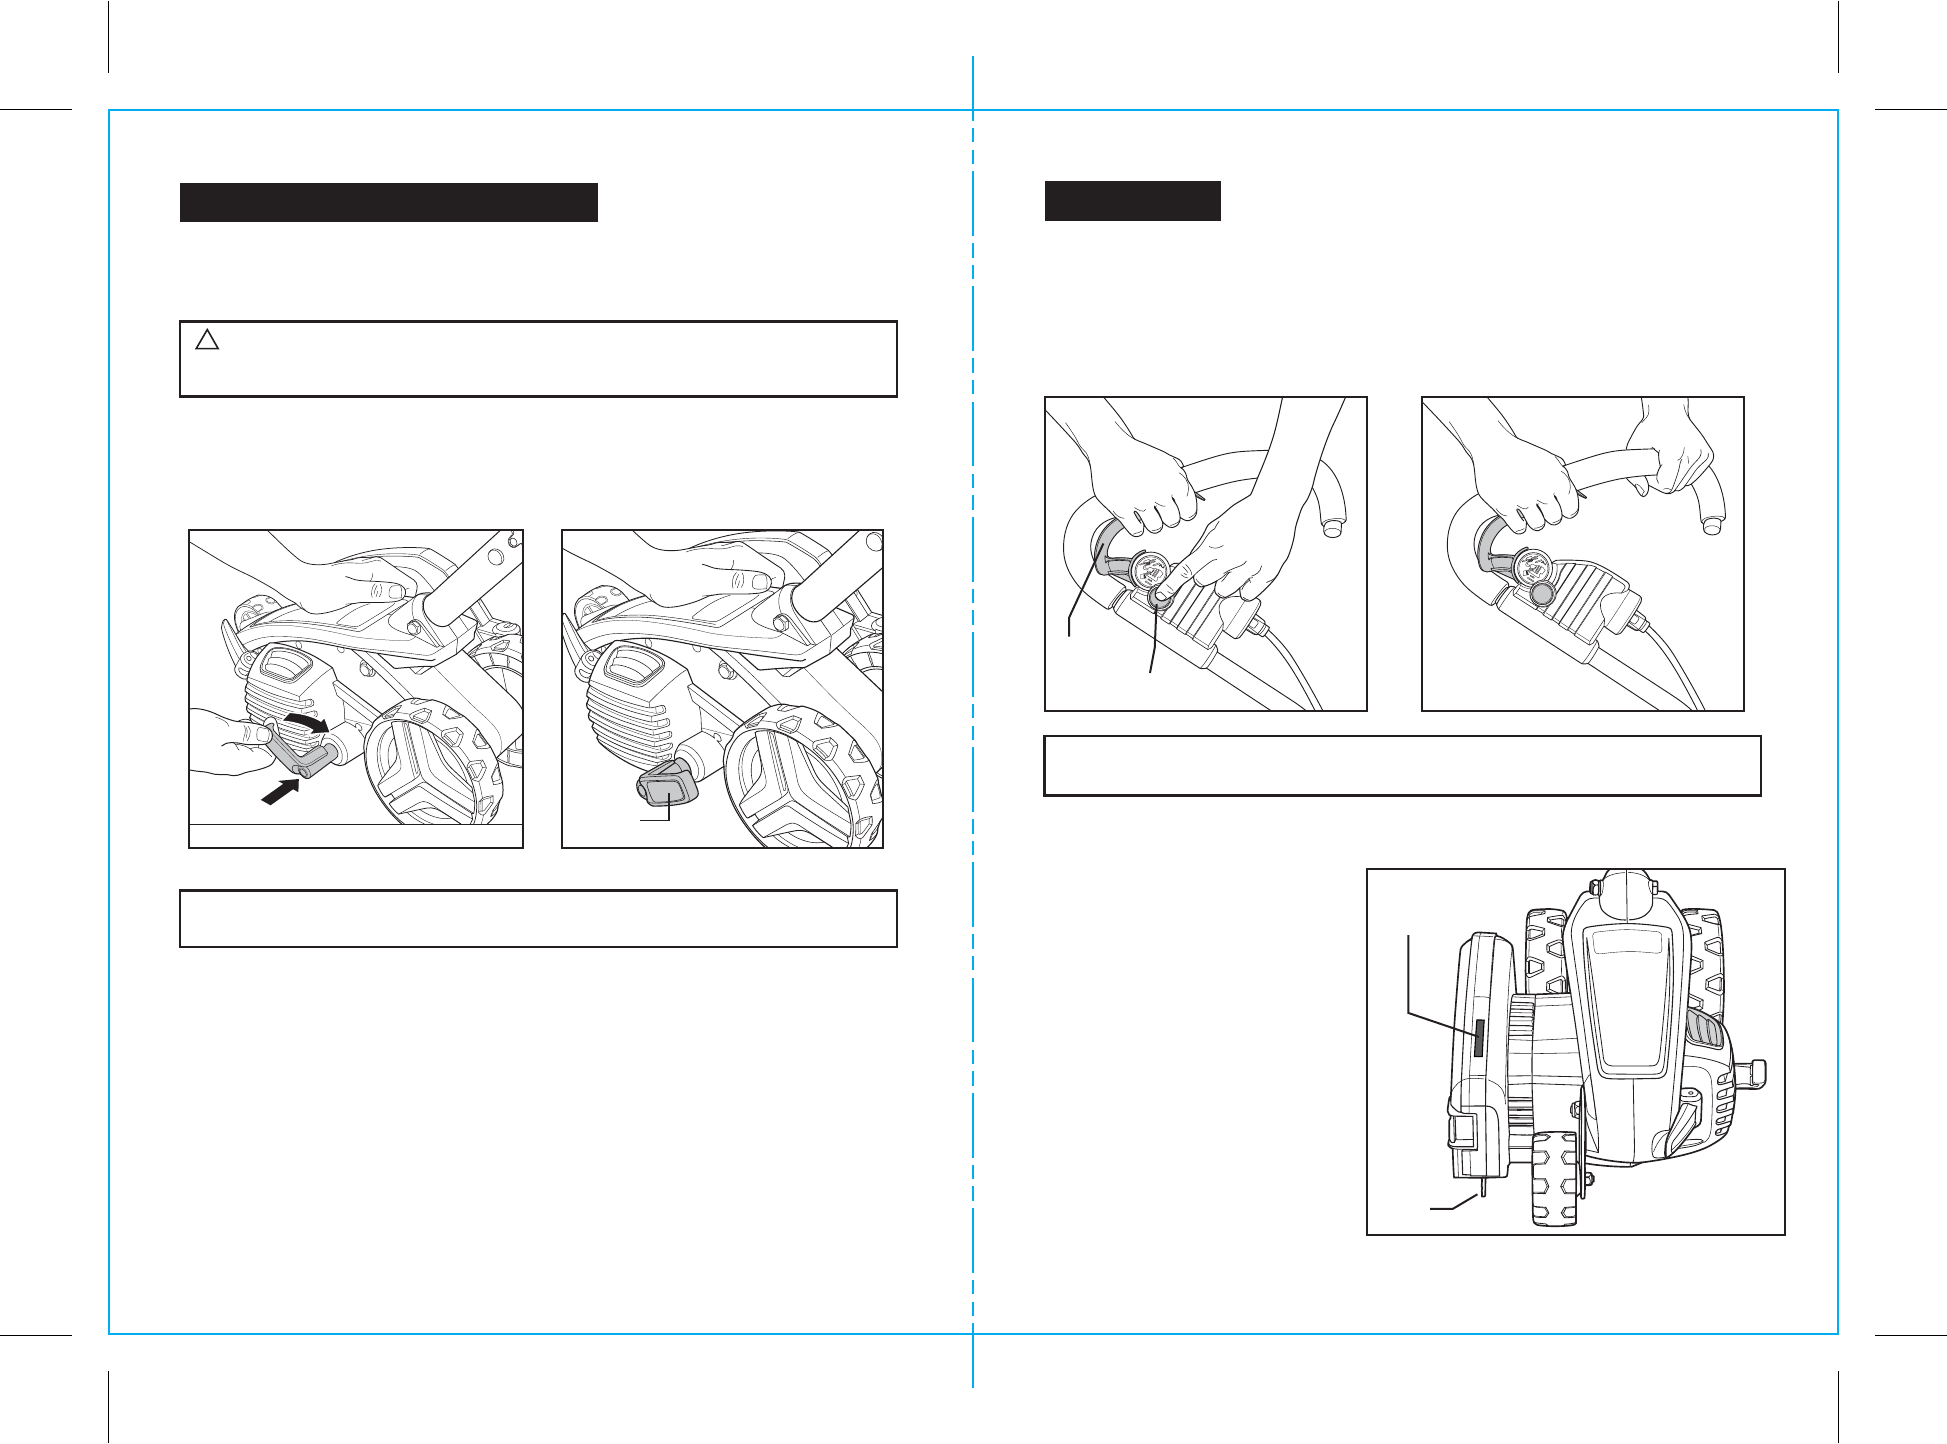
WARNING:
To avoid injury, ALWAYS turn off and disconnect the Edger
from the power outlet BEFORE installing parts or cleaning the Edger or making
any adjustments.
!
EDGE GUIDE
The Edge Guide is useful for cutting a straight path along sidewalks, driveways,
or other straight existing edges.
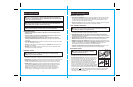
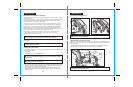
POWER SWITCH LEVER
To turn Edger ON, press in the Power Safety Lock-Off Switch and squeeze the Power
Switch Lever (Fig. 9a). As soon as Edger starts up you can release the Power Safety
Lock-Off Switch (Fig. 9b). The Power Switch Lever has been designed so that it is very
easy to hold in the ON position. To turn tool OFF, simply release Power Switch Lever.
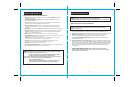
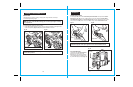
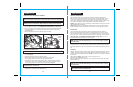
CUT LINE INDICATOR
Your Edger has a Cut Line Indicator
located on top of the door of the
Blade Guard. This shows the location
of the Cutting Blade and enables you
to position the Edger properly (Fig. 10).
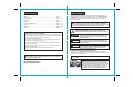
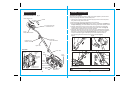
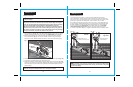
To place the Edge Guide in the down position:
1. Locate Edge Guide Adjustment Lever, press in, and turn clockwise to set Edge Guide
in the down position (Figs. 8a, 8b). See position illustrations on lever.
NOTE: You may need to tilt the Edger back to allow Edge Guide to be moved
into the down position.
Power Safety
Lock-Off Switch
In-Operation
Power Switch
Lever
OPERATION
Fig. 9a Fig. 9b
NOTE: The Edger is a major appliance and should not be operated
simultaneously with other major appliances on the same household circuit.
Press Lever IN...
...Turn clockwise to lower Edge Guide
Fig. 8a Fig. 8b
Lowered
Edge Guide Position
Fig. 10
Cut Line
Indicator
Blade