


2120
OPERATION cont. OPERATION cont.
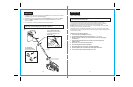
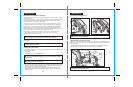
TRENCHING AND LANDSCAPING OPERATION
The Edger can also be used for Trenching. The blade will leave a small trench for placing
wiring underground.
Because of the direction of the Blade rotation the Edger can kickback towards the operator
if it hits an obstruction such as thick, matted grass. Keep a firm grasp on the Handle,
especially when trenching in thick, matted material.
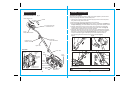
The Edger can be used in Landscaping applications, including cutting along the edges
of flower and shrubbery beds, around trees, and cutting in preparation for sod removal.
While trenching and landscaping, the Edge Guide can interfere with moving the Edger
through hard soil or sod. For this reason trenching and landscaping are done with the
Blade only and without use of the Edge Guide. Locate the Edge Guide Adjustment Lever
and put Edge Guide in the up position. Refer to illustrations on Lever.
Before trenching, inspect and ensure there are no exposed or buried cables, pipes
or other objects that may create a hazard or interfere with operating the Edger.
Set depth to only that required for the job.
Do not overload. If tool slows down, pull back slightly and wait until blade comes up to
normal speed.
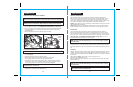
OPENING THE BLADE GUARD
The Blade Guard swings open for cleaning inside the blade chamber or for changing blades.
To open the Blade Guard:
1. Unplug tool.
2. Wait for blade to come to a COMPLETE STOP.
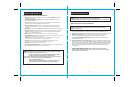
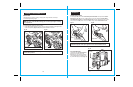
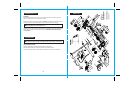
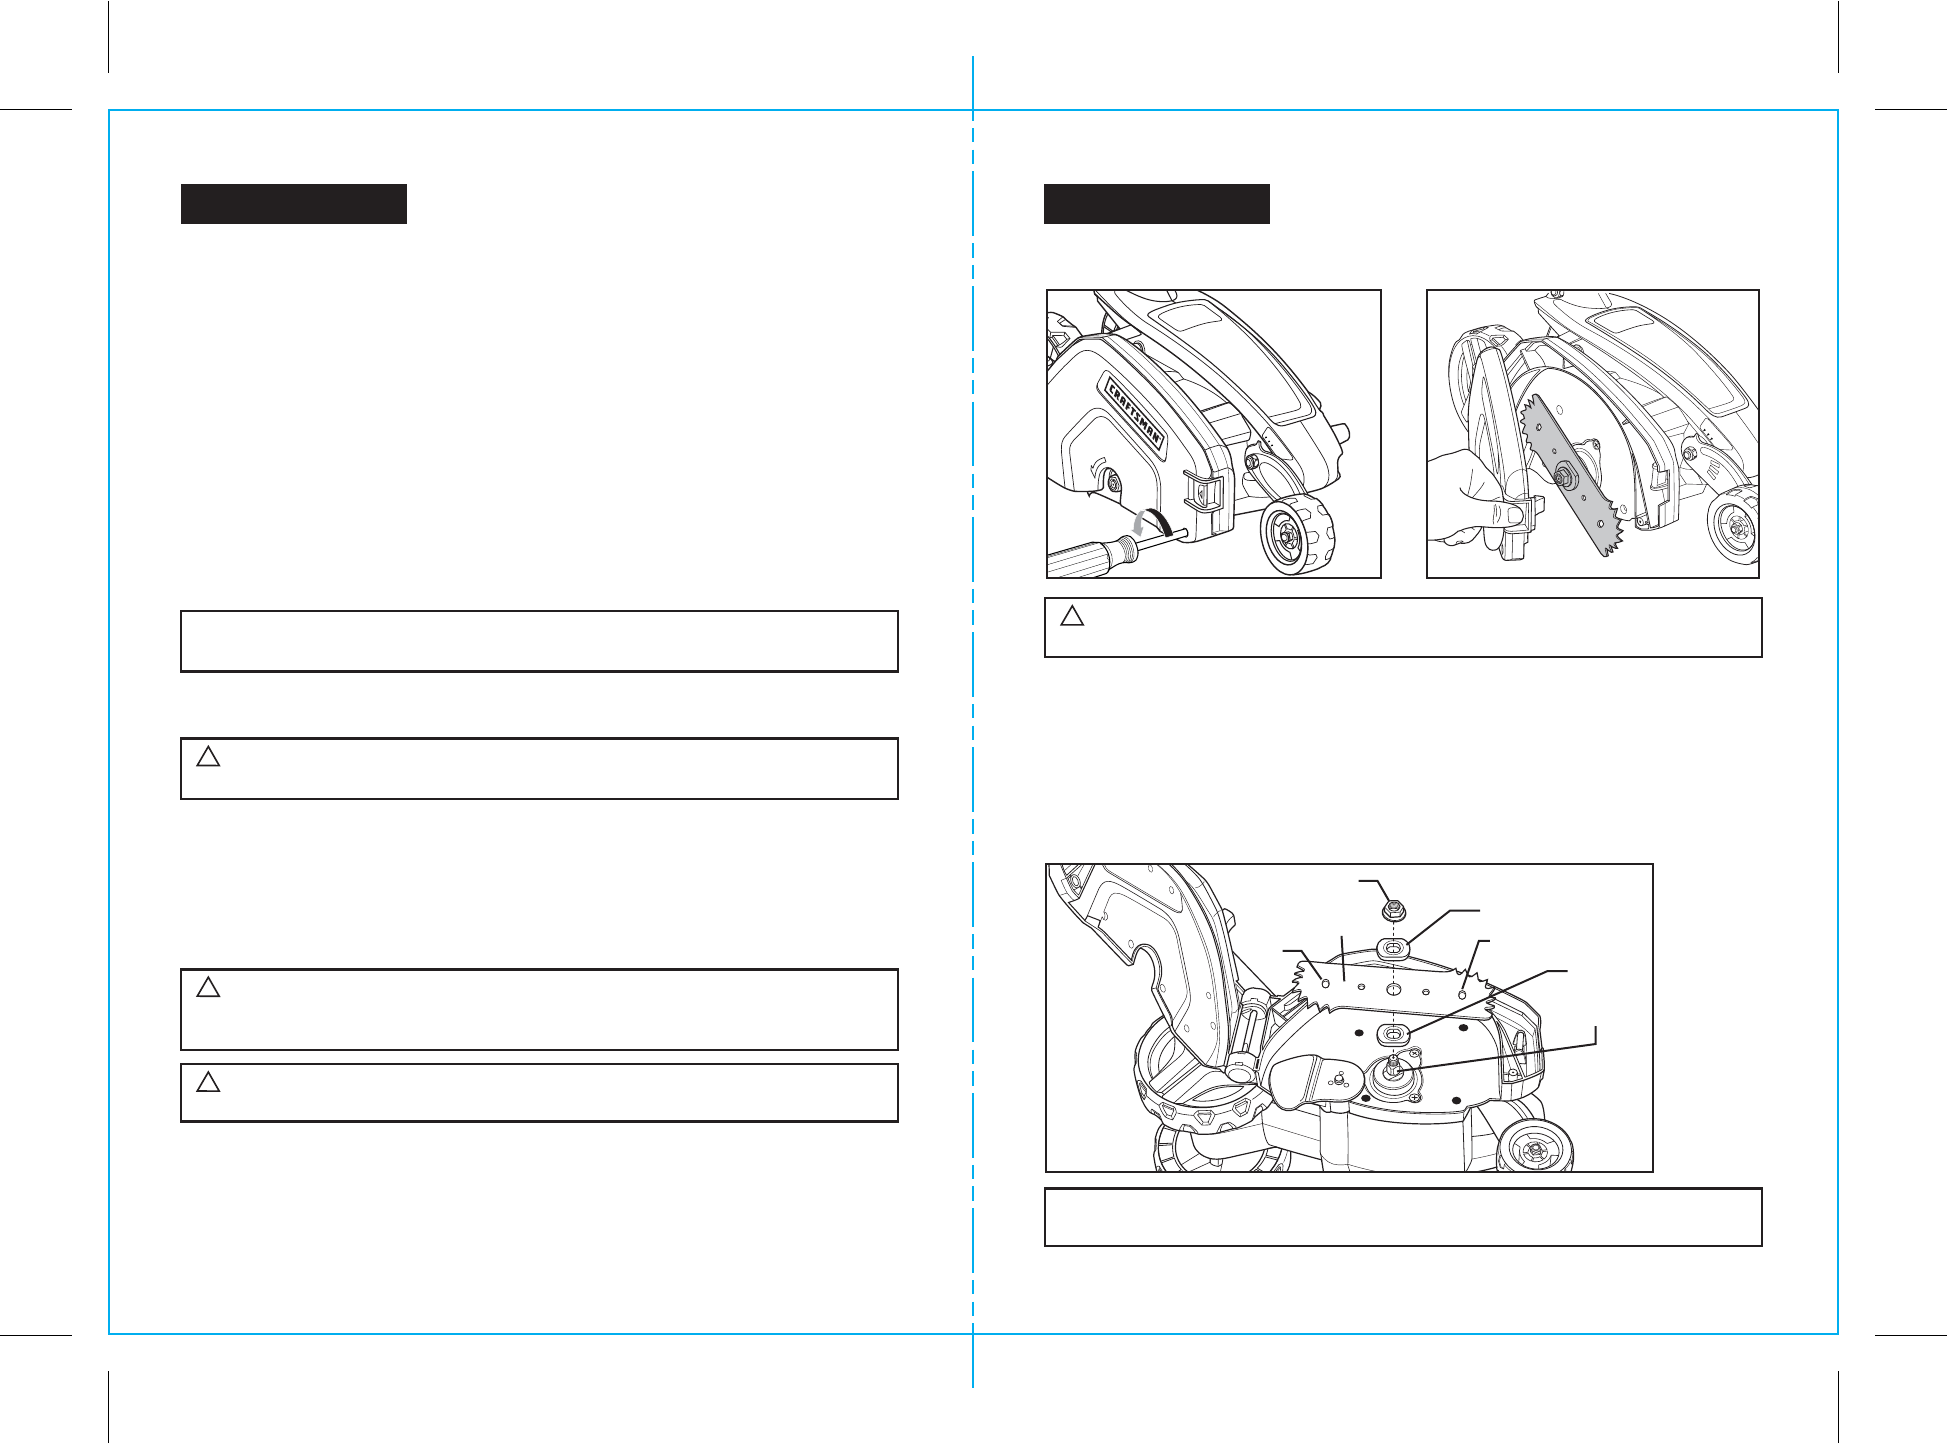
The blade, two spacers and hex head nut with conical washer should be attached to your
Edger in the order shown (Fig. 14). Check that the blade has been properly mounted before
using your Edger.
The Edger Blade has two wear indicators that show when the original blade needs to be
replaced. When the blade wears to the small holes, it should be replaced.
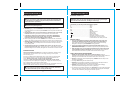
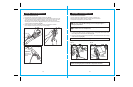
3. To open Blade Guard, loosen the Screw under the Blade Guard Release Lever counter-
clockwise (as you face Blade Guard side of tool), see Fig. 13a. Pull out on the Guard
Release Lever and open Blade Guard (Fig. 13b).
4. To close Blade Guard, push in until you hear Guard Release Lever click into place.
Tighten the Screw under the Blade Guard Release Lever. Make sure Blade Guard is
securely in place.
WARNING:
DO NOT use Edger with any type of accessory or attachment.
Such usage might be hazardous.
!
WARNING:
To avoid injury, ALWAYS turn off and disconnect the Edger
from the power outlet BEFORE installing parts or cleaning the Edger or making
any adjustments.
!
CAUTION:
BLADE ROTATES momentarily after power switch is released.
Wait for blade to come to a complete stop.
!
OPENING THE BLADE GUARD cont.
REMOVING AND ATTACHING THE BLADE
WARNING:
BE SURE GUARD IS PROPERLY CLOSED AND SCREWED
SHUT BEFORE OPERATING EDGER.
!
Fig. 13a
Loosen Screw
Fig. 13b
Hex Head Nut
with conical washer
Top
Spacer
Bottom
Spacer
Shaft
Blade
Indicator
Hole
Indicator
Hole
Fig. 14
NOTE: To increase blade life, keep initial cutting depth at minimum and
increase depth setting as blade wears.
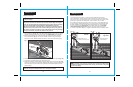
NOTE: ALWAYS stand to the left of the Handle. Any debris thrown by the Edger
would be coming from the Blade Guard area on the right of the Edger.
1.5”
1.25”
1.0”
1.5”
1.25”
1.0”