


14 15
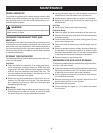
MAINTENANCE
WARNING:
When servicing, use only identical Ryobi replacement
parts. Use of any other parts may create a hazard or
cause product damage.
WARNING:
Always wear safety goggles or safety glasses with side
shields during power tool operation or when blowing
dust. If operation is dusty, also wear a dust mask.
WARNING:
Before inspecting, cleaning or servicing the machine, shut
off engine, wait for all moving parts to stop, and discon-
nect spark plug wire and move it away from spark plug.
Failure to follow these instructions can result in serious
personal injury or property damage.
GENERAL MAINTENANCE
Avoid using solvents when cleaning plastic parts. Most
plastics are susceptible to damage from various types of
commercial solvents and may be damaged by their use. Use
clean cloths to remove dirt, dust, oil, grease, etc.
WARNING:
Do not at any time let brake fluids, gasoline, petroleum-
based products, penetrating oils, etc., come in contact
with plastic parts. Chemicals can damage, weaken or
destroy plastic which may result in serious personal
injury.
Only the parts shown on the parts list are intended to be
repaired or replaced by the customer. All other parts should
be replaced at a Ryobi Authorized Service Center.
CLEANING THE AIR FILTER
See Figure 19.
A wet or dirty air filter can affect the way the engine starts,
performs, and wears. The air filter should be checked and
cleaned after 8 hours of operation. If working in dusty soil,
check the air filter after each refueling.
For best performance, the air filter should be replaced once
each year.
To clean the air filter:
n Loosen the knob on the air filter cover.
n Remove the cover.
n Lift the edge of the air filter carefully and peel it out.
n Wash the air filter with warm, soapy water.
n Rinse and squeeze to dry.
n Reinstall the air filter.
NOTE: Make sure the filter is seated properly inside the
cover. Installing the filter incorrectly will allow dirt to enter
the engine, causing rapid engine wear.
n Reinstall the cover.
n Tighten knob to secure.
Fig. 19
KNOB
AIR FILTER
AIR FILTER
COVER
REPLACING THE SPARK PLUG
See Figure 20.
The cultivator uses NGK BPMR7A or Champion RCJ-6Y spark
plug. Use an exact replacement and replace annually.
n Remove the spark plug boot.
n Loosen the spark plug by turning it counterclockwise with
a socket.
n Remove the spark plug.
n Hand thread the new spark plug, turning it clockwise.
n Tighten with a socket and torque to 170 in. lb. minimum,
190 in. lb. maximum. Do not overtighten.
CAUTION
Be careful not to cross-thread the spark plug. Cross-
threading will seriously damage the product.
Fig. 20
SPARK
PLUG