


20
TROUBLESHOOTING
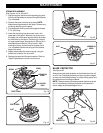
1. Lubricate with silicone spray.
2. Install more string. Refer to “String Replacement”
earlier in this manual.
3. Pull strings while alternately pressing down on and
releasing spool retainer.
4. Remove string from spool and rewind. Refer to “String
Replacement” earlier in this manual.
5. Advance string at full throttle.
1. Cut tall grass from the top down.
2. Operate trimmer at full throttle.
Clean threads and lubricate with grease - if no improve-
ment, replace spool retainer.
1. Operate trimmer at full throttle.
2. Use fresh fuel and the correct 2-cycle oil mix.
3. Clean per instruction in Maintenance Section.
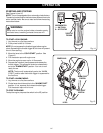
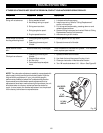
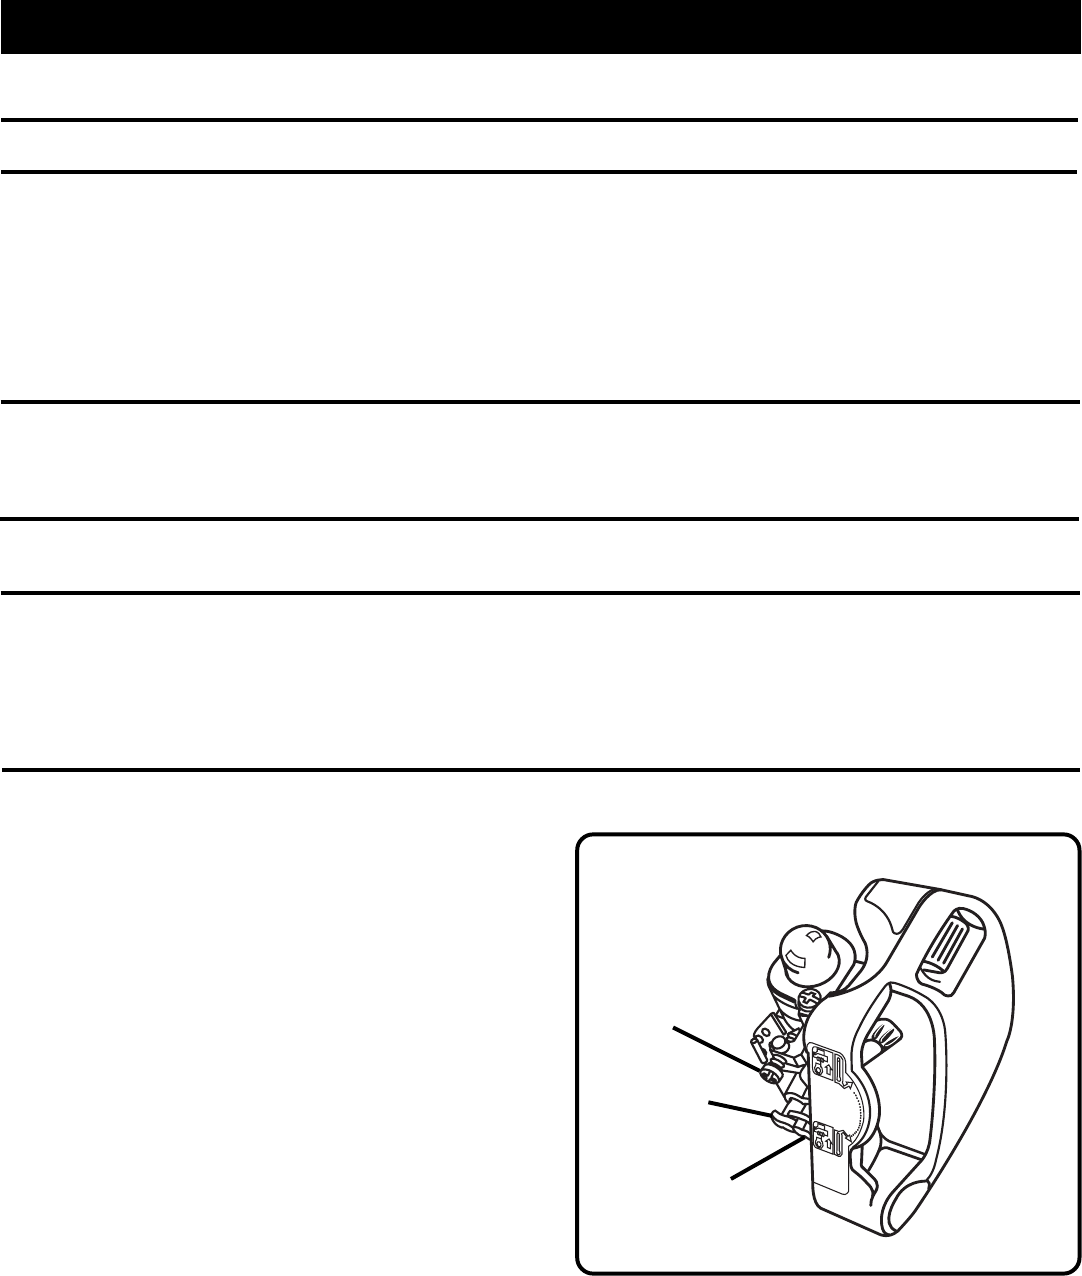
4. Turn “H” needle clockwise 1/16 - 1/8 turn.
See Figure 25.
1. String welded to itself.
2. Not enough string on spool.
3. String worn too short.
4. String tangled on spool.
5. Engine speed too slow.
1. Cutting tall grass at ground
level.
2. Operating trimmer at part
throttle.
Screw threads dirty or damaged.
1. Operating trimmer at part
throttle.
2. Check oil/fuel mixture.
3. Air filter dirty.
4. Carburettor requires adjust-
ment.
String will not advance:
Grass wraps round shaft
housing and string head:
Spool retainer hard to
turn:
Oil drips from silencer:
PROBLEMPROBLEM
PROBLEMPROBLEM
PROBLEM
POSSIBLE CAUSEPOSSIBLE CAUSE
POSSIBLE CAUSEPOSSIBLE CAUSE
POSSIBLE CAUSE
SOLUTIONSOLUTION
SOLUTIONSOLUTION
SOLUTION
IF THESE SOLUTIONS DO NOT SOLVE THE PROBLEM, CONTACT YOUR AUTHORISED SERVICE DEALER.
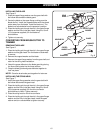
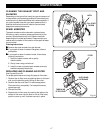
NOTE: The carburettor adjustment needle(s) are equipped with
plastic cap(s) which prevent anticlockwise rotation from the
original factory adjustment. If your unit exhibits specific
performance problem(s) where the Troubleshooting Section
recommends an anticlockwise needle adjustment and no
adjustments have been made since original purchase, the unit
should be taken to a factory-authorised service dealer for
repair. In most cases, the needed adjustment is a simple task
for the factory-trained service representative.
“L” LO
NEEDLE
“H” HIGH
NEEDLE
IDLE SPEED
SCREW
Fig. 25