MAINTENANCE AND REPAIR INSTRUCTIONS
17
Installing a Prewound Reel
1. Hold the outer spool with one hand and
remove the Bump Knob™ by turning it
counterclockwise (Fig. 13, Pg. 15). Inspect
the bolt inside the Bump Knob™ to make
sure it will move freely. Replace the Bump
Knob™ if damaged.
2. Remove the inner reel from the outer spool
(Fig. 14, Pg. 15).
3. Remove the spring from the old inner reel
(Fig. 14, Pg. 15).
4. Place the spring in the new inner reel.
NOTE: The spring must be assembled on
the new inner reel before reassembling
the cutting attachment.
5. Insert the ends of the line through the eyelets
in the outer spool (Fig. 20, Pg. 16).
6. Place the new inner reel inside the outer
spool (Fig. 14, Pg.15). Push the inner reel
and outer spool together. While holding the
inner reel and outer spool, grasp the ends
and pull firmly to release the line from the
holding slots in the spool.
7. Hold the inner reel in place and install the
Bump Knob™ by turning clockwise. Tighten
securely.
AIR FILTER MAINTENANCE
Removing the Air Filter/Muffler Cover
WARNING: To avoid serious
personal injury, always turn your
trimmer off and allow it to cool
before you clean or do any
maintenance on it.
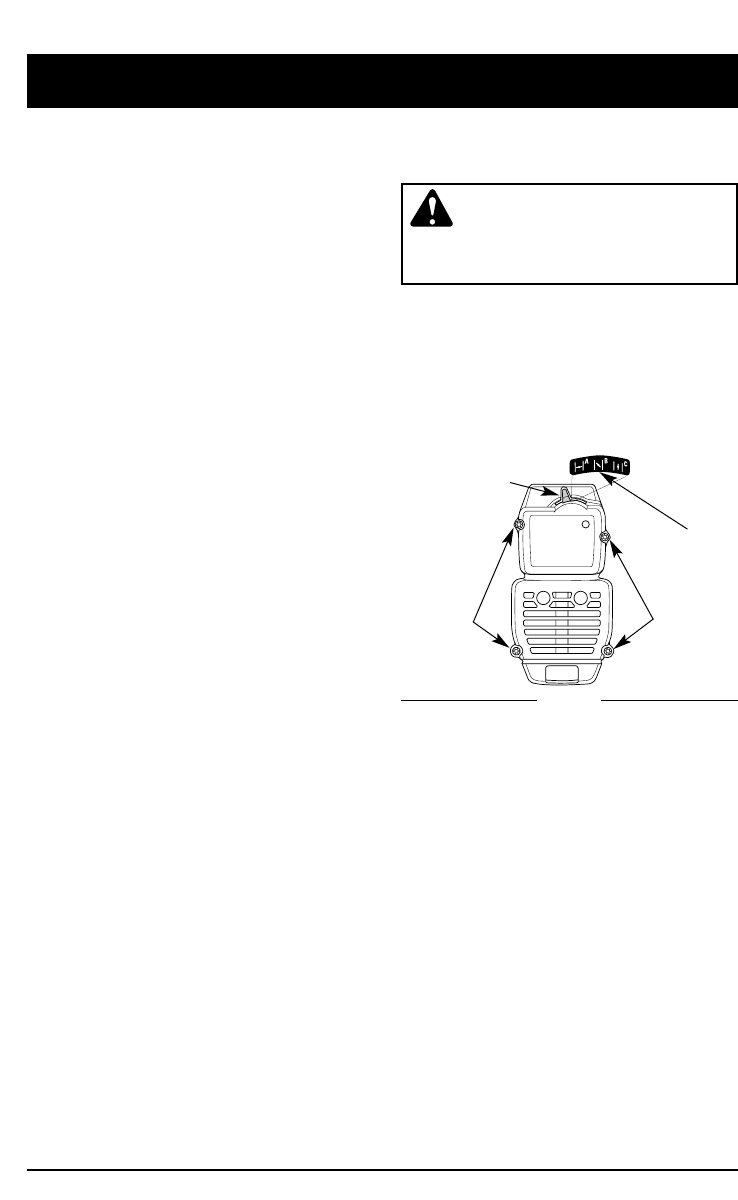
1. Place the choke lever in the PARTIAL choke
position (
B)
.
NOTE: The choke lever must be in the
PARTIAL choke position (B) (Fig. 21)
to remove the air filter/muffler cover.
2. Remove the four (4) screws securing the
air filter/muffler cover (Fig. 21). Use a flat
blade or T20 Torx bit screwdriver.
Choke Lever
Screws
Screws
Partial Choke
Position (B)
Fig. 21
3. Pull the cover from the engine. Do not force.


