


REAR CATCHER MOWER SET-UP TROUBLE SHOOTING GUIDE
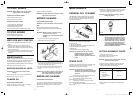
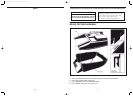
GRASS CATCHER (Fig. 2)
To Fit: Raise FLAP, grasp HANDLE, and position catcher against
rear of mower.
To Remove: Grasp HANDLE, lift FLAP, remove catcher.
WARNING: Stop engine to fit or remove catcher.
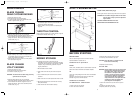
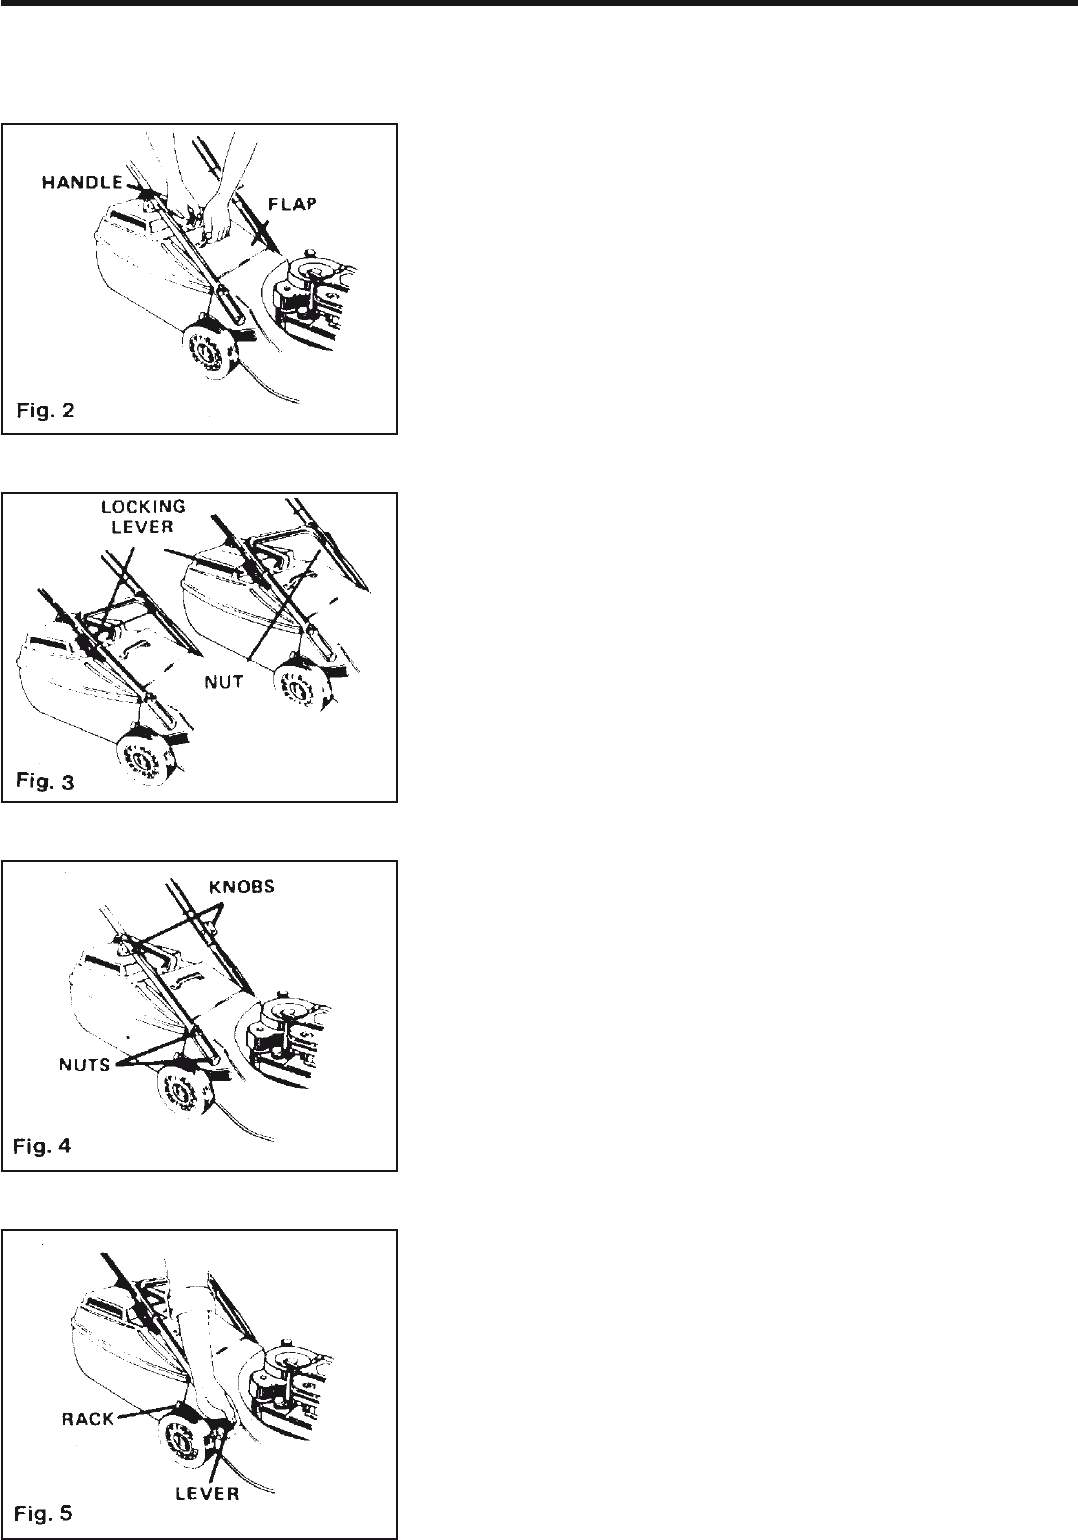
HEIGHT OF CUT (Fig. 5)
Apply outward pressure to disengage LEVER from RACK. Move lever
forward or back to adjust cutting height.
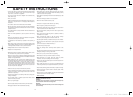
FOLDING HANDLE (Fig. 3)
Your mower handle is held in position with either a LOCKING LEVER
(Fig.3) or KNOBS (Fig. 4).
On Self-Propelled mowers the handles must be assembled when the
mower is removed from the carton. Insert the threaded shank of the
Locking Lever through the handle bars and secure with the nyloc nuts
supplied.
If the handle will not lock in the mowing position when the LOCKING
LEVER is pushed down, adjust NUT. Use 1/2” AF or 13mm AF
spanner or socket. (Fig. 3).
CAUTION: Do not allow handle to fall to ground. Throttle cable
damage may result.
Fold or unfold handle carefully and ensure throttle
cable is not pinched or kinked.
Beware snags that may catch and damage throttle
cable.
HANDLE HEIGHT
To adjust handle height, loosen NUTS and remove handle. Re-
Tighten NUTS when handle is in desired position. Use a 1/2” AF or
13mm AF spanner or socket.
4 9
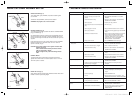
Problem Possible Cause Corrective Action
1. Move Throttle to CHOKE or RUN
2. Refer BEFORE STARTING and TO START
MOWER
3. Service air cleaner element: refer ENGINE or
SNORKEL AIR CLEANER
4. Tighten spark plug to 20 Nm.
5. Fit wire on plug
6. Set gap between electrodes at 0.7 to 0.8mm
7. Install new, correctly gapped plug: Refer SPARK
PLUG
8. Move Throttle to STOP. Pull starter rope 6 times.
Move Throttle to CHOKE or RUN and start
engine. If engine continues to flood rotate
carburettor needle valve 1/8 turn clockwise to
obtain a leaner mixture: refer ENGINE
INSTRUCTIONS - ADJUSTMENTS
9. Contact ROVER Mower Service Agent
1. Drain fuel and clean tank. Fill tank with clean,
fresh fuel: refer BEFORE STARTING
2. Clean or replace fuel tank cap.
3. Service air cleaner element: refer ENGINE or
SNORKEL AIR CLEANER.
1. Install new, correctly gapped plug: refer SPARK
PLUG
2. Set gap between electrodes at 0.7 to 0.8mm
3. Service air cleaner element: refer ENGINE or
SNORKEL AIR CLEANER
1. Service air cleaner element: refer ENGINE or
SNORKEL AIR CLEANER
2. Remove debris from cooling fins and air
passages
1. Set gap between electrodes at 0.7 to 0.8mm
1. Remove any debris from slots in shroud, blower
housing, air passages, and cooling fins on
engine
2. Install CHAMPION CJ8
3. Check oil level and top up if necessary: refer
ENGINE INSTRUCTIONS - BEFORE STARTING
1. Refer CUTTING ASSEMBLY CHECK
2. Refer CUTTING ASSEMBLY CHECK
1. Check oil level. Drain excess oil: refer ENGINE
INSTRUCTIONS - MAINTENANCE
2. Check oil level. Check air cleaner and spark
plug: refer ENGINE INSTRUCTIONS -
MAINTENANCE
1. Throttle not in CHOKE or RUN position
2. Fuel tank is empty or fuel tap in OFF
position
3. Air cleaner element is dirty
4. Spark plug loose
5. Spark plug wire loose or disconnected from
plug
6. Spark plug gap is incorrect
7. Spark plug is defective
8. Carburettor is flooded with fuel
9. Faulty ignition module
1. Dirt, water, or stale fuel in fuel tank
2. Vent hole in fuel tank cap is plugged
3. Air cleaner element is dirty
1. Spark plug is defective
2. Spark plug is incorrect
3. Air cleaner element is dirty
1. Air cleaner element is dirty
2. Cooling fins and air passages under engine
blower housing are plugged
1. Gap between electrodes of spark plug is
too close
1. Cooling air flow is restricted
2. Incorrect spark plug
3. Low oil
1. Cutting assembly is loose
2. Cutting assembly is unbalanced
1. Engine overfilled with oil
2. Mower tipped or handled incorrectly
Engine does not start
Engine difficult to start or
loses power
Engine operates erratically
Engine idles poorly
Engine skips at high speed
Engine overheats
Mower vibrates abnormally
Oil leaks from muffle or air
cleaner
3259 Domestic Rotary 18/5/06 1:52 PM Page 4