


SHEET - 3 BACKS SHEET 4
iv
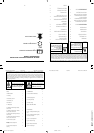
Gefeliciteerd met Uw aankoop van een Rover Mulch ‘N Catch maaier met het exclusiefe Rover
Vari-Tilt systeem (Patent Aangevraagd). De Rover Mulch ‘N Catch is een verwisselbarende
maaier. Dit maakt het mogelijk om te maaien met een opvanger voor het gras of zonder de opvanger,
met een hakseltap geinstalleerd, om het gras te hakselen. Het voordeel van dit ontwerp is om
gehakselt gras te benuttigen, maar in tijd van snelle groei of wanneer het haksel gras te veel opbouwt,
om het met de opvanger te verwijderen.
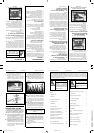
Rover Mowers Limited NEDERLANDS MULCH ‘N CATCH
TM
WAARSCHUWING!
De veiligheid van de werker en
anderen is hiermee
verbonden. Lichamelijke
verwonding kan plaats nemen
indien deze informatie niet
bestudeerd wordt.
VOORZICHTIG!
Volg deze instructies en
voorkom schade aan de
maaier en mogelijk verlies van
garantie.
22
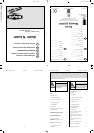
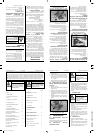
5. Mettere lame, bulloni, rondelle e dadi nuovi,
una lama per volta in modo da mantenere
l’equilibrio dell’apparato (Figura 5).
6. Stringere i dadi delle lame a 16 Nm.
Controllare che le lame si muovano
liberamente quando i dadi sono in tensione.
7. Rimuovere il puntello del lato a cerniera e
riattaccare il cavetto alla candela.
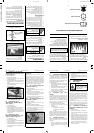
Figura 4 – Cambio lame
Figura 5 – Lama e dispositivo di fissaggio.
La falciatura con distribuzione dello strame
è una forma d’arte acquisita con l’esperienza
e per ottenere consistentemente degli ottimi
risultati è bene seguire questi suggerimenti :
��
��
� Non si deve cercare di distribuire l’erba
se questa è troppo bagnata. L’erba bagnata
tende a raggrupparsi e non si sparge
egualmente. Inoltre si ammucchia e finisce
per otturare la parte inferiore della base.
��
��
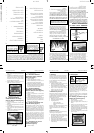
� Non si deve distribuire l’erba se la si taglia
troppo bassa. Bisogna ricordarsi che il taglio
massimo dovrebbe essere 25 mm sotto la
cima dell’erba oppure 1/3 dell’altezza del filo
d’erba, calcolando valida la lunghezza
minore. (Figura 6).
��
��
� Non si deve spingere troppo velocemente
la tosaerba quando distribuisce. Per
ottenere il miglior risultato dovrebbe essere
necessario regolare la velocità sul terreno.
��
��
� Fare andare il motore a tutto gas. Se il
motore va a velocità bassa non riesce a dare
alle lame la forza di tagliare efficacemente
l’erba.
Figura 6 – Altezza dell’erba
��
��
� Occorre mantenere affilate le lame da
taglio . Queste lame sono state progettate
per tagliare e tagliare di nuovo i fili d’erba.
Se queste lame non sono mantenute affilate
la loro prestazione di taglio e distribuzione
sarà ridotta.
��
��
� Si devono mantenere ben puliti sia la parte
inferiore della base che l’adattatore.
L’ammucchiarsi d’erba sotto la base finisce
per bloccare il flusso d’aria creato dalle lame
e quindi riduce la prestazione distributiva.
Se si nota una striscia d’erba tagliata
occorre alzare l’altezza di taglio della
tosaerba.
Se le condizioni per la distribuzione dell’erba
come strame non sono ideali e si notano delle
strisce d’erba tagliata dopo il passaggio con
la tosaerba, allora potrebbe essere necessario:
1. Installare il raccoglitore e raccogliere l’erba.
2. Ripassare la tosaerba sui mucchietti o strisce
d’erba tagliata.
3. Alzare l’altezza taglio.
4. Rastrellare i mucchietti d’erba dopo la
tosatura.
Rover Mowers Limited ITALIANO MULCH ‘N CATCH
TM
20
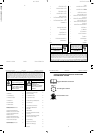
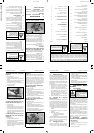
4. Inserire l’adattatore, cominciando dalla parte
destra lunga, nella parte posteriore della
tosaerba.
5. Guidare dentro l’adattatore fino a che l’aletta
elastica si trovi contro il margine superiore
della base della tosaerba e il suo margine
inferiore si trovi sul margine frontale
superiore del braccio porta asse.
6. Dare all’adattatore un colpo in avanti e in
basso fino a metterlo in posizione.
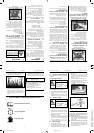
Figura 1 – Montaggio Adattatore
distribuzione strame – 35m, 75m.
1. Fermare il motore.
2. Alzare il lato posteriore a cerniera della
tosaerba
.
3. Rimuovere il raccoglitore d’erba o il deflettore
(se montato).
4. Inserire l’adattatore cominciando con la parte
destra lunga nella parte posteriore della
tosaerba.
5. Guidare dentro l’adattatore e sistemarlo sul
braccio porta asse posteriore.
Figura 2 – Montaggio Adattatore
distribuzione strame – 50m, 51m, 60m,
61m e 80m.
6. Riabbassare e richiudere il lato posteriore a
cerniera della tosaerba.
1. Fermare il motore.
2. Alzare il lato posteriore a cerniera.
3. Prendere l’adattatore per il manico e con un
colpo fermo staccarlo dalla tosaerba.
4. Guidare fuori l’adattatore ruotando il suo lato
sinistro più corto verso destra e poi guidando
la sua parte destra più lunga verso l’esterno
fino a portarlo fuori dalla tosaerba.
1. Fermare il motore.
2. Alzare il lato posteriore a cerniera della
tosaerba
3. Prendere l’adattatore per il manico e alzarlo
e tirarlo verso l’esterno della tosaerba.
4. Guidare l’adattatore fuori ruotando il suo lato
più corto di sinistra verso destra e poi
guidando la parte più lunga di destra fino a
portarlo fuori dalla tosaerba.
Sulla tosaerba è montato il sistema “Vari-Tilt”
(in attesa di Brevetto) per migliorarne le
prestazioni. In via generale si raccomanda che
la barra di connessione Conbar si trovi alla sua
massima lunghezza per la funzione distributrice
d’erba della tosaerba e alla sua minima lunghezza
per la funzione raccoglitrice. Queste
raccomandazioni potrebbero però non essere
valide in certe condizioni del tappeto erboso, nel
qual caso sta all’utente regolare il Conbar nella
maniera più giusta. Si ricorda che il Conbar alla
sua massima lunghezza provvede anche
all’ottenimento della maggiore altezza possibile
dell’erba.
1. Fermare il motore.
Rover Mowers Limited ITALIANO MULCH ‘N CATCH
TM
1
Rover Mowers Limited ENGLISH MULCH 'N CATCH
TM
The Rover Mulch ‘N Catch mower setup as a
mulching mower (grass catcher removed and
mulch plug fitted) reduces the grass clippings
into very fine particles. The design allows for
the even distribution of the grass particles at
the base of the lawn.
The mulched clippings can then:
� Break down quickly, releasing nutrients into
the soil, saving on fertiliser costs.
� Reduce evaporation of moisture from the soil
which reduces watering costs and effort.
� Help to control temperature extremes
protecting the roots of the grass.
� Assist in controlling soil erosion.
Research has shown that lawns are usually cut
too short. Grass, like any other plant life, relies
on photosynthesis to regenerate and survive.
Reduced leaf size (from cutting too low) can
seriously affect a lawn by:
� Making it easy prey for disease.
� Encouraging weeds to take hold.
� Exposing the soil to:
– greater evaporation;
– temperature extremes; and
– erosion.
Raising the cut height and using mulch mowing
follows the best practice for nurturing a
healthier more attractive lawn with less water
usage.
Because you mulch as you mow the time and
cost savings are also significant:
� Eliminates raking of leaves before mowing
(the Mulch ‘N Catch mower picks up and
converts fallen leaves into mulch).
� Eliminates raking of cut grass.
� Saves the time spent emptying the catcher.
� Automatically disposes of grass clippings.
� Eliminates the need to dispose of clippings
at the refuse tip.
Your Mulch ‘N Catch mower is fitted with
multipurpose cutting blades for both mulching
and catching, as shipped from the factory. It is
also supplied with a mulch plug for mulch
mowing and a grass catcher for catch mowing.
To convert to a mulching mower install the
mulch plug (Refer 2.2 or 2.3) and adjust the
conbar to suit (Refer 2.7).
To convert to a catching mower, install the grass
catcher (Refer Owner’s Manual), and adjust the
conbar to suit (Refer 2.8).
1. Stop the engine.
2. Lift the rear flap of the mower.
3. Remove the grass catcher or deflector (if
fitted).
4. Insert the long right hand side of the mulch
plug first, into the rear of the mower.
5. Guide the mulch plug in until the spring tab
rests against the top edge of the mower base
and the lower edge rests on the front top edge
of the axle retaining bracket.
6. Give the mulch plug a firm jolt forward and
down into place.
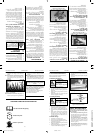
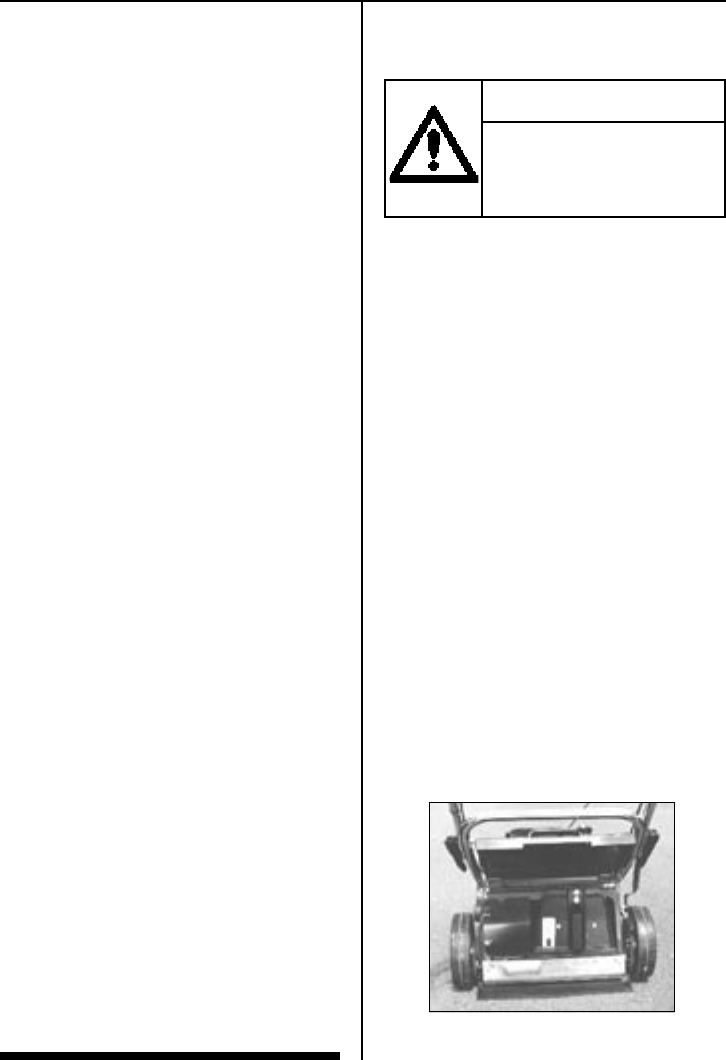
Figure 1 - Installing the Mulch Plug -
35m, 75m
WARNING
Before removing or installing
the mulch plug or
grasscatcher. The engine
must be stopped.
6304 Mulch n Catch imposed.indd 10/22/2004, 11:23 AM3