


10
113005
www.desatech.com
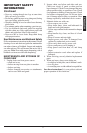
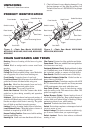
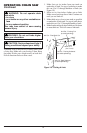
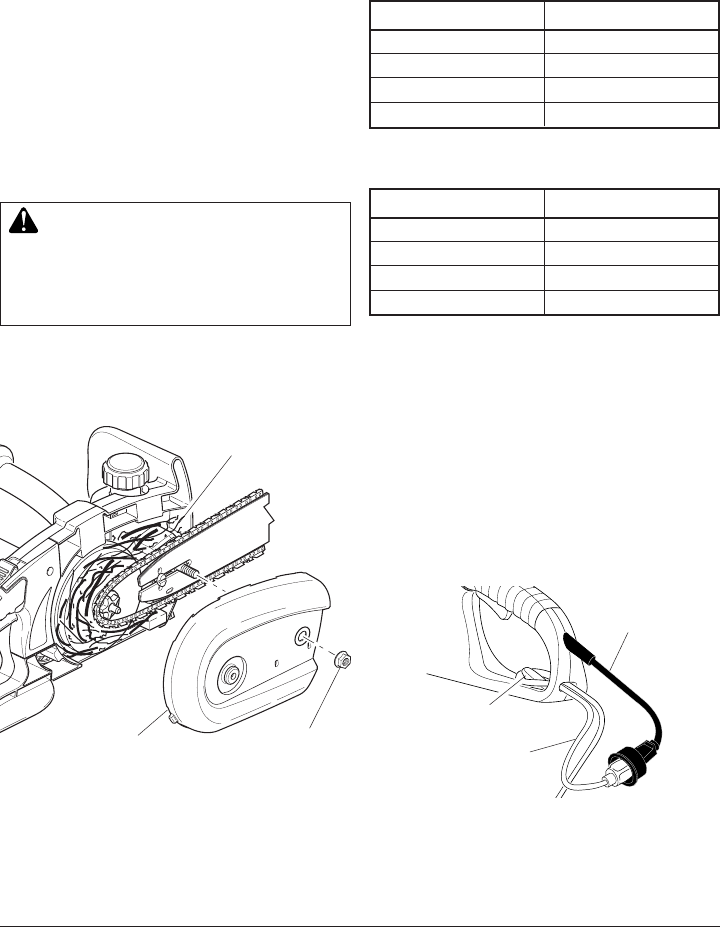
Figure 11 - Looping Extension Cord over Cord
Hitch
Power Cord
Extension Cord
Cord Hitch
Cord Length AWG Cord Size
25 feet 16 AWG
50 feet 16 AWG
100 feet 16 AWG
150 feet 14 AWG
Models M12510US, M15012US, M15014US,
M15014AS
Keep cord away from cutting area. Make sure cord
does not catch on branches or logs during cutting.
Inspect cords often. Replace damaged cords.
This chain saw is designed with an extension cord hitch
that prevents the extension cord from being pulled loose
during use. To use, form a loop with the end of the
extension cord, insert loop into slot in rear of handle,
and place loop over cord hitch (see Figure 11). Gently
pull loop against cord hitch until slack is removed.
Plug extension cord into chain saw cord.
EXTENSION CORDS
Use proper extension cords with this saw. Use only
extension cords marked for outdoor use. The cord must
be marked with suffix W or W-A following the cord
type designation. Example: SJTW-A or SJTW.
Use proper sized cord with this saw. Cord must be heavy
enough to carry current needed. An undersized cord will
cause voltage drop at saw. Saw will lose power and over
-
heat. Follow cord size requirements listed below.
Cord Length AWG Cord Size
25 feet 16 AWG
50 feet 16 AWG
100 feet 14 AWG
150 feet 12 AWG
Models M30016US, M30016AS, M30016AW,
M35016UW, M35016AW
OPERATING CHAIN SAW
Continued
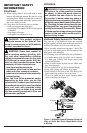
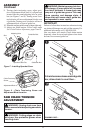
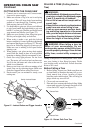
CLEARING SPROCKET COVER OF
DEBRIS
While operating the chain saw, wood chips, small
twigs, and other debris can occasionally build up
inside the sprocket cover. To properly maintain the
saw and keep it in good working order, periodic
removal of this debris may be required. To properly
clear debris from the sprocket cover:
1. Unplug chain saw.
2. Loosen and remove guide bar nut (see Figure
10).
3. Turn chain tensioning screw counterclockwise
to loosen chain until sprocket cover is easily
removed.
4. After sprocket cover is removed, clear all chips,
twigs, and debris.
WARNING: Use caution when clear-
ing debris that is around chain. Cutting
edges on chain are sharp. Use protec
-
tive gloves when working around or
handling chain.
5. Once debris has been removed, follow steps 7
through 11 on pages 7 and 8 in the
Assembly
section to re-assemble the sprocket cover to the
chain saw.
Figure 10 - Removing and Clearing Sprocket
Cover of Debris
Wood Chips, Twigs,
and Debris
Sprocket Cover
Guide Bar Nut