


8
113005
www.desatech.com
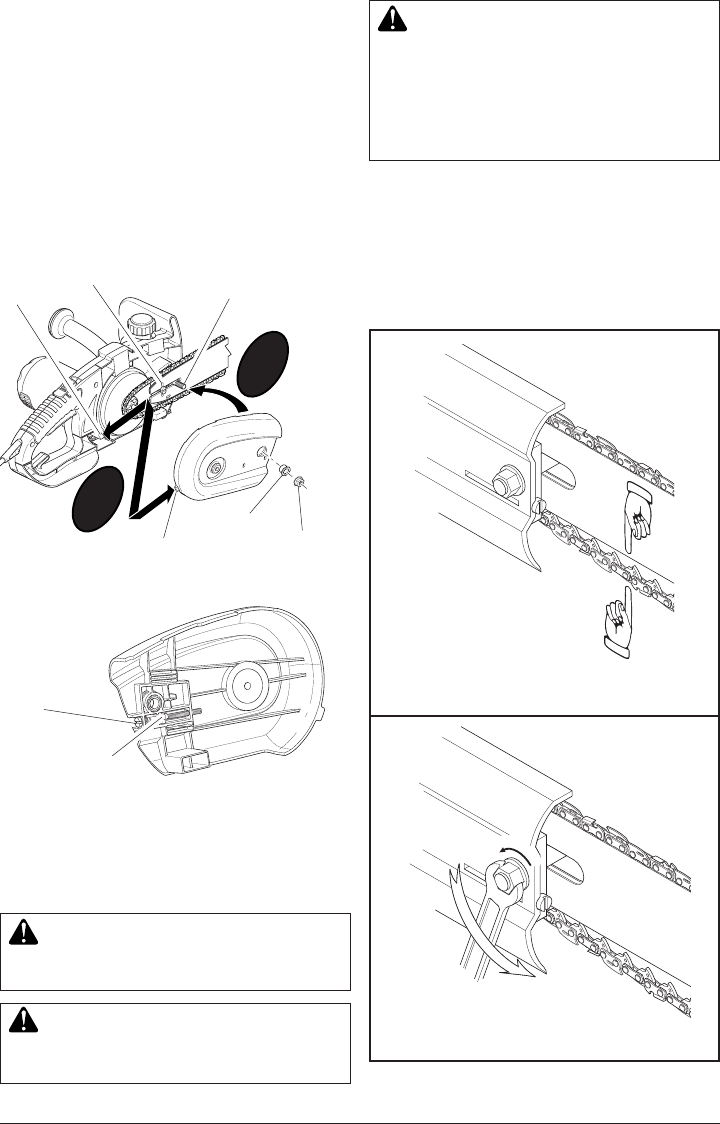
SAW CHAIN TENSION
ADJUSTMENT
WARNING: Unplug chain saw from
power source before adjusting saw chain
tension.
WARNING: Cutting edges on chain
are sharp. Use protective gloves when
handling chain.
WARNING: Maintain proper chain ten-
sion always. A loose chain will increase
the risk of kickback. A loose chain may
jump out of guide bar groove. This may
injure operator and damage chain. A
loose chain will cause chain, guide bar,
and sprocket to wear rapidly.
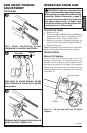
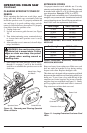
Figure 8 - Chain Tensioning Screw and
Adjustment Block Location
ASSEMBLY
Continued
IMPORTANT!
Failure to follow these instructions when tensioning
saw chain will damage saw and void the warranty. For
additional information call 1-800-858-8501.
New saw chains will stretch. Check chain tension
frequently when first used and tighten when chain
becomes loose around guide bar.
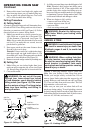
L
O
O
S
E
N
❶
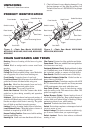
Loosen nut...
If chain becomes loose around guide
bar, allow chain to cool then...
❷
Chain Tensioning
Screw
Adjustment Block
Step
1
Step
2
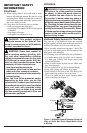
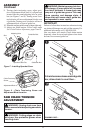
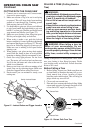
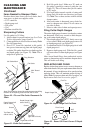
Figure 7 - Installing Sprocket Cover
Guide Bar Bolt
Bushing
Guide Bar Nut
Sprocket Cover Tab
Slot
Adjusting Hole
9. Turning chain tensioning screw, adjust posi-
tion of adjustment block until it is aligned and
inserted into the round adjusting hole on guide
bar (see Figures 7 and 8). Turning screw coun
-
terclockwise will move adjustment block to rear
of guide bar. Turning screw clockwise will move
adjustment block to front of guide bar.
10. If needed, readjust guide bar nut to finger tight only.
11. Adjust saw chain tension. Follow steps under
Saw Chain Tension Adjustment,
pages 8 and 9.