6
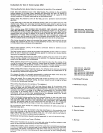
B6. Locate the section at the end of this manual tabbed “Lamp OEM
Instructions”. Read, become familiar with and follow the “Lamp OEM
Instructions”.
B7. Locate the lamp shipping box. Put on a protective mask, goggles (glasses),
and gloves and carefully remove the lamp from its shipping box. Do not
remove the protective cover from the lamp at this time.
B8. Become familiar with the lamp, noting in particular the “+” and “—”
terminals on each end of the lamp and the short black line on the “+” end.
Also, look at the top terminal in the lamp housing and note the small pin
protruding into the through hole in the top terminal. Insert the “+” terminal
on the lamp into the top terminal in the lamp housing. Orient the lamp so
that the clear part of the lamp envelope will face the source mounting flange
when installed with the top terminal in the original orientation. While gently
holding the lamp in the tope terminal, securely hold the top terminal and
tighten the terminal clamping screw in the top terminal using the Allen
wrench provided. Caution: Do not over tighten the clamping screw.
Caution: Do not apply any pressure to the lamp when tightening the set screw! Do
not over tighten the set screw.
B9. Very carefully remove the protective cover from the lamp. Gently insert the
lamp (with the top terminal connected) into the split clamp in the base
terminal until it rests on the small pin.
Caution: Do not apply any stress or strain to the lamp. Assure that the top terminal
is oriented approximately as noted in stop #B4.
B10. Tighten base terminal clamping screw using the Allen wrench provided
until the lamp is secure.
Caution: Do not over tighten the clamping screw.
B11. Replace the top cover.
The xenon lamp is now properly installed.


