Questions? Call Toll Free at 1-800-737-2112 Copyright © 2009 MAT Engine Technologies, LLC
Before you adjust the height of cut, stop the engine. Wait
for all moving parts to stop. Allow engine to cool and dis-
connect the spark plug wire.
The height of cut can be set from 1.5 to 3 in. [38-76 mm].
Recommended cutting height for the average yard is 2 in.
[51 mm].
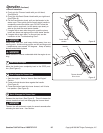
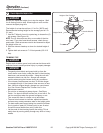
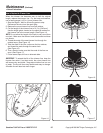
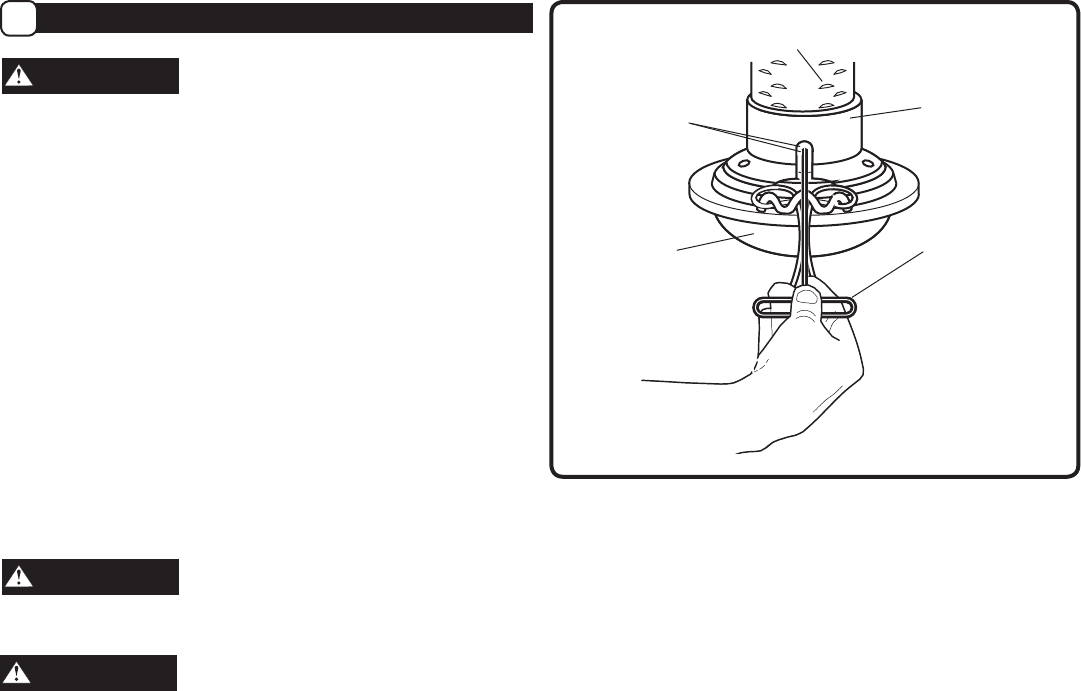
1. Use the T-Wrench, found in a parts bag, to loosen the (2)
set screws. (See Figure 10)
NOTE: The (2) set screws are only on one side of the trim-
mer head. If you don’t see the set screws, check the op-
posite side. Both set screws need to be loosened to adjust
the height of the cut.
2. Slide the trimmer head up or down for desired height of
cut.
3. Tighten both set screws to 7-12 foot-pounds (9.5-16.3
Nm).
TRIMMING TIPS
Debris such as sticks, gravel, and rocks can be thrown with
sufcientforcetocausepersonalinjuryorpropertydamage.
• Frequentlycleandebrisandgrassbuildupfromthe
recoil starter cover holes, under the deck in the trimming
headarea,andaroundthemufer.Usingtheunitwith
excessivedebriscanriskre.Alwaysuseextreme
caution when using the trimmer during dry conditions.
• Ifthetrimmerlinesbecometooshort,itwilltakelonger
to complete this job. If the trimmer lines are worn to less
than half their original length, change to a new trimmer
line.See“HowtoReplacetheTrimmerLine”inthe
Maintenance section.
• Donottrimonexcessivelysteepslopes.SeeSlope
Guide.Ifaslopeisdifculttostandon,donottrimit.Do
not trim on slopes when the ground is slippery or wet.
Trim across the face of a slope, not up and down.
• Trimmerheadcontacttoconcrete,asphaltandharder
surfaces may create premature wear to the height guide.
• Forbestresultsandlongerlastingline,soakthetrimmer
line in a pale of water for 24 hours prior to use. A moist
linewillbemoreexiblethanadry,brittleline.
• Lettheendsofthetrimminglinedothecutting.Thisis
easily done by moving slowly through very thick or heavy
weeds.
Operation (Continued)
• Save all instructions
How to Adjust the Height of Cut
F
WARNING
WARNING
HeightofCutPositions
Set Screws
TrimmerHead
T-HandleWrench
HeightGuide
Figure 10
WARNING
11


