8
Tighten
chain
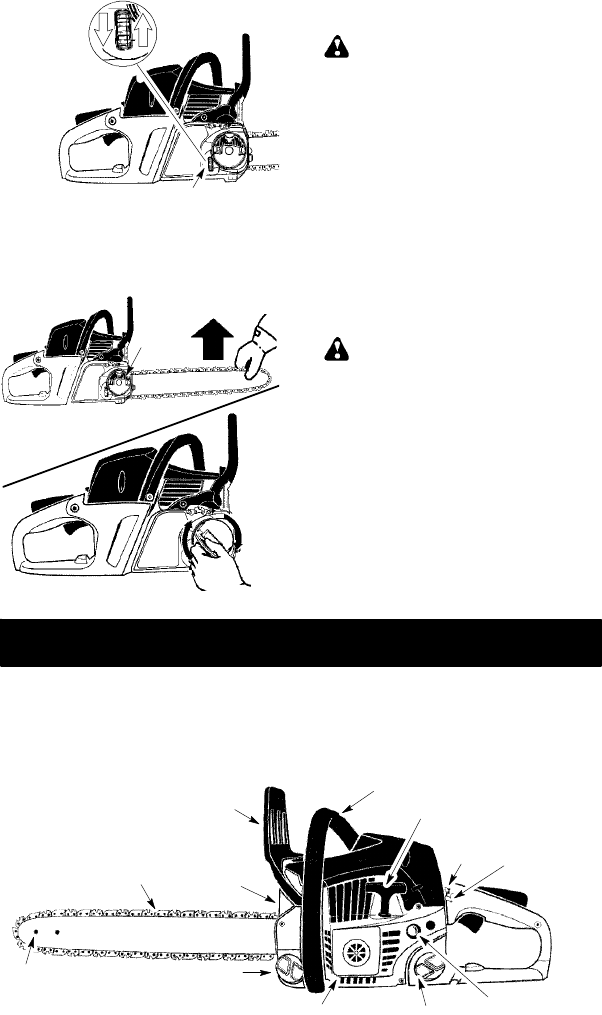
Adjusting Wheel
Loosen
chain
3. Usi ng a screwdriver, mo v e chai n arou nd
guide bar to ensure all links are in bar
groove.
4. While lifting tip of guide bar, tighten bar
knob securely (clockwise). Hand tight-
en only!
TIGHTEN
Bar
Knob
5. Push lever on bar knob down to return
lever to closed/locked position.
WARNING: Failure t opushleveron
bar knob down t o closed/locked position
could result in serious personal injury or
damage to your chain saw.
6. Useascrewdriver tomovechainaround
guide bar .
7. If chain does not rotate, it is too tight.
Loosen bar knob 1 turn (counterclock-
wise); then, loosen chain by turning the
adjusting wheel
1
/
4
turn (upward direc-
tion). Retighten bar knob.
8. If chain is too loose, it will sag below the
guide bar. DO NOT operate the saw if
the chain is loose.
NOTE: The chai n is tensioned correctly
when the weight of the chain does not cause it
to sag below the guide bar (with the chain saw
sitting in an upright position), but the chain still
moves freely around the guide bar .
WARNING: If the saw is operated
with a loose chain, the chain could jump off
the guide bar and result in serious injury to
the operatorand/or damagethe chain makingit
unusable. If the chain jumps of f t he guide bar ,
inspect each drive link for damage. Damaged
chain must be repaired o r replaced.
OPERATION
KNOW YOUR CHAIN SAW
READ THIS INSTRUCTION MANUAL AND SAFETY RULES BEFO RE OPERATING YOUR
CHAIN SAW. Compare the illustrations with your unit to familiarize yourself with the location of
the various controls and adjustments. Save this manual for future reference.
Primer Bulb
Bar Oil Fill Cap
Chain
Front Hand Guard
Front Handle
Starter Rope
ON/STOP
Switch
Muffler
Choke/
Fast Idle
Lever
Fuel Mix Fill Cap
Bar
Sprocket
Hole
Starter Housing


