


12
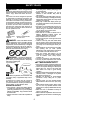
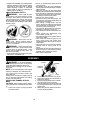
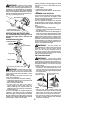
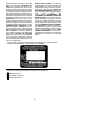
1. Clean the cover and the area around it to
keep dirt from falling into the carburetor
chamber when the cover is removed.
2. Remove parts by pressing button to re-
lease air filter cover.
NOTE: To avoid creating a fire hazard or
producing harmful evaporative emissions, do
not clean filter in gasoline or other flammable
solvent.
3. Wash the filter in soap and water.
4. Allow filter to dry .
5. Replace parts.
Button
Air Filter Cover
Air Filter
INSPECT MUFFLER AND SPARK
ARRESTING SCREEN
WARNING: The muffler on thisprod-
uct contains chemicals known to the State of
California to cause cancer.
As your unit isused, carbon deposits buildup
on themuf flerand spark arresting screenand
must be removed to avoid creating a fire haz-
ard or affecting engine performance.
For normal homeowner use, the muffler and
spark arresting screen will not require any
service. After 50 hours of use, we recom-
mend that your muf fler be serviced or re-
placed by an authorized service dealer.
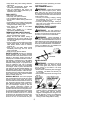
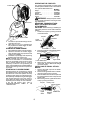
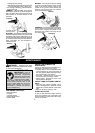
REPLACE SPARK PLUG
Replace the spark plug each year to ensure
the engine starts easier and runs better. Set
spark plug gap at 0.025 inch (0.6 mm). Igni-
tion timing is fixed and nonadjustable.
1. Twist, then pull off spark plug boot.
2. Remove spark plug from cylinder and
discard.
3. Replace with Champion RCJ-6Y spark
plug and tighten securely with a 3/4 inch
(19 m m) socket wrench.
4. Reinstall the spark plug boot.
SERVICE AND ADJUSTMENTS
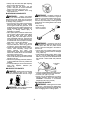
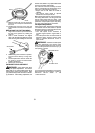
REPLACING THE LINE
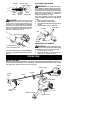
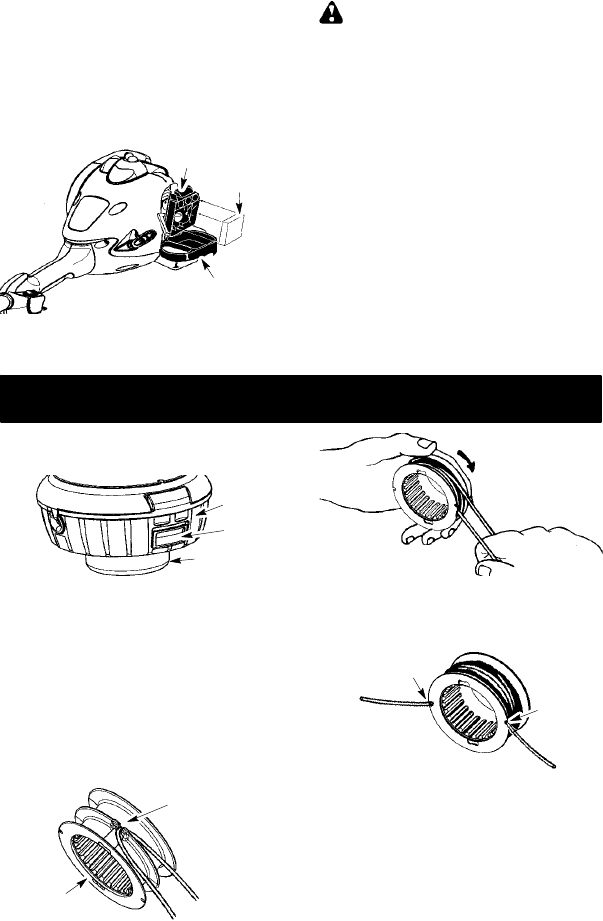
1. Press the tabs on the side of the trimmer
head an d remove cover and spool.
Tab
Cover
Tap Button
2. Remove any remaining line.
3. Clean dirt and debris from all parts. Re-
place spool if it is worn or damaged.
4. Replace with a pre-wound spool, or re-
place line using a 15 feet (4.5 meters)
length of 0.095 inch (2.4 mm) diameter
Poulan PRO brand line.
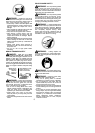
5. When installing new line on an existing
spool, hold the spool as shown in the il-
lustration below.
6. Bend the line at the midpoint and insert
the bend into the slot in the center rim of
the spool. Ensure line s naps intoposition
in the slot.
Slot
Spool
7. With your finger between the lines, wrap
the lines evenly and firmly around the
spool in a clockwise direction.
8. Position the lines in the guide slots.
Guide
Slot
Guide Slot
9. Insert the end s of the lines through exit
holes in the sides of the cover.
10. Place the spool in the cover.