10
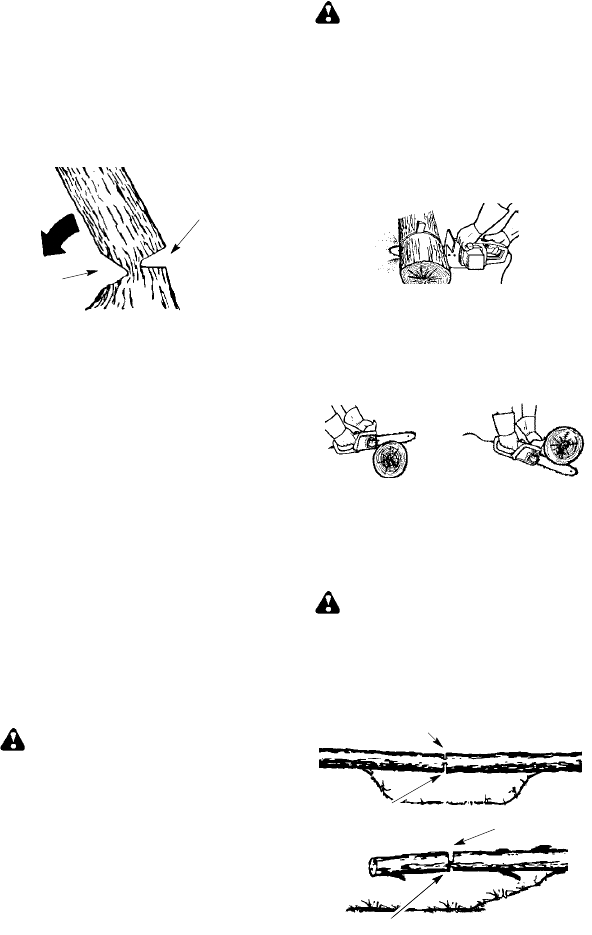
S After r emovi ng t he wood from t he notch,
make the felling cut on the opposite side
of the not ch. Thi s is done by making a
cut a bout two i nches hi gher t han the
center of the notch. This wi l l leave
enough uncut wood between the felling
cut and the notch to form a hi nge . Thi s
hinge will hel p prevent t he tree from fal-
ling in t he wrong di r ecti on.
Opening
of felling
cut
Closing of
notch
Hing e holds tree on stum p and
helps control fall.
NOTE: Before felling cut is complete,
use wedges to open the cut when
necessary to control the direction of fall.
To avoid kickback and chain damage,
use wood or plastic wedges, but never
steel or iron wedges.
S Be aler t to signs that t he t r ee is ready t o
fall : crackin g sou nds, widening of the
felling cut, or movement i n the upper
branches.
S As tree starts to fall, stop saw, put it
down, and get away quickly on your
planned r et r eat path.
S
DO NOTuse your sawto cut down a par-
ti all y fallen tree. Be extr emel y cauti ous
with partially fallen trees that may be
poorly supported. When a t r ee doesn’t
fall completely, set saw aside and pull
down tree with a cable winch, block and
tackle, or tractor .
CUTTING A FALLEN TREE
(BUCKING)
Buckin g is the te r m used for cutting a fall-
en tree to the desired log size.
WARNING: Do not stand on the
log being cut. Any portion can roll caus-
ing loss of footing and control. Do not
stand downhill of the log being cut.
IMPORTANT POINTS
S Cut only one l og at a time.
S Cut shattered wood very car ef ul ly;
sharp pi eces of wood could be f lung to-
ward operator.
S Use asawhorseto cutsmall logs.Never
allow another person t o hold t he log
while cutting and never hold the log with
your leg or foot.
S Do no t cut in an are a where logs, li m b s,
and roots are t angl ed. Dr ag logs into a
clear area before cutting them by pulling
out exposed and cl ear ed logs fi r st.
BUCKING TECHNIQUES
WARNING: If saw becomes
pinched orhung ina log, don’ttryto f or ceit
out .Youcan lose c ontr olof t h e sawresult-
ing in injury and/or damage to the saw .
St op the saw, dr ive a wedge of plasti c or
wood into the cut unti l t he saw can be re-
movedeasily.Restartthesawandcare-
full y reent er the cut . Do not use a metal
wedge. Do not att empt t o restar t your saw
when i t is pinched or hung i n a log.
Use a wedge to remove pinched saw
Turn saw OFF and use a plastic or
wooden wedge to force cut open.
Overcutting begins on the top side of t he
log wi t h the bott om of the saw against t he
log. When overcutti ng use lightdownward
pressure.
Overcutting Undercutting
Undercutt i ng involves cutting on the un-
derside of t he log with top of saw against
the log . W he n under c utt ing use light up-
ward pr essure. Hold saw fi r ml y and main-
tain contro l . The saw w ill te nd to push
back towar d you.
WARNING: Neverturn sawups ide
down to und ercut. The saw cannot be
controlled in this position.
Alwa ys make your fi r st cut on t he c om-
pressions side of t he l og. The compres-
sion side of the log is where the pressure
of the log’s weight is concentrat ed.
First cut on compression side of log
Second cut
First cut on compression side of log
Second cut
BUCKING WITHOUT A SUPPORT
S Over cu t through
1/3 of the d iameter of
the log.
S Roll the log over and finish with a sec-
ond overcut .


