8
BEFORE STARTING SAW
WARNING: Be sure to read the
electrical safety information in the safety
rules section of this manual before you
begin. If you do not understand the elec-
tricalsafety information donot attemptto
use your unit. Seek help from s omeone
that doe s understand the information or
call the customer assistance help line at
1-800-554-6723.
GUIDE BAR AND CHAIN OIL
The bar and chain require lubr i cat i on. The
chain o i ler provides lubrica tion to the
chainandguidebar.Besuretofillthebar
oil tank bef ore each cutt ing session. Lack
of o il will qu ickly ruin the ba r and chain .
Too little oil will cause overheating shown
by smoke coming f rom the chain a nd/ or
discolorat i on of the bar. For maximum
guide bar and chain li f e, we recommend
you use Poulan or Poulan PRO chain
saw bar oil. If Poulan or Poulan PRO bar
oil is not available, you may u se a good
grade SAE 30 oil until you ar e able t o ob-
tain Poulan or Poulan PRO brand. Use a
funnel t o f i ll the t ank. Replace oil cap se-
curely. C heck oi l level after every 15 mi n-
utes of operat i on.
CHAIN BRAKE
Ensure chain brake is disengaged by pull-
ing the f r ont hand guar d back toward t he
fr ont handle as far as possibl e. The chain
brake m ust be disengaged befor e cutt ing
with the saw.
STOPPING YOUR SAW
S Release the trigger switch.
S If motor does not stop, disconnect the
extension cord. Discontinue use of
the unitun til ithas been repaired by an
authorized service dealer.
STARTING YOUR SAW
1. Connect the saw to a power source
using the propersize extension cord
;
see SELECT AN EXTENSION CORD).
2. Grip both handles firmly.
3. Push and hold the trigger lock--out
button with yo ur right hand thumb.
4. Squeeze and hold the trigger switch.
CHAIN BRAKE
WARNING: If the brake band is
wor n too thi n i t may break when the chain
brake is triggered. With a broken brake
band, the chain brake will not stop the
chain. The chain br ake must be repl aced
if any part is worn to l ess than 0. 020″ (0.5
mm) thi ck. Repai r s on a chain brake
should be made by your au thori zed ser-
vice deal er. Take your unit to the place of
purchase or to the nearest authori zed ser-
vice d ealer.
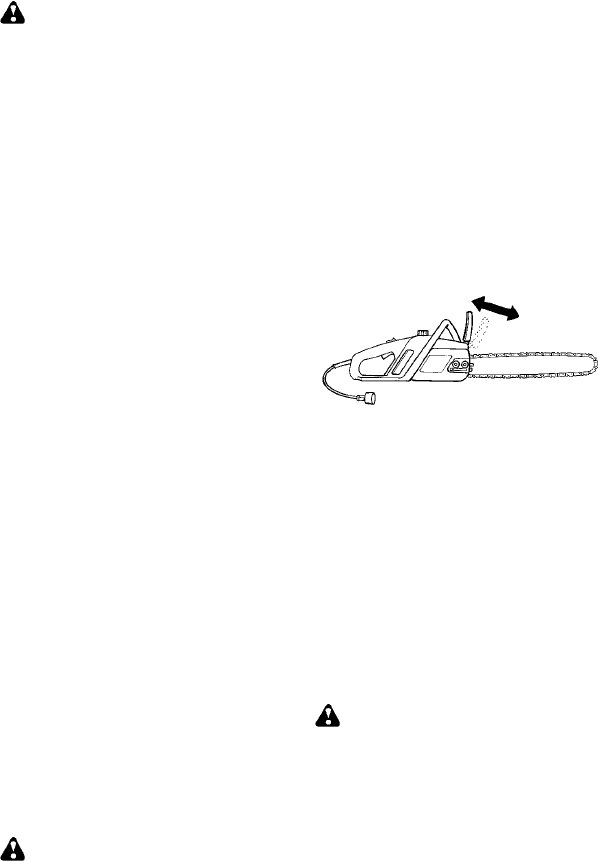
S This saw is equipped w i t h a chain
brake. The brake is designed to stop the
chain if k i ckb ac k occurs.
S The iner t i a--activated c hain brake is ac-
ti va ted if the front hand guard is pushed
forwar d, either manually (by hand) or
automati call y (by sudden movement).
S If the brake is alr eady activated, it is dis-
engaged by pulling the front hand guard
back t oward the f r ont handle a s far as
possib le.
S When cutting with the saw, the chain
brake must be disengaged.
Disengaged
Engaged
Braking function control
CAUTIO N: The chain brake must be
checked several times daily. The motor
must be running when performi ng thi s
pr oced ure. This is the only instance whe n
the saw s hould be placed on the ground
wit h the mot or running.
Place the saw on fi r m ground. Grip the
rear handle with your right hand and the
front hand le with y our left hand.
Squeeze trigger switch and allow motor
to reach full speed. Activate the chain
brake by turni ng your left wr ist against the
hand guard without releasing your grip
around the front handle. The chain should
stop immedi at ely.
Iner t i a act i vating f unct i on contr ol
WARNING: When performing the
following procedure, the motor must not
be running and the saw must be un-
plugged from the p ower source.
Grip the rear handle with your right hand
and the front handle with your left hand.
Hold the chain saw approximatel y 14″ (35
cm) above a s t ump or other wooden sur-
face. Rel ease your gri p on the front han-
dle and use the weight of the saw to let t he
ti p of t he guide bar fall f orwar d and contact
the stump. When the tip of the bar hits the
stu mp , the b rake shoul d a ctivate.


