18
Using the [BROWSE] button
Rearranging tracks (Sort menu)
When in the library browse mode, the tracks can be rearranged using the Sort
menu. (The Sort menu is not displayed when in the folder browse mode.)
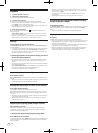
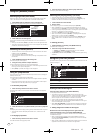
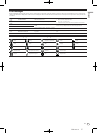
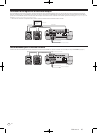
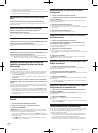
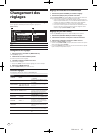
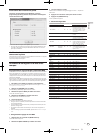
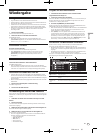
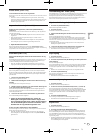
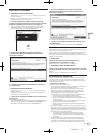
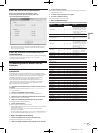
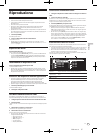
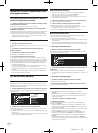
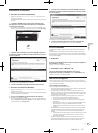
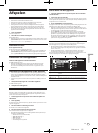
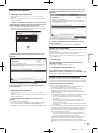
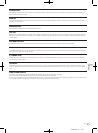
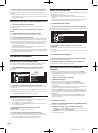
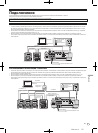
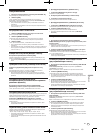
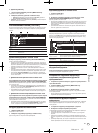
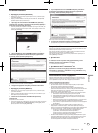
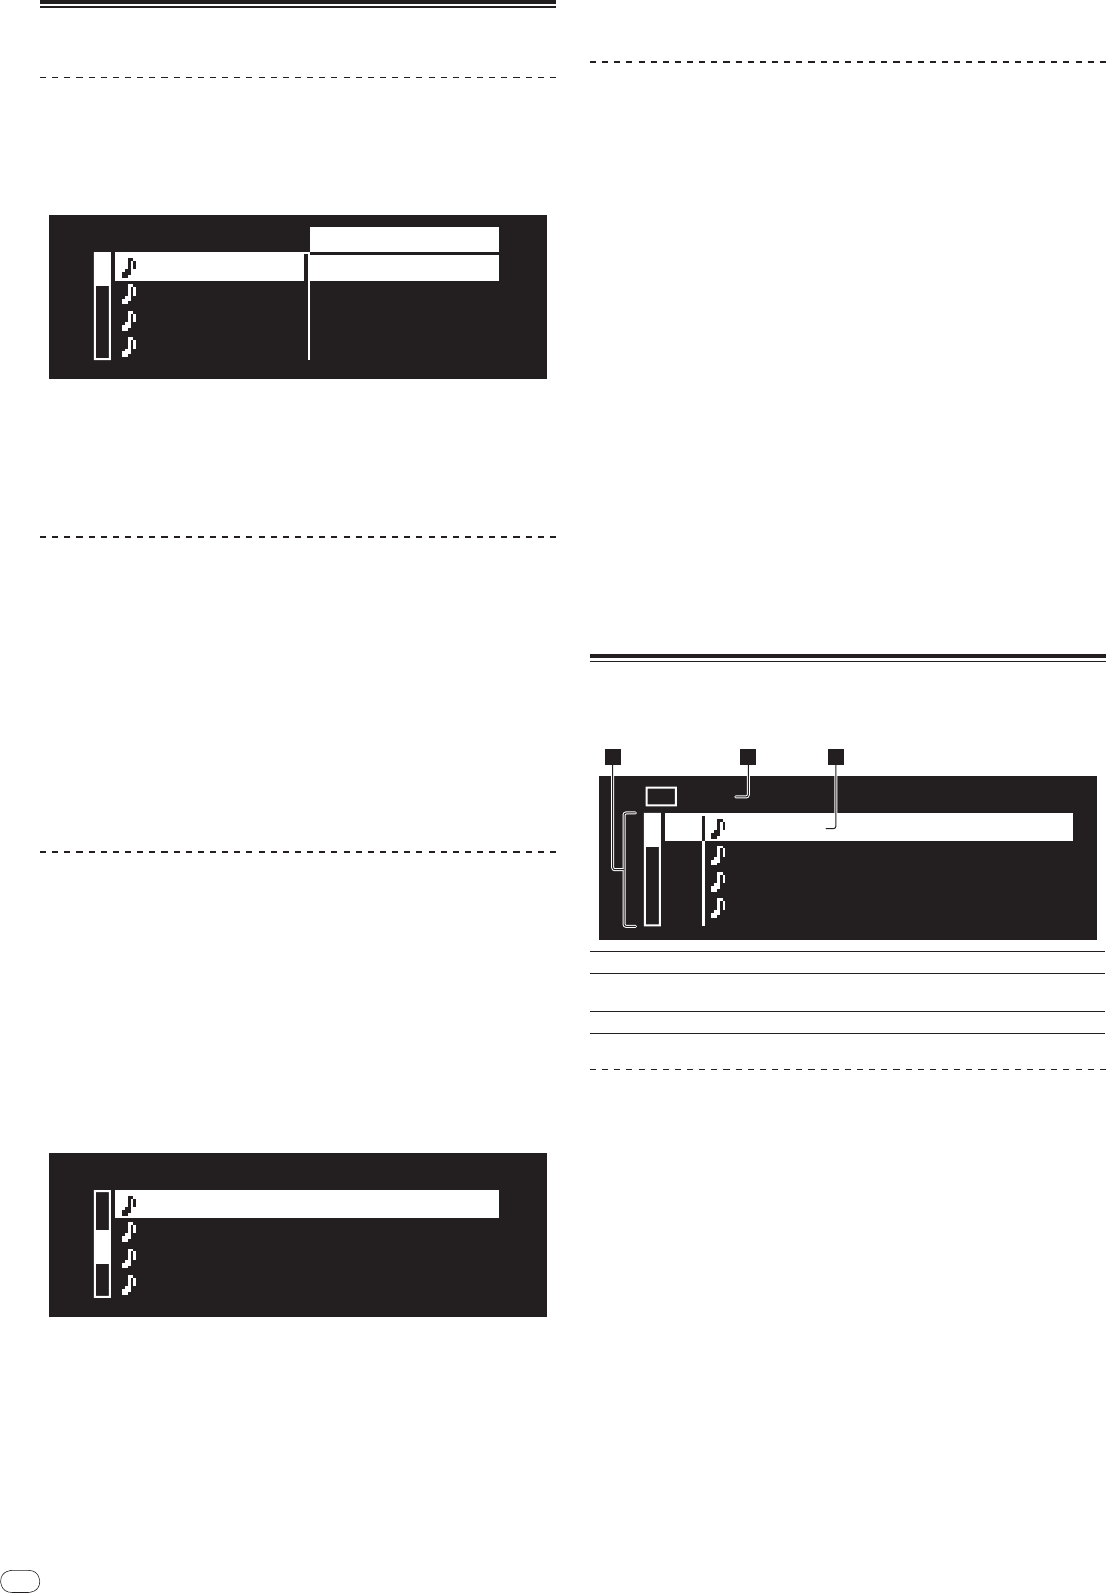
1 Press [MENU/UTILITY] while the tracks are displayed.
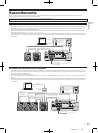
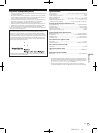
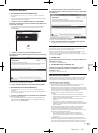
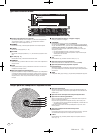
The Sort menu is displayed to the right of the information display screen.
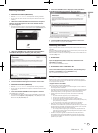
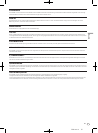
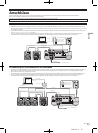
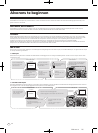
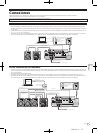
Title 01
Title 02
Title 03
Title 04
ARTIST
ALBUM
BPM
RATING
TRACK
SORT
2 Select and enter the setting item.
The tracks are sorted according to the selected item. The track information is
displayed.
! Sorting is canceled when [BACK] is pressed to return to the uppermost level.
! The types of sorting items on the Sort menu can be changed in the rekordbox
preferences (environmental settings).
Searching for tracks (SEARCH)
! The search function can be used to search for tracks recorded on the media
loaded in the set with [SEARCH].
! Tracks recorded on discs cannot be searched.
! Tracks recorded on media for which library browsing is not possible cannot
be searched.
1 Select [SEARCH] and enter the setting item.
The character input screen appears.
2 Using the rotary selector to input characters.
Tracks including the character you have input are displayed.
! When more characters are input at this point, tracks starting with the charac-
ter string you have input are displayed.
! When [BACK] is pressed, the category screen reappears.
Using the jump function
The jump function can be used to instantaneously move to the track, category or
folder you want to play.
The jump function includes the two modes below.
! Letter jumping: Use this when the tracks are arranged or sorted in alphabeti-
cal order.
! Page jumping: Use this when the tracks are not arranged or sorted in alpha-
betical order. Turn the rotary selector to jump by page.
In the letter jump mode
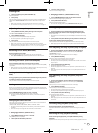
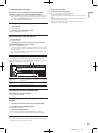
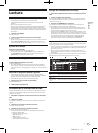
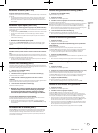
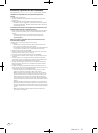
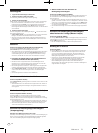
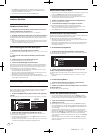
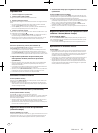
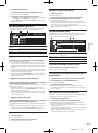
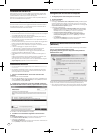
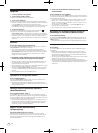
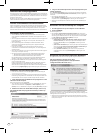
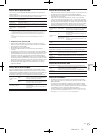
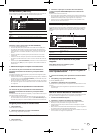
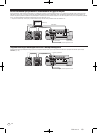
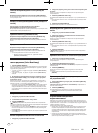
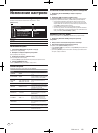
1 Press the rotary selector for at least 1 second.
The letter jump mode is set. The first letter of the selected track is displayed at
the top left.
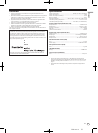
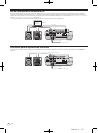
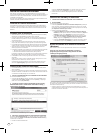
Title 01
Title 02
Title 03
Title 04
T
2 Select the character or symbol to which you want to jump and
enter.
The display moves to the category starting with the selected character or symbol.
! The characters that can be displayed are letters A – Z, numbers 0 – 9 and
symbols.
In the page jump mode
1 Press the rotary selector for at least 1 second.
The mode switches to the page jump mode.
2 Select the page to which you want to jump and enter.
The display moves to the selected page.
Checking the playing history (HISTORY)
! The track playing history is recorded and displayed at [HISTORY].
! Playlists can be created based on the playing history at [HISTORY] using
rekordbox. For details, see rekordbox’s operating instructions.
1 Load a USB device in the CDJ-900.
2 Playing tracks.
The currently playing track is recorded and displayed at [HISTORY].
! When a USB device, etc., is connected to the CDJ-900 for the first time or
reconnected, the new [HISTORY] is automatically created on the USB device.
! A warning message is displayed if there is not enough free space on the USB
device, etc., or if the device is write-protected.
! The name of [HISTORY] can be preset at [UTILITY] (page 20).
! When a track already recorded in [HISTORY] is played again after playing a
different track, it is newly recorded in [HISTORY].
! The maximum number of tracks that can be recorded in [HISTORY] is 999.
When a 1 000th track is recorded, the oldest item in the playing history is
deleted.
Deleting [HISTORY]
1 While [HISTORY] is selected, press [MENU/UTILITY].
The delete menu is displayed.
2 Select the range to be deleted and enter.
! [DELETE]: The [HISTORY] item selected with the cursor is deleted.
! [ALL DELETE]: The entire [HISTORY] is deleted.
! The [HISTORY] is deleted when [HISTORY] is converted into a playlist using
rekordbox.
Using the [TAG LIST] button
Up to 60 tracks to be played next or tracks selected for specific DJ scenes can be
preset in the tag list.
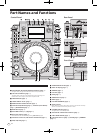
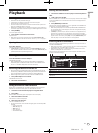
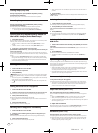
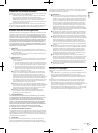
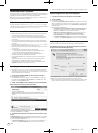
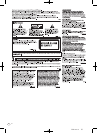
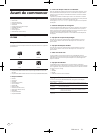
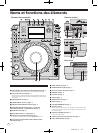
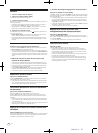
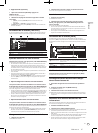
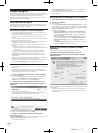
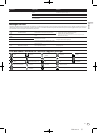
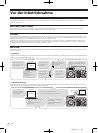
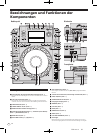
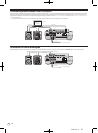
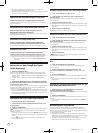
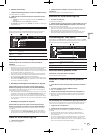
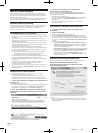
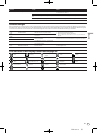
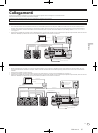
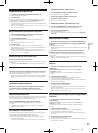
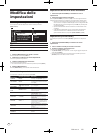
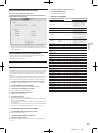
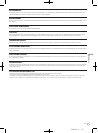
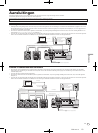
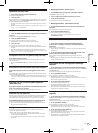
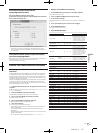
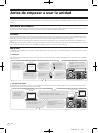
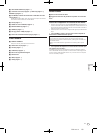
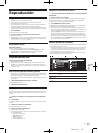
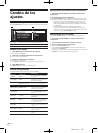
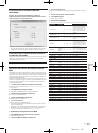
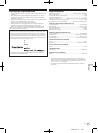
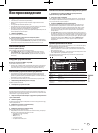
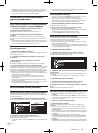
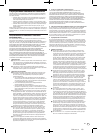
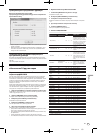
USB
1
Total Track 13
Title 01
Title 02
Title 03
Title 04
01
02
03
04
2 31
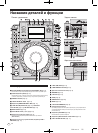
1List of contents
The contents of the tag list are displayed here.
2Medium name
The name of the medium on which the track is recorded is displayed
here.
3Cursor
Turn the rotary selector to move the cursor up and down.
Adding tracks to the tag list
Select the track, then press [TAG TRACK/
REMOVE].
1 is displayed to the left of the track.
! The number of tracks that can be added to the tag list is 60 tracks per
medium. If you attempt to add a 61st track, a warning message is displayed
and the track cannot be added. (There is no limit to the number of tracks
when a computer on which rekordbox is installed is connected.)
! Tracks can be recorded in the tag list ahead of time using rekordbox.
! When multiple DJ players are connected by PRO DJ LINK, the same tag list
contents are displayed on all DJ players.
! When [TAG TRACK/
REMOVE] is pressed while the information is displayed
after pressing [INFO], the tracks loaded in this unit are added to the tag list.
Adding categories or folders to the tag list
With the list of the tracks displayed on the right side of the
information display screen, press [TAG TRACK/
REMOVE].
The category name/
folder name flashes, and the tracks in that category/
folder
are added to the tag list.
! When a category/
folder including tracks already added to the tag list is
selected and [TAG TRACK/
REMOVE] is pressed, only the tracks not already
on the tag list are added.
! When a folder is added while in the folder browse mode, the track names are
registered as file names. The artist names are not registered.