DRB1484-A
En
17
English
1716
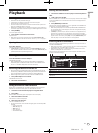
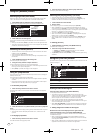
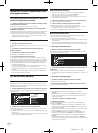
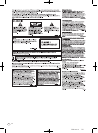
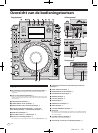
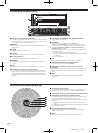
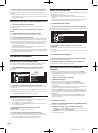
Scratch play [VINYL]
When the jog mode is set to the VINYL mode, tracks can be played according to
the direction and speed at which the jog dial is spun by spinning the top of the
jog dial while pressing it.
1 Press [JOG MODE VINYL].
Set the jog mode to VINYL.
2 During playback, press the top of the jog dial.
Playback slows then stops.
3 Spin the jog dial in the desired direction and at the desired
speed.
The sound is played according to the direction and speed at which the jog dial is
spun by spinning the top of the jog dial while pressing it.
4 Release your hand from the top of the jog dial.
Normal playback resumes.
Adjusting the speed at which playback slows then stops
when the top of the jog dial is pressed and the speed at
which playback returns to normal when the top of the
jog dial is released.
Turn [VINYL SPEED ADJUST TOUCH/BRAKE].
The speed increases when turned clockwise, decreases when turned
counterclockwise.
! When the jog mode set to the VINYL mode, the speed at which playback starts
and stops when [PLAY/PAUSEf] is pressed changes simultaneously.
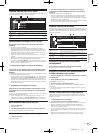
Using the [SLIP] button
When [SLIP] is set to on, normal playback with the original rhythm continues in
the background during scratch play, loop play and reverse play. When scratch
play, loop play or reverse play is canceled, normal playback resumes from the
position playing in the background at that time.
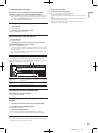
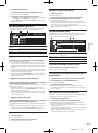
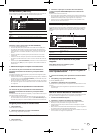
Slip scratch play [VINYL]
1 Press [JOG MODE VINYL].
Set the jog mode to VINYL.
2 Press [SLIP].
The mode switches to the slip mode.
3 During playback, press the top of the jog dial.
The scratch play mode is set.
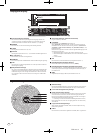
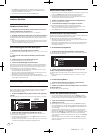
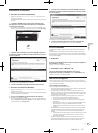
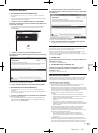
Normal playback continues in the background during scratch play. The SLIP
indicator flashes in beat with the sound playing in the background. The position
playing in the background is shown on the jog dial’s SLIP play display.
! The slip loop and slip reverse operations cannot be performed during slip
scratch play.
4 Release your hand from the top of the jog dial.
Normal playback of the sound that was playing in the background resumes.
! To cancel the slip mode, press [SLIP] again.
Slip looping
1 Press [SLIP].
The mode switches to the slip mode.
2 Press [LOOP IN/
CUE (IN ADJUST)], then press [LOOP OUT
(OUT ADJUST)].
Loop playback starts.
Normal playback continues in the background during looping. The SLIP indicator
flashes in beat with the sound playing in the background. The position playing in
the background is shown on the jog dial’s SLIP play display.
! Loops of over 8 seconds cannot be set.
3 Press [RELOOP/EXIT].
Looping is canceled, and normal playback of the sound that was playing in the
background resumes.
! To cancel the slip mode, press [SLIP] again.
Auto beat slip looping
1 Press [SLIP].
The mode switches to the slip mode.
2 Press one of the [AUTO BEAT LOOP] buttons (1, 2, 4 or 8).
The loop is set automatically and loop playback begins.
Normal playback continues in the background during looping. The SLIP indicator
flashes in beat with the sound playing in the background. The position playing in
the background is shown on the jog dial’s SLIP play display.
3 Press [RELOOP/EXIT].
Normal playback of the sound that was playing in the background resumes.
! To cancel the slip mode, press [SLIP] again.
Slip reverse
1 Press [SLIP].
The mode switches to the slip mode.
2 During playback, press [REV].
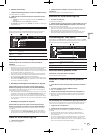
The REV indicator lights and the track plays in the reverse direction.
Normal playback continues in the background during reverse playback. The SLIP
indicator flashes in beat with the sound playing in the background. The position
playing in the background is shown on the jog dial’s SLIP play display.
! Slip reverse play is automatically canceled after 8 beats have elapsed from
the position at which [REV] was pressed. Normal playback of the sound that
was playing in the background resumes.
! If [REV] is pressed again before 8 beats have elapsed, slip reverse play is can-
celed and normal playback of the sound that was playing in the background
resumes.
! To cancel the slip mode, press [SLIP] again.
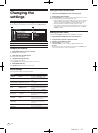
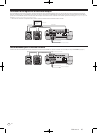
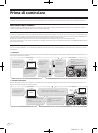
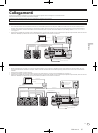
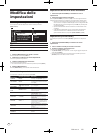
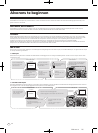
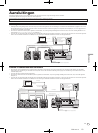
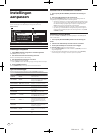
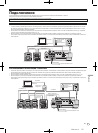
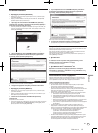
Operating the CDJ-900 in combination
with other devices
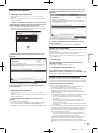
Starting playback using a DJ mixer’s fader
(Fader Start)
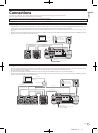
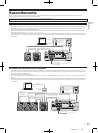
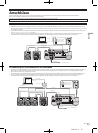
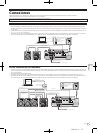
1 Connect the CDJ-900 with a Pioneer DJ mixer using the
included control cord.
For instructions on connecting, see Basic style on page 11.
2 Move the DJ mixer’s channel fader or cross fader.
The DJ player’s pause mode is canceled and the track is played instantaneously.
Also refer to the operating instructions of the connected DJ mixer.
! When the channel fader or cross fader is set back to its original position, play-
back cues back to the set cue point and the pause mode is set (Back Cue).
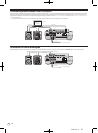
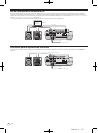
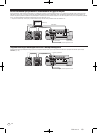
Relay play on two DJ players
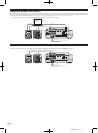
1 Connect the CDJ-900 and a DJ mixer.
For instructions on connecting, see Connections for relay play on page 12.
2 Set the DJ mixer’s cross fader to the center position.
3 Turn auto cue on for both DJ players.
The DJ players’ auto cue indicators light.
4 Start playback on this unit.
The first track on this unit is played, and once it finished playback begins auto-
matically on the other DJ player. This unit cues to the beginning of the next track
and pauses. This operation is repeated for relay play between the two DJ players.
! The medium can be changed and the cue point set on the DJ player that is in
standby.
! If the power of one DJ player is turned off during playback, playback may
start on the other DJ player.
! The fader start function does not work during relay play.
! Relay play may not be possible if the two DJ players are not connected to the
same DJ mixer.