


22
MAINTENANCE
WARNING: Always turn unit off, remove ignition key,
and disconnect the spark plug wire before making any
repairs or adjustments.
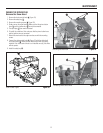
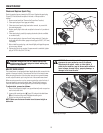
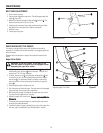
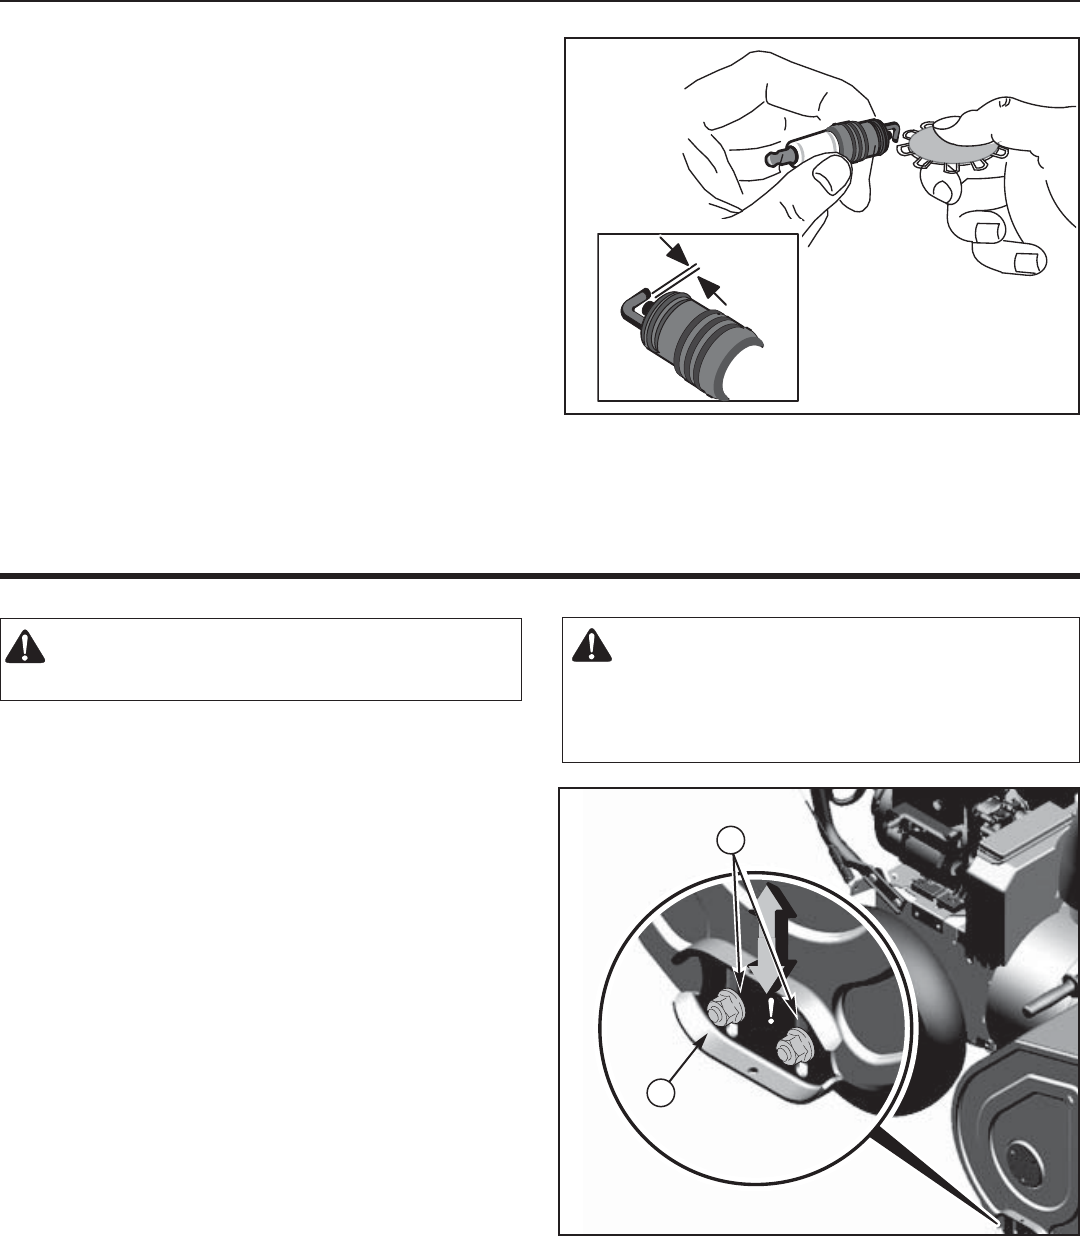
ADJUST SKID HEIGHT
This snow thrower is equipped with two height adjust skids, secured to the
outside of the auger housing. These elevate the front of the snow thrower.
When removing snow from a hard surface area such as a paved driveway
or walk, adjust the skids up to bring the front of the snow thrower down.
When removing snow from rock or uneven construction, raise the front of
the snow thrower by moving the skids down. This will help to prevent
rocks and other debris from being picked up and thrown by the augers.
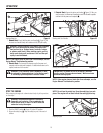
To adjust skids, proceed as follows:
1. Place a block (equal to height from ground desired) under scraper bar
near but not under skid.
2. Loosen skid mounting nuts (A
A
, Figure 23) and push the skid down
(B
B
) until it touches the ground. Retighten mounting nuts.
3. Set skid on other side at same height.
NOTE: Make sure that snow thrower is set at same height on
both sides.
Adjusting Skid Height Figure 23
A
B
WARNING: Be certain to maintain proper ground
clearance for your particular area to be cleared.
Objects such as gravel, rocks, or other debris, if
struck by the impeller, may be thrown with sufficient
force to cause personal injury, property damage, or
damage to the snow thrower.
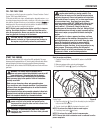
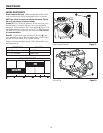
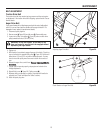
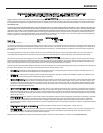
Check and Replace Spark Plug
Check the spark plug every twenty-five (25) hours. Replace the spark plug
(Figure 22) if the electrodes are pitted or burned or if the porcelain is
cracked.
1. Remove snow hood (see “Remove the Snow Hood” section).
2. Clean spark plug and reset gap periodically.
3. Clean area around spark plug base before removal, to prevent dirt
from entering engine.
4. Replace spark plug if electrodes are pitted or burned or if porcelain is
cracked.
5. Clean spark plug by carefully scraping electrodes (do not sandblast
or use wire brush).
6. Be sure spark plug is clean and free of foreign material. Check elec-
trodes gap with a wire feeler gauge and reset gap to 0.030" (0.76 mm)
if necessary.
7. Before installing spark plug, coat threads lightly with graphite grease
to insure easy removal.
8. Tighten plug firmly into engine. If torque wrench is available, tighten
plug to 18-23 ft-lbs (24.4-31.2 Nm).
.030 in.
(.76 mm)
Replacing Spark Plug Figure 22