


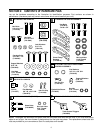
9
IMPORTANT:
It is NOT recommended that this snow
thrower be operated on a gravel surface, as loose
stones can be easily picked up and thrown by the
machine. If you must operate on a gravel surface,
ALWAYS adjust the skid shoes into the HIGH position
to allow the shave plate maximum clearance.
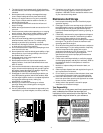
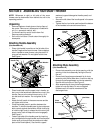
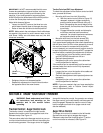
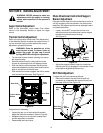
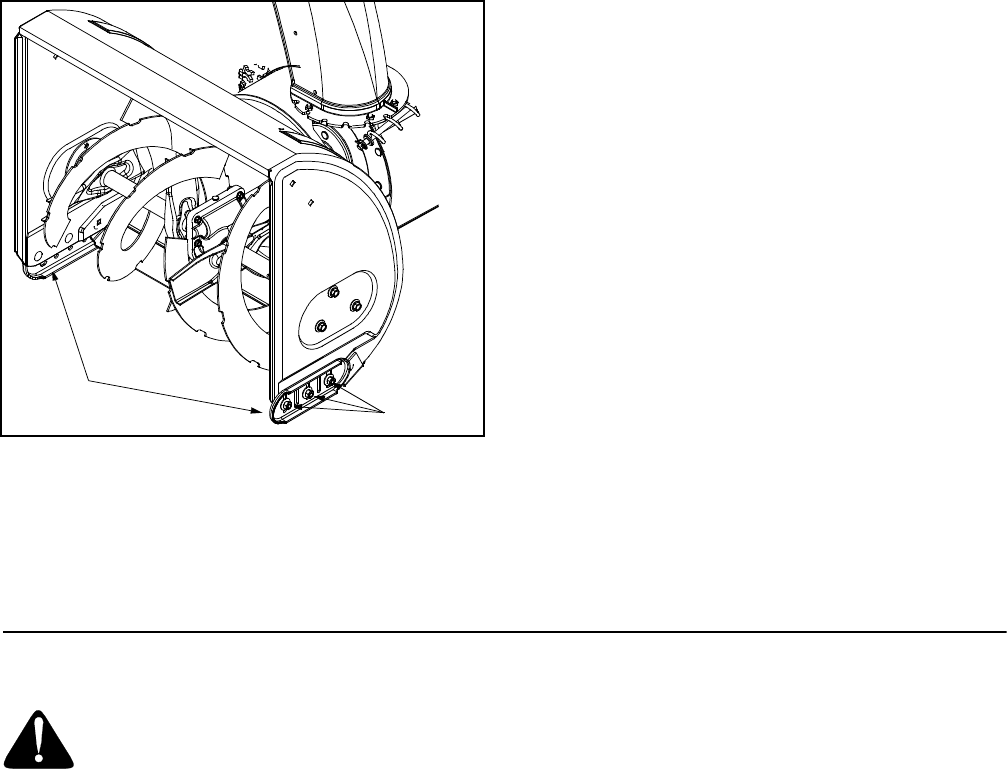
Adjust skid shoes as follows:
• Loosen, but do NOT remove, the three hex nuts
which fasten the skid shoe to the auger housing.
• Raise or lower the skid shoe to desired position.
NOTE: Make certain the entire base of both skid shoes
are against the ground to avoid uneven wear on the
skid shoes. When one side does wear out, the skid
shoes are reversible.
Figure 11
• Retighten the hex nuts loosened earlier.
• Repeat this adjustment on the skid shoe found on
the opposite side of the snow thrower.
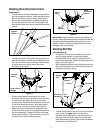
Traction Control and Shift Lever Adjustment
To check the adjustment of the traction control and shift
lever, proceed as follows:
• Move the shift lever into sixth (6) position.
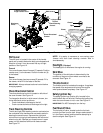
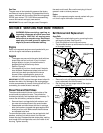
a. With the traction control (refer to Figure 12)
released, squeeze in triggers and gently
push the snow thrower forward, then pull it
back. Disregarding the overall weight of the
snow thrower, the machine should otherwise
move freely.
b. Engage the traction control and attempt to
move them machine both forward and
rearward. You should experience resistance
as the tracks should not be turning.
• Move the shift lever into the fast reverse (R2)
position and repeat the previous steps (a & b).
If you experienced resistance either when repositioning
the shift lever from 6 to R2 or when attempting to move
the machine forward or rearward with the traction
control released, your snow thrower’s traction control is
in need of adjustment and you should NOT operate the
machine before completing the adjustment as follows:
• Loosen the jam nut on the traction control cable
and UNTHREAD the cable one full turn.
• Recheck the adjustment.
• Retighten the jam nut to secure the cable when
correct adjustment is reached.
If the machine can be moved freely both forward and
rearward when the traction control fully depressed,
proceed as follows:
• Loosen the jam nut on the traction drive cable and
THREAD the cable in one full turn.
• Recheck the adjustment and repeat adjustment as
necessary.
• Retighten the jam nut to secure the cable when
correct adjustment is reached.
NOTE: If you are uncertain that you have reached the
correct adjustment, refer to Traction Control Adjust-
ment in Adjustment Section.
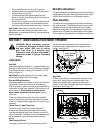
SECTION 4: KNOW YOUR SNOW THROWER
WARNING: Read, understand, and follow
all instructions and warnings on the
machine and in this manual before
operating.
Traction Control / Auger Control Lock
The traction control is located on the right handle.
Squeeze the traction control to engage the track drive.
Release to stop. See Figure 12.
This same lever also locks the auger control so you can
turn the chute directional control without interrupting the
snow throwing process. If the auger control is engaged
along with the traction control, the operator can release
the auger control (on the left handle) and the augers will
remain engaged. Release the traction control to stop
both the augers and track drive (auger control must
also be released).
Auger Drive Control
The auger drive control is located on the left handle.
Squeeze the control grip to engage the augers.
Release to stop the snow throwing action. (Traction
control must also be released.) See Figure 12.
Skid
Hex Nuts
Shoes