


6
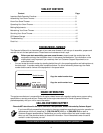
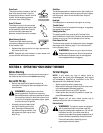
Figure 3
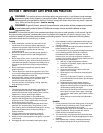
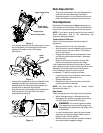
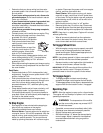
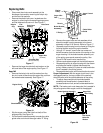
• If not already attached, slip the cables that run from
the handle panel to the discharge chute into the
cable guide located on top of the engine.
See Figure 4.
Figure 4
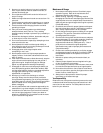
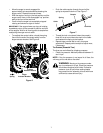
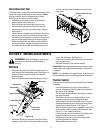
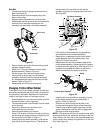
• Unwrap the headlight wire which is attached to the
headlight, beneath the handle panel. Wind the
headlight wire around the lower right handle until
excess slack is removed. See Figure 5.
• Plug the wire from the headlight into the alternator
lead coming from the right side of the engine
underneath the fuel tank.
Figure 5
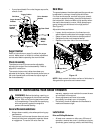
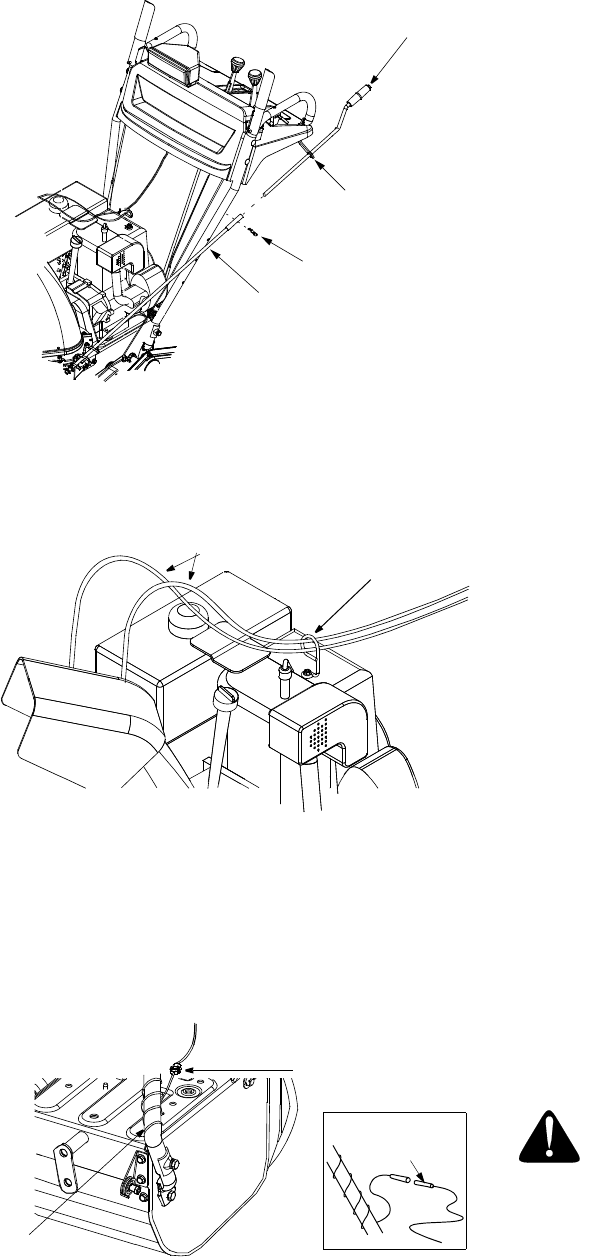
Chute Clean-Out Tool
• This tool and the electric cord are fastened with a
cable tie to the rear ofthe auger housing for
shipping purposes. Cut the cable tie and remove
electric cord before operating the snow thrower.
Final Adjustments
Make these final adjustments before operating your
snow thrower for the first time. Failure to follow these
instructions may cause damage to the snow thrower.
NOTE: If you have a question about the terms used in
these instructions, refer to the descriptions and
illustration starting on page 8.
Traction Control & Shift Lever
Perform the following test to determine need for
adjustment:
• Move the shift lever into sixth (6) position.
• With the traction control released, push the snow
thrower forward, then pull it back. The machine
should move freely.
• Engage the traction control and attempt to move
the machine both forward and back, resistance
should be felt.
• Move the shift lever into the fast reverse (R2)
position and repeat the previous two steps.
If you experienced resistance rolling the unit, either
when repositioning the shift lever from 6 to R2 or when
attempting to move the machine with the traction
control released, adjust the traction control
immediately. To adjust, proceed as follows:
• Loosen the jam nut on the traction control cable
and unthread the cable one full turn.
• Recheck adjustment.
• Retighten the jam nut to secure the cable when
correct adjustment is reached.
NOTE: For more details, refer to Traction Control
Adjustment on page 11.
Auger Control
Check the adjustment of the auger control as follows:
• When the auger control is released and in the
disengaged “up” position, the cable should have
very little slack, but should NOT be tight.
• In a well-ventilated area, start the snow thrower
engine as instructed on page 9. Make sure the
throttle is set in the fast position.
• While standing in the operator’s position (behind
the snow thrower) engage the auger.
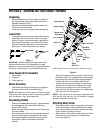
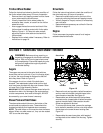
Upper Chute Crank
Lower Chute Crank
Hairpin Clip
Upper Chute
Crank Bracket
Cable
Discharge
Chute
Guide
Cable
Alternator Lead
Lamp Wire
Alternator
Lead
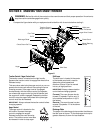
NOTE:
Wheels are omitted from illustration for clarity.
WARNING: Do not over-tighten the cable.
Over-tightening may prevent the auger from
disengaging and compromise the safety of the
snow thrower.