14
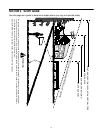
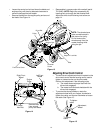
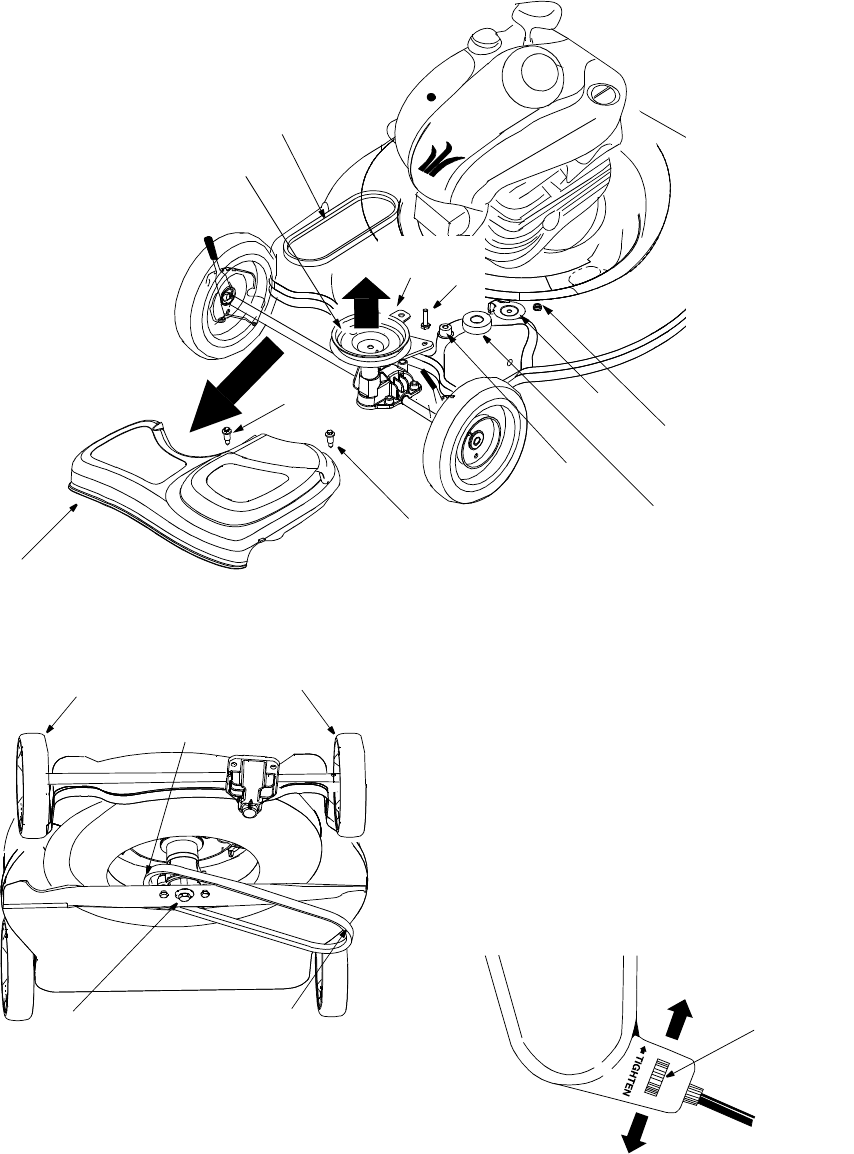
• Loosen the center hex bolt and lower the blade and
engine pulley until there is adequate clearance to
move the belt past the belt keeper.
• Remove the belt from the engine pulley and around
the blade. See Figure 14.
• Reassemble in reverse order with new belt (part #
754-0465). NOTE: Begin idler reassembly by
inserting bolt up through the idler bracket hole.
Adjust the drive clutch following instructions on
page 14.
Figure 13
Figure 14
Adjusting Drive Clutch Control
• The drive clutch adjustment wheel is located on the
drive clutch control handle housing and is used to
tighten or loosen tension on the drive cable.
Perform this adjustment if the following exists.
a. The mower does not propel itself with the
drive clutch engaged.
b. The mower’s drive wheels hesitate with the
drive clutch engaged.
• To resolve the above problems, rotate the
adjustment wheel with your fingers: clockwise to
tighten the cable, and counter-clockwise to loosen
the cable. See Figure 15 .
Figure 15
Lock Nut
Belt
Keeper
Idler
Bolt
Idler
Bracket
Drive Belt
Pulley
Front Drive Cover
Shoulder
Shoulder
Screw
Screw
NOTE: The wheels have
been moved forward in
this picture for clarity.
Do not remove the
wheels away from the
mower housing while
doing the job.
Spacer
Remove belt
Engine
Pulley
Left Front
Wheel
Right Front
Wheel
from around
pulley and blade
Center
Hex Bolt
To tighten
cable
To loosen
cable
Adjustment
Wheel


