


20
4. Press ENTER. “Calculating” displays. Then “Saturn” and a set of coordinates displays.
Satur
n’s (and other planets’) coordinates change throughout the year.
5. Press GO TO.“Saturn: Slewing...” displays and the telescope slews until it finds Saturn.You
may need to use the Arrow keys to center Saturn precisely in the eyepiece. AutoStar then
automatically sle
ws (moves) the telescope so that it "tracks" Saturn (or whatever other
object you may have chosen);
i.e., Saturn remains centered in the eyepiece. If an object is
observed in the telescope without using AutoStar's GO TO or automatic tracking capabili-
ties, objects in the eyepiece gradually drift out of the field of view due to the Earth's rota-
tion.
Using the Guided Tour
You’ve been hiking all day and night falls after you’ve set up camp. The only light is from the
stars, which seem so close that you feel you can reach out and touch them.You’ve gotten
your friends all excited about looking through your scope during the hike.
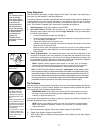
You initialize Autostar, set the home position and get aligned.You find Jupiter in the Solar
System menu and you show off Jupiter’s four moons and you talk about the detail you can
see in the bands circling the giant planet.
Next, you choose Saturn from the Solar system menu and — Autostar displays “Below hori-
z
on.” So you quickly pick out Mars from the menu. It’s also below the horizon.Your friends are
losing interest.
This is the perfect time to use Autostar’s “Guided Tour.”
Guided Tour is one of Autostar’s more fun features. For example, check out the tour called
“Tonight’s Best.” “Tonight’s Best” will take you on a tour of the best objects in the sky. Objects
that are in the sky right now—the tour changes all the time depending on the time, date and
place.
1. To find the Guided Tour menu, keep pressing MODE until “Select Item: Object” displays.
2. Press one of the Scroll keys to page through the menus. Keep pressing until “Select
Item: Guided Tour” displays.
3. Press ENTER. “Guided Tour: Tonight’s Best” displays. Press ENTER.
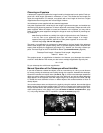
4. “Tonight’s Best: Searching...” displays. After calculating, “Tonight’s Best: Jupiter” might
displays—different objects may be displayed on a tour list on any given night.
5. Press ENTER to display information about an object. Even though you may have just
looked at Jupiter, read the information screens (use the scroll keys to page through these
screens).You may discover some
cool information you didn’t know
about Jupiter.
6.
Press MODE to retur
n to the
Tour
list of objects. Press one of the
Scroll keys to scroll through the list.
Press ENTER when you find the
next object you wish to observe;
press ENTER to select the object.
Then press GO TO to move the tel-
escope to that object. Repeat this
procedure to find other objects.
7. Press and hold down MODE for two
seconds to leave the Guided Tour
menu.
NOTE:
Keep in mind that
when viewing
through an eyepiece
in the 90°eyepiece
holder, images of
terrestrial objects
are r
ight-side-up,
but reversed left-for-
right. Normally, such
an image orienta-
tion is not bother-
some, unless trying
to read a distant
sign, for example.
If you wish to use
the telescope for
terrestrial observa-
tion, use the eye-
piece in the 45°
prism. The image in
this eyepiece will be
correctly
oriented.
TIPS
FOR BEGINNERS
Which One’s the Alignment
Star?
If AutoStar has chosen an alignment star with which
y
ou are unf
amiliar
, ho
w can you be sure if the star
in your eyepiece is really the alignment star?
The r
ule of thumb is that an alignment star is usual-
ly the br
ightest star in that area of the sky
.
When you
view an alignment star in an eyepiece, it stands out
dramatically from the rest of the stars in that portion
of the sky.
If you have an obstruction, such as a tree or a build-
ing b
loc
king y
our vie
w of the alignment star
, or if y
ou
have any doubts at all about the star that has been
chosen, no problem.Just press the Scroll Down key
and A
utoStar will find another star to align upon.