


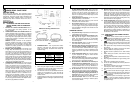
9
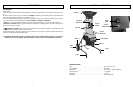
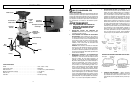
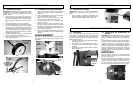
3-3. HOPPER ASSEMBLY
NOTE: Locate small bag of hardware containing five one
way security screws and washers.
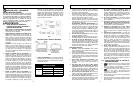
1.
Place the hopper on top of the Top Cover Assembly,
align the holes. Secure with the 5 one way safety
screws and washers. Figure 3-3A
8
3 - ASSEMBLY INSTRUCTIONS
3-3A
4 - OPERATING INSTRUCTIONS
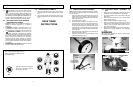
4-1. OPERATION
Read and understand the safety instructions in this user
manual before using your Chipper Shredder. Failure to
comply can result in accidents involving fire, electric shock,
or serious personal injury.
1. Connect the shredder to a suitable grounded power
outlet.
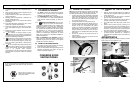
2. To start the Chipper Shredder, move the switch locat-
ed at the rear of the Motor to the ON position.
3. To stop the Chipper Shredder, move the switch to the
OFF position. (Fig . 4-1)
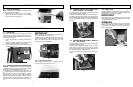
4-2. OVERLOAD PROTECTION AND MOTOR
JAMMING If overfeeding clogs the machine the overload
protection switch may cut out the motor. To restart, switch
the machine off and disconnect the po
w
er cord.
Loosen the Top Cover Assembly Knobs and remove top
co
v
er assemb
ly
, then remove any clogged debris from the
cutting chamber
.
If the top co
v
er assemb
ly becomes
jammed and will not lift off, turn the V-cutter by pushing a
piece of w
ood through the bac
k chute of the top hopper to
rotate the
V
-cutter to enab
le the top co
v
er assemb
ly to be
removed. Reset motor overload protection switch. (See Fig.
4-1)
IMPORTANT
Before replacing top cover assembly ensure that the V-cut-
ter is positioned as shown in (Fig. 4-2).
Replace the top cover assembly together with the top cover
screw knob ensuring this is tight. If the top cover screw
knob is not tight the motor will not start due to the motor
lock out switch not being activated.
4-3. A
TT
ACHING MULCH BAG
Place a heavy duty trash bag ( not included) using the
mulch bag strap (not included). (Fig. 4-3)
4-1
ON-OFF
Switch
Overload
Protection Switch
4-2
4-3
4 - OPERATING INSTRUCTIONS
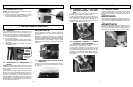
4-4. FEEDING LEAVES AND SMALL GAR-
DEN CLIPPINGS - TOP HOPPER
The sloping chute of the top hopper is designed to accept
leaves and small garden clippings.
Shredding and mulching is achieved by natural suction of
the debris through the blade chamber. Do not overfeed and
do not feed wet, soggy material into the garden shredder as
this may clog the blade chamber and the discharge chute.
(Fig. 4-4)
4-5. FEEDING TWIGS AND SMALL BRANCH-
ES - TOP HOPPER
The smaller back chute of the top Hopper accepts medium
to larger size garden clippings.
Shredding and mulching is achieved through the same
action as the front chute. If a finer type mulch is required
than is initially achieved, re-feed the mulch through again
until the desired result is obtained. (Fig. 4-5).
Do not feed solid branches through the two Top Hopper
chutes.
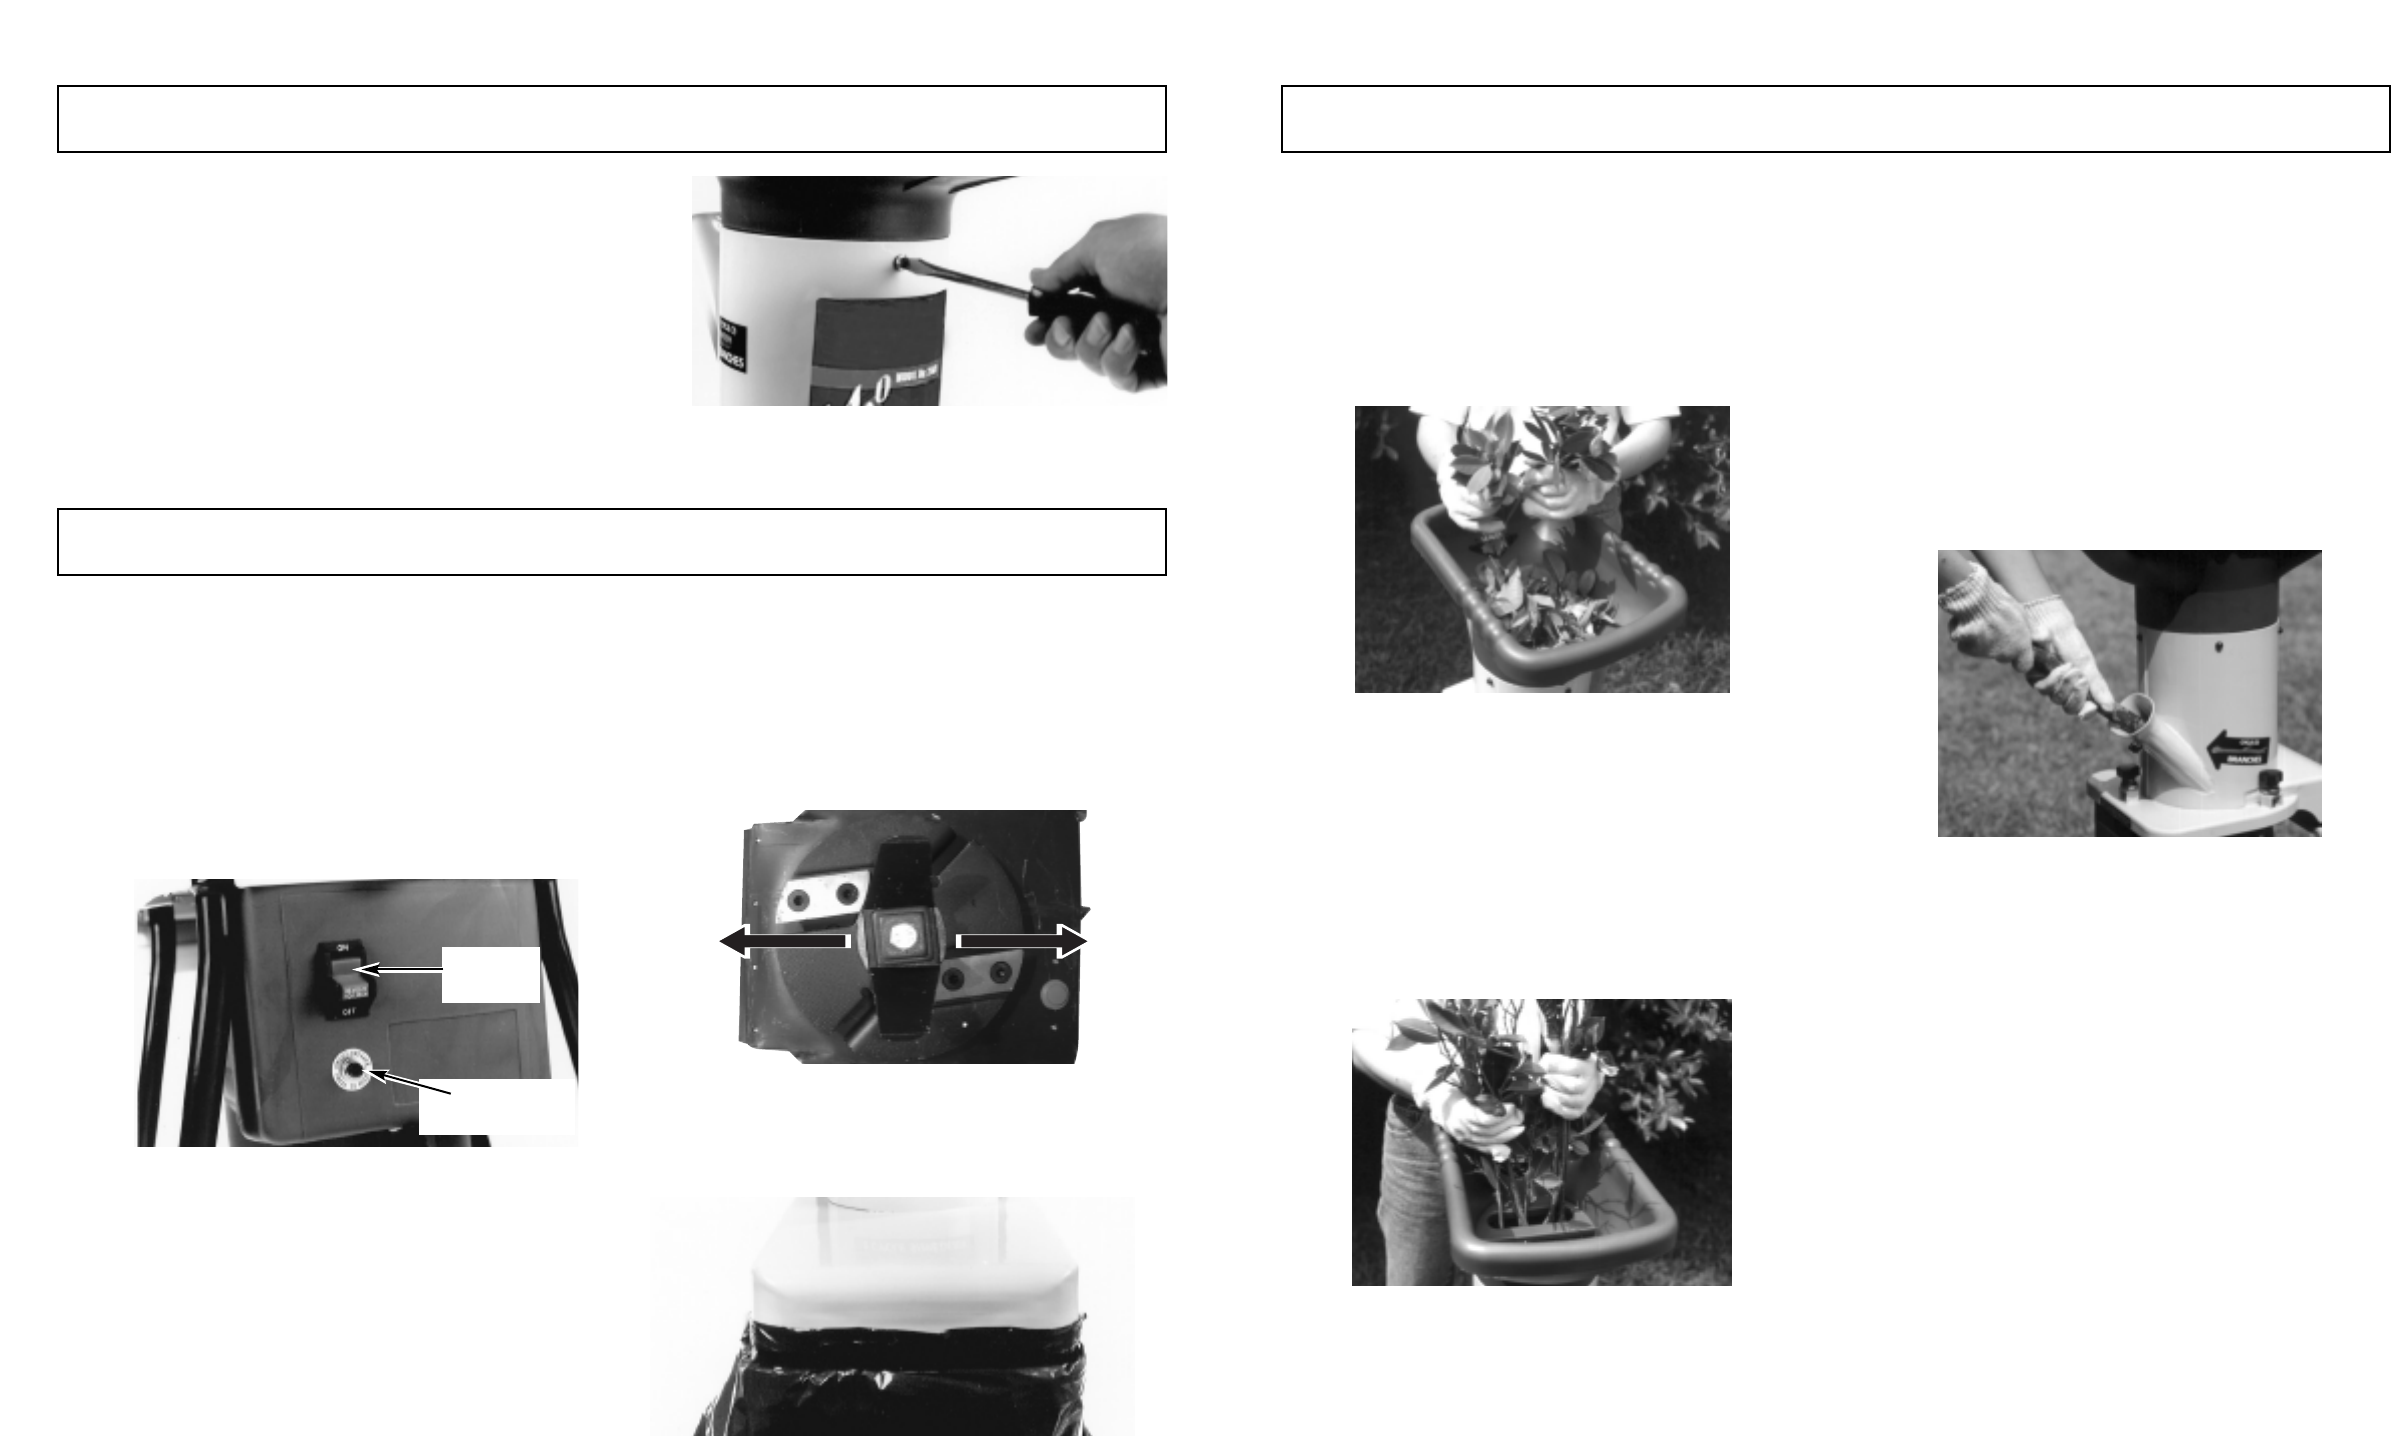
4-6. SIDE CHUTE
The elongated chute located at the rear of the machine is
specially designed to accept solid garden clippings and
branches up to 1-1/2" (38mm) in diameter.
IMPORTANT
When feeding long, large diameter material, control the
rate of feed by pulling back on the material so as not to stall
or overload the motor. (Fig. 4-6)
WARNING
Do not under any circumstances, place hands inside the
feeding chutes while the machine is operation. Force feed-
ing of debr
is is not necessary due to the natural suction
action of the shredder.
4-4
4-5
4-6