


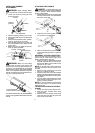
8
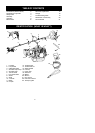
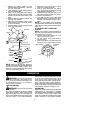
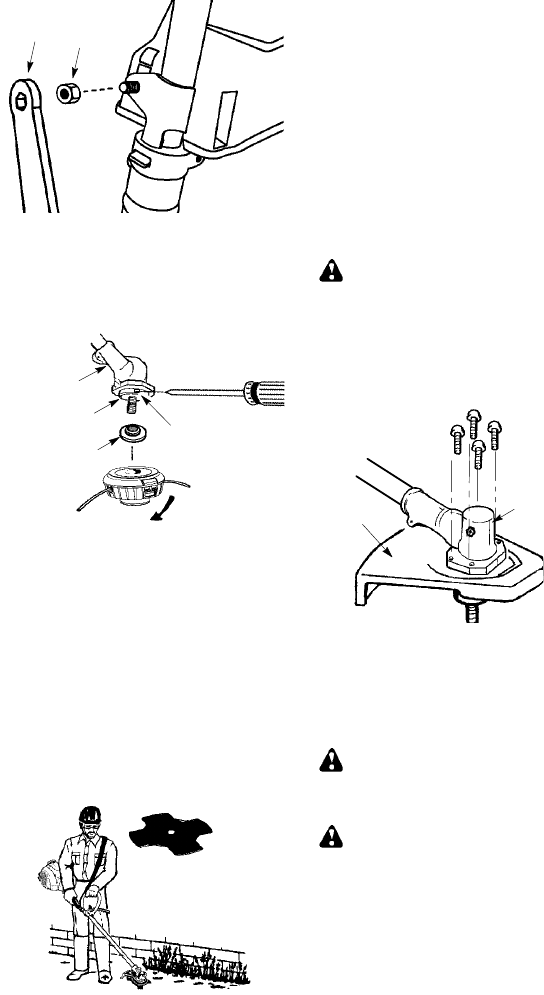
Nut
Wrench
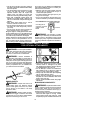
NOTE: If your unit has a plastic cover over
thethreads onthethreadedshaft,removethe
coveringtoexposethethreads.Beforeinstal-
lingthetrimmerhead,makesurethedustcup
and retaining washer are positioned on the
gearbox.
Retaining
washer
Dust cup
Gearbox
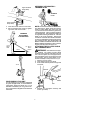
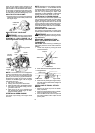
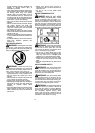
Aligned holes
NOTE: Make sure all parts ar e properly
installed as shown in the illustration before
installing the trimmer head.
5. Align holein thedust cupwiththehole i nthe
side ofthe gearboxby rotating t he dust cup.
6. Insert a small screwdriver into align ed
holes.This willkeeptheshaftfromturning
while tightening trimmer head.
7. While holding thescrewdriver inposition,
thread trimmer head onto the shaft in the
direction shown on the decal (counter-
clockwise). Tighten until secure.
NOTE: The retaining washer must be posi-
tioned wi th th e rai sed section facing toward th e
gearbox.
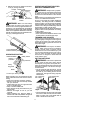
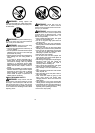
ASSEMBLY INFORMATION -- WEED
BLADE
WEED
BLADE
NOTE: Remove the t rimmer head and plastic
shield bef ore a ttaching t he metal shield a nd
installingtheweedblade.Toremove t hetrimmer
head, align hole in the dust cup with the hole in
the side of t he gearbox by rotating t he dust cup.
Insert a small screwdriver into aligned holes.
This will keep the shaft from turning while loos-
ening the trimmer head. Remove the trimmer
head by turningclockwise. Remove the screw-
driver. Toremove the plastic shield, loosen and
remove nut . P ivot shield torelease bracket from
slot. See INSTALLA TION OF THE CUTTING
HEAD a n d A TTACHING T HE PLASTIC
SHIELD for illustrations. Be sure to store all
parts and instructions for future use. Never use
the trimmer head with the metal blade installed.
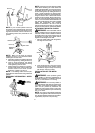
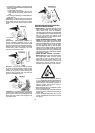
ATTACHING THE METAL SHIELD
WARNING: The metal shield must be
properly installed on the tool a nytime the tool is
used with a blade. Failure to install the shield in
the positionshowncan result inserious injury to
the operator. The length of the shield must be
aligned with the length of the shaft.
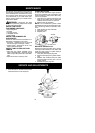
1. Place the metal shield under the gearbox,
and align the screw holes.
Shield
Gearbox
2. Insert and thread the 4 mounting screws
through the holes of the gearbox and the
metalshield. Tightenevenly andsecurely
with the hex wrench provided.
INSTALLATION OF THE METAL
BLADE
WARNING: W ear protective gloves
when handling or performing maintenance on
the b ladetoavoid injury . Theblade issharpand
can cut you even when it is not moving.
WARNING: Do not use any blades, or
fastening hardware other thanthe washers and
nuts shown in the following illustrations. These
parts must be p rovided by McCulloch and
installed as shown below. Failure to use proper
parts can cause t he blad eto flyoffandseriously
hurt you or others.
NOTE: Thedust cupand retainingwasher a re
located o nthe gearbox shaftand notin t heparts
bag. All o ther fasteners mentionedin thefollow-
ing assembly steps are in the parts bag.