


GB
13
7. Putting into operation
7.1. Setting the cutting height
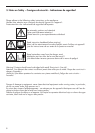
A
Warning! To prevent injury,
never set the cutting height
when the motor is running.
Set the cutting height on the
Cordless Reel Mower as follows:
1. Stand the mower on a flat,
solid surface.
2. Position yourself in front of the
cutting height scale of the
mower (fig. D).
3. Loosen both fixing nuts (fig. D
pos. 9).
4. With both hands on the
adjusting cutting height you
require (fig. E/E1):
Highest cutting height: 1.75”
Lowest cutting height: .75”
Note: Make sure that the arrows
marking the cutting height (8)
show the same cutting height on
both sides of the scale (fig. E/E1
pos. 8).
5. Re-tighten both fixing nuts
(fig. D pos. 9).
Note: When setting the Cordless
Reel Mower to a low cutting
height, ensurethat thelower blade
and cutting cylinder do not touch
the groundif theground isuneven.
7.2.Charging the Battery
For technical reasons the Battery
(fig. F pos. 20) is not charged.
Consequently, the unit needs to
be charged before initial
operation.
For this exclusively use the
Charger (fig. F pos. 21).
Plug the charger (fig. F pos. 21)
into the mains socket and then
push the plug for the charger
(fig. F pos. 22) into the charging
socket (fig. F pos. 23) of the
Battery. The charging procedure
begins.
Ensure you use the correct mains
voltage!
Charging time: approx. 24 hours
for the initial charge. Afterwards,
12 – 24 hours depending on the
state of charge.
The Battery reaches its full
capacity only after numerous
(approx. 5)
charging/discharging processes.
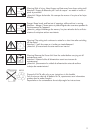
A
Do not charge the Battery
with charging equipment
other than the Charger since
only this charger has been
specifically adapted for use with
the Battery.
The use of other charging units
can lead to damage and injuries.
The use of other charging units
makes all claims for compen-
sation null and void and releases
the manufacturer from all
guarantee services.
A
Charge the Battery for 24
hours before using your
Cordless Reel Mower for the first
time.
A
The mains plug heats up
slightly during the charging
procedure.
A
Charge the Battery in a dry
place and away from direct
sunlight.
A
Never charge the Battery
anywhere near easily
inflammable materials.
7.3. Connecting the Battery
1. Open the har
ness
compar
tment (fig. G pos. 13).
Hold the Batter
y in your right
hand and use your left hand
to pull the har
ness to the left
so that the ends of the
har
ness lie flat
against the
Batter
y (fig. H).
2. Push the Battery into the
contact bar (fig. I pos. 24)
until you hear it click into
place.
3. Fold the harness into loops,
stow it away in the harness
compartment (fig. J) and close
the cover (fig. J pos. 13). This
also secures the Battery in the
contact bar.
7.4. Starting your mower
A
Warning! Before starting
your Cordless Reel Mower
check for foreign bodies in the
cutting cylinder and remove if
necessary.
Start your Cordless Reel Mower
as follows:
1. Stand your mower on a level
part of the lawn.
2. To start the motor, press and
hold down the release knob
(fig. K pos. 15) and with the
other hand, simultaneously
pull the starting handle (fig. K
pos. 16) towards the cross
bar.
3. If you release the starting
handle (fig. K pos. 16) the
motor switches off again.
A
The switches installed by the
manufacturer must not be
removed or be bridged e.g.: by
taping down the starting handle
to the guide handle. This will
prevent the mower switching off
automatically, and could cause
fatal injury.
A
Attention! Cutting cylinder
continue to run for a few
seconds after the motor is
switched off.
When working with the Cor
dless
Reel Mower the Batter
y heats
up; this is nor
mal and does not
af
fect its per
for
mance.