


8
7 5 6
1
2
3
4
2
1
10
8
9
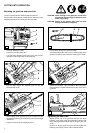
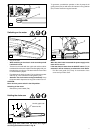
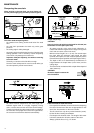
A
- Unscrew retaining nut (A/2).
- Pull off the sprocket guard (A/1).
- Turn the chain adjusting screw (A/3) to the left (counter-
clockwise) until the pin (A/4) is at the left stop.
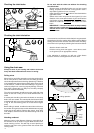
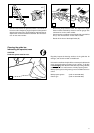
B
- Lay the chain (B/5) on the guide bar (B/6).
- The cutting edges (B/7) of the chain on the top edge of the
guide bar must face in the direction shown by the arrow.
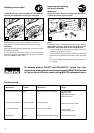
C
- Pull the chain around the sprocket (C/8) and into the
sprocket teeth (C/9).
- Position the guide bar. Take care that the pivot (A/4) of the
chain tightener is inserted into the bore (see circle) of the
guide bar.
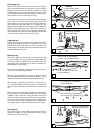
D
E
F
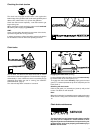
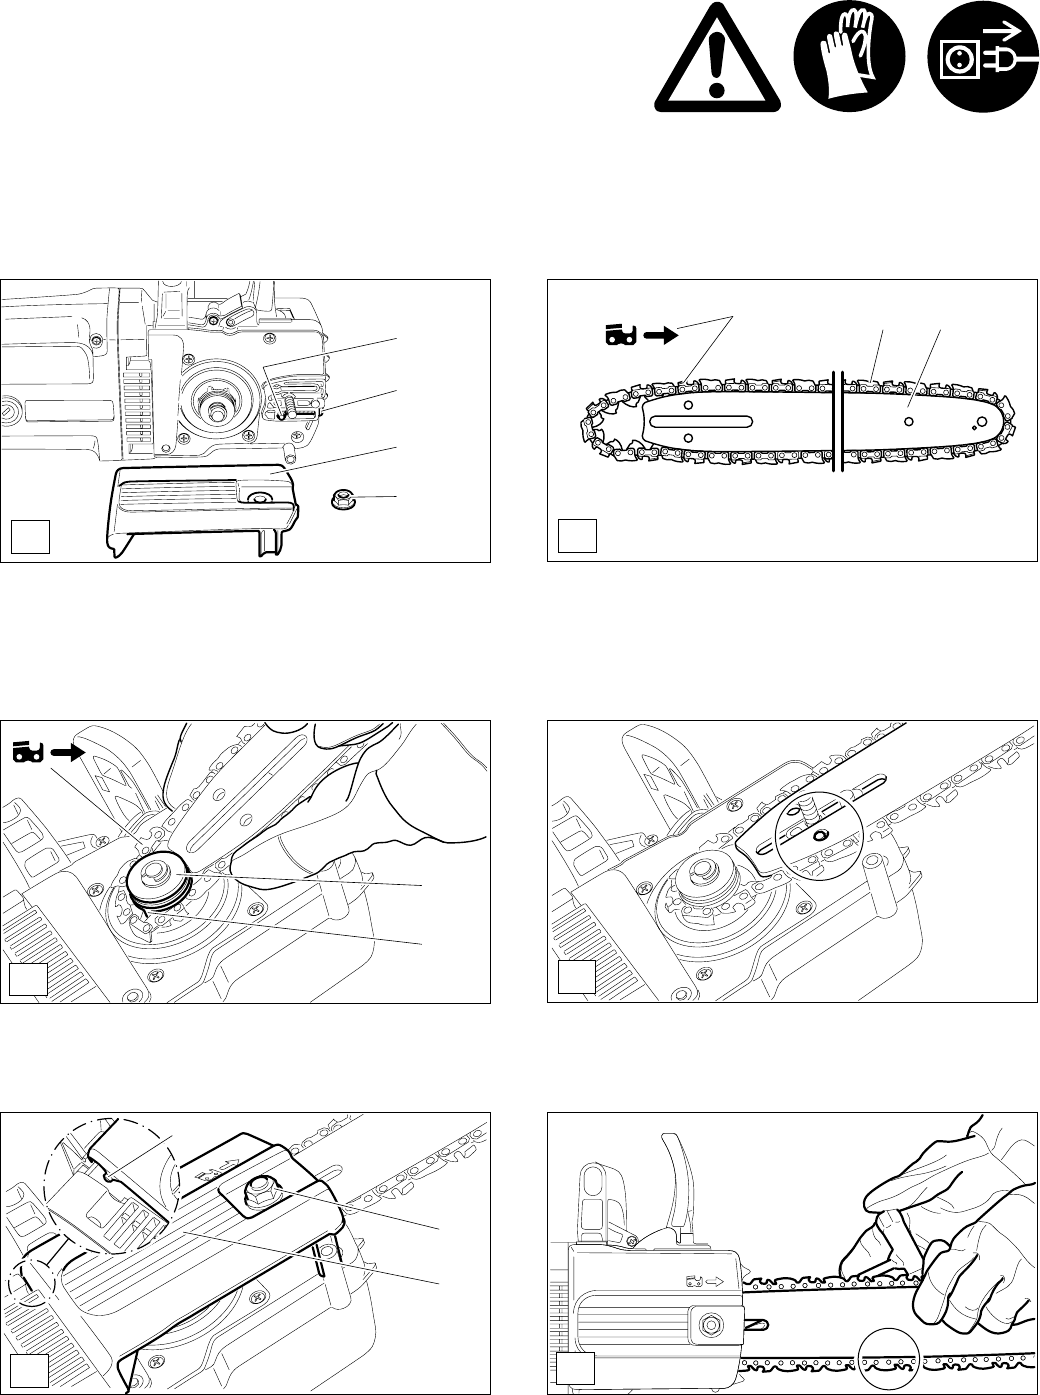
Tightening the saw chain
- Slightly lift the end of the guide bar and turn the chain
tightener screw (A/3) to the right (clockwise) until the saw
chain rests against the bottom side of the guide bar (see
circle).
- Continue to lift the guide bar end and firmly tighten the
fastening nut (E/2) by means of the universal wrench.
PUTTING INTO OPERATION
Mounting the guide bar and saw chain
Use the universal wrench delivered with the machine.
Put the electric chain saw on a stable surface and carry out the
following operations for mounting the bar and chain:
CAUTION: When working on the guide bar or saw chain
always wear protective gloves and pull out the
power supply plug.
CAUTION: Switch on the electric chain saw only after
having assembled it completely.
- When putting on the sprocket guard (E/1) make sure that
the sprocket guard lug (E/10) fits into the hole (see enlarged
illustration).
- Tighten mounting nut (E/2) lightly by hand.