


16
Inspection and Refill of Engine Oil
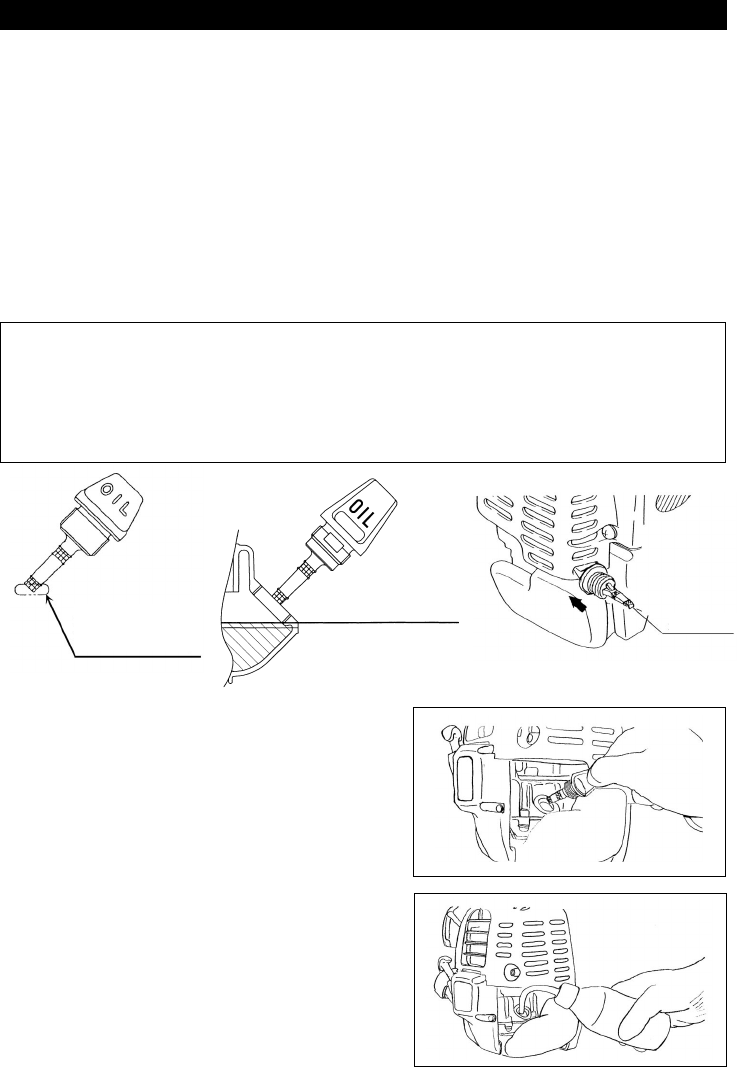
– Perform the following procedure, with the engine cooled down.
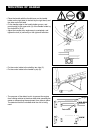
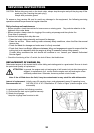
– While keeping the engine level, remove the oil gauge, and confirm that the oil is filled within the upper and
lower limit marks.
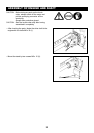
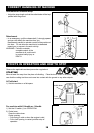
When the oil is in short in such a way that the oil gauge touches the oil only by its tip, in particular with the oil
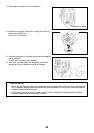
gauge remaining inserted in the crankcase without screwing-in (Fig. 1), refill new oil near the port (Fig. 2).
– For reference, the oil refill time is about 15 h (refill frequency: 15 times).
– If the oil changes in color or mixes with dirt, replace it with new one. (For the interval and method of
replacement, refer to P. 21)
Recommended oil: SAE 10W-30 oil of API Classification, Class SF or higher (4-stroke engine for
automobile)
Oil volume: Approx. 0.1 L
Note: If the engine is not kept upright, oil may go into around the engine, and may be refilled excessively.
If the oil is filled above the limit, the oil may be contaminated or may catch fire with white.
Point 1 in Replacement of Oil : “Oil Gauge”
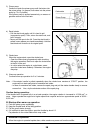
– Remove dust or dirt near the oil refill port, and detach the oil gauge.
– Keep the detached oil gauge free of sand or dust. Otherwise, any sand or dust adhering to the oil
gauge may cause irregular oil circulation or wear on the engine parts, which will result in troubles.
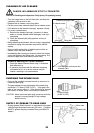
– As an example to keep the oil gauge clean, it is recommended to insert the oil gauge on its knob side
into the engine cover, as shown in Fig.3.
(1) Keep the engine level, and detach the oil gauge.
(2) Fill oil up to the edge of the oil refill port. (Refer to Fig.2).
Feed oil with the lubricant refill container.
(3) Securely tighten the oil gauge. Insufficient tightening
may cause oil leakage.
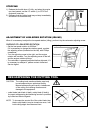
BEFORE START OF OPERATION
If oil adheres
around this tip,
refill new oil.
Fig.1
Upper limit of oil level
(Lower part of oil refill
port threaded part)
Fig.2
Oil gauge
Fig.3