


[3] DISASSEMBLY/ASSEMBLY
[3] -3. Pipe section
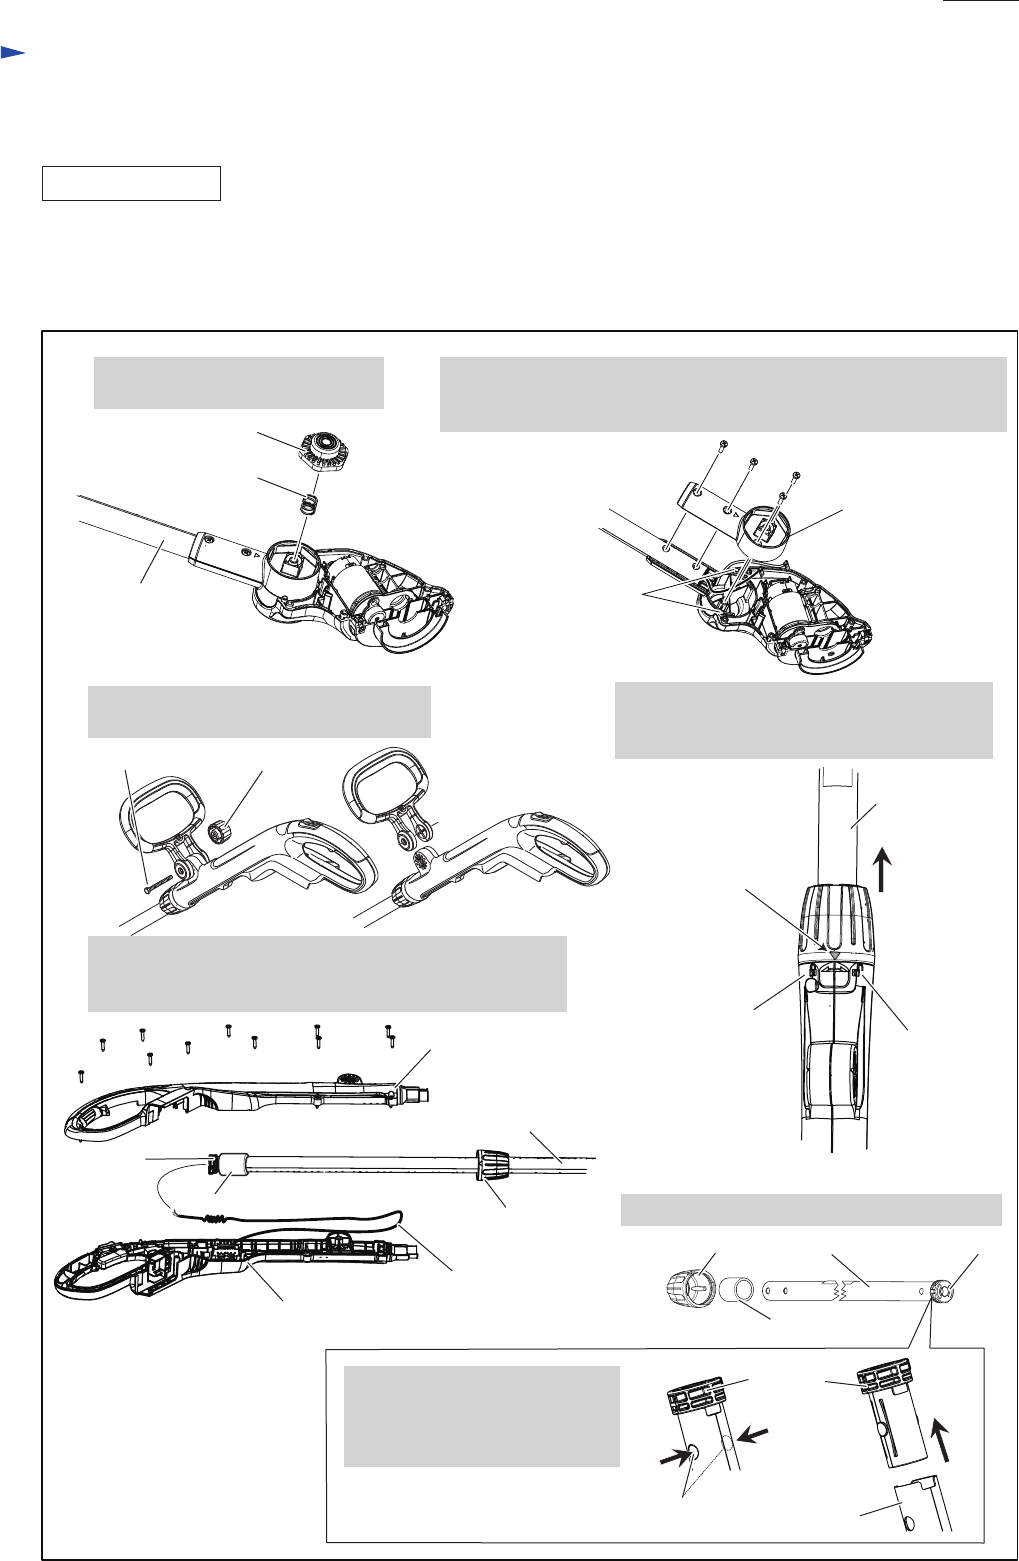
DISASSEMBLING
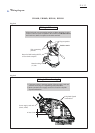
Lock off button B
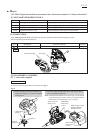
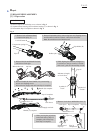
1. Remove Lock off button B and
Compression spring 12.
3. Remove M6 Nut and M6x60 Hex bolt.
And remove Front grip.
5. Remove Handle (R) from Handle (L) by unscrewing
eleven 4x18 Tapping screws.
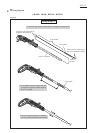
Pull out Power supply cord unit from Pipe 25 complete.
2. Remove Pipe holder (R) by unscrewing four 4x18 Tapping screws
and disconnect Lead wires (black, white) from DC motor.
Note: Be careful not to lose Rubber pin 6.
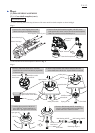
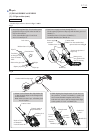
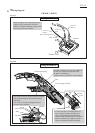
7. While pressing the projections
on the both sides of Pipe 25
complete, pull off Pipe cap
from Pipe 25 complete.
Compression spring 12
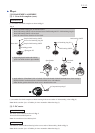
(1) Remove Spool set and Safety cover as drawn in Fig. 2.
(2) Separate Motor housing (R) from Motor housing (L) as drawn in Fig. 3.
(3) Disassemble Pipe 25 complete as drawn in Fig. 6.
Fig. 6
Pipe holder (R)
Rubber pin 6
Symbol of
“Lock”
Pipe 25
Symbol of
“Unlock”
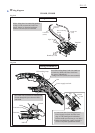
4. While aligning the indicator (triangle) on
Lock sleeve to the just center of “Unlock”
and “Lock”, pull off it toward Pipe 25 side.
Pipe 25
Handle (R) complete
Pipe 25 complete
Pipe 25 complete
Rubber sleeve 25
Handle (L) complete
Indicator (triangle)
on Lock sleeve
Lock sleeve
Pipe 25
complete
Pipe cap
Pipe cap
Pipe cap
Projections of
Pipe cap
Lock sleeve
Rubber sleeve 25
Power supply cord unit
6. Remove Lock sleeve and Rubber sleeve 25.
M6 NutM6x60 Hex bolt
Repair
P 6/ 12