NOTE: DIAGRAMS AND ILLUSTRATIONS ARE NOT TO SCALE.
18
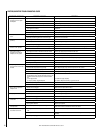
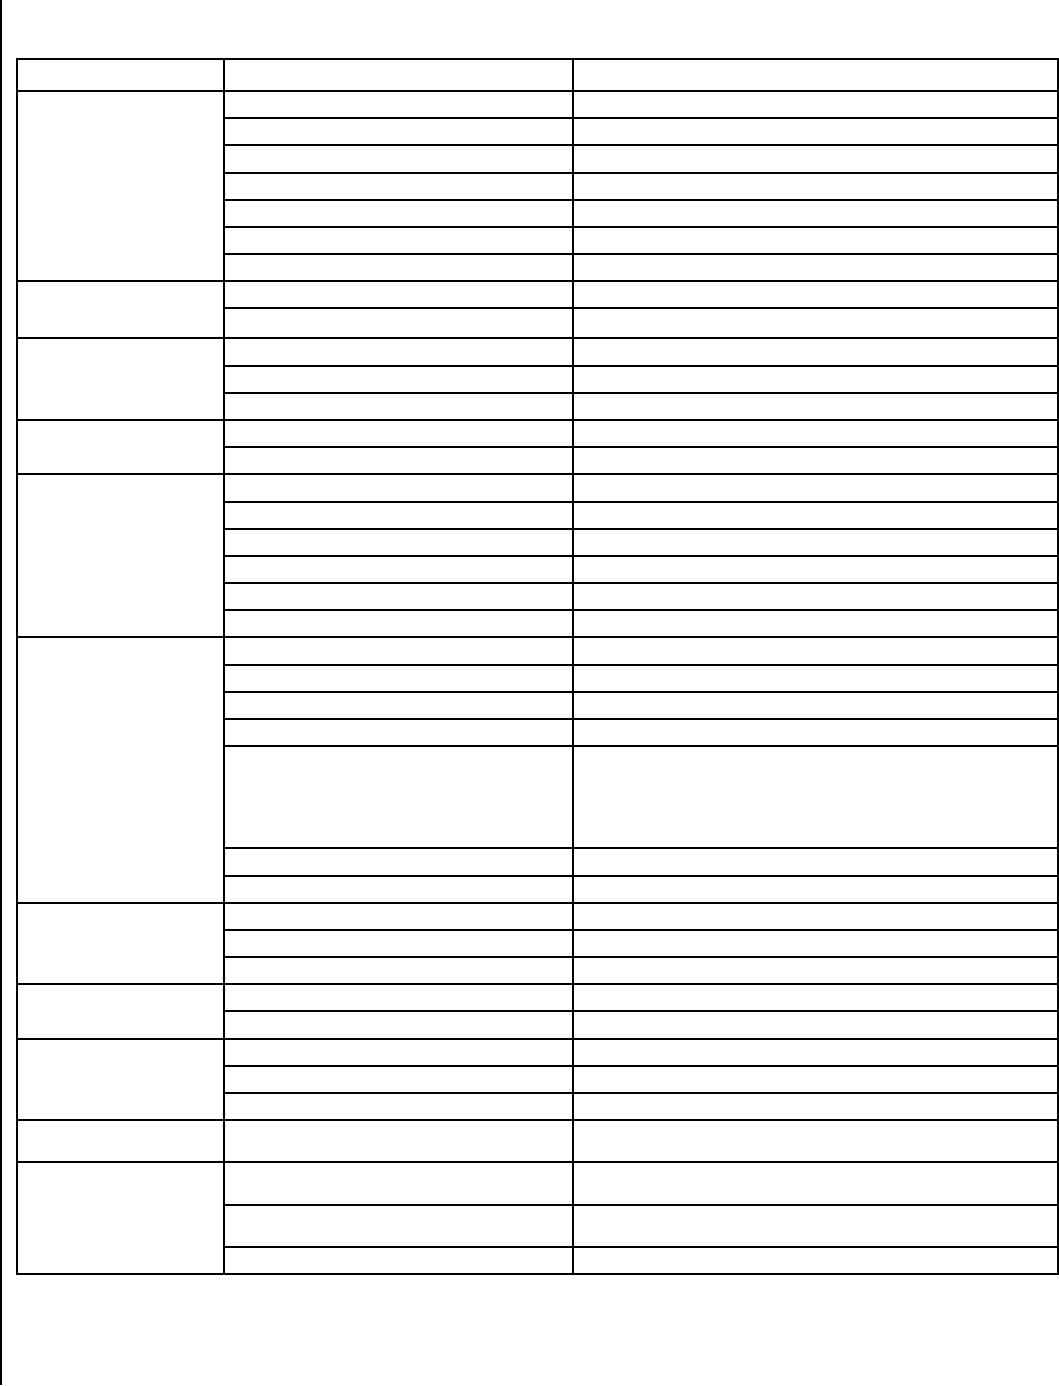
VENTED/UNVENTED TROUBLESHOOTING GUIDE
OBSERVED PROBLEM POSSIBLE CAUSE REMEDY
1. When igniter button is
pressed, there is no spark
at ODS/pilot.
A. Igniter electrode positioned wrong. Replace igniter.
B. Igniter electrode broken. Replace igniter.
C. Igniter electrode not connected to igniter cable. Reconnect igniter cable.
D. Igniter cable pinched or wet.
Free igniter cable if pinched by any metal or tubing. Keep igniter cable dry.
E. Piezo igniter nut is loose. Tighten nut.
F. Broken igniter cable. Replace igniter cable.
G. Bad piezo igniter. Replace piezo igniter.
2. Heater produces unwanted
odors.
A. Heater burning vapors from paint, hair spray, glues, etc. Ventilate room. Stop using odor-causing products while fireplace is running.
B. Gas leak. See Warning statement on the front page. Locate and correct all leaks.
3. Heater shuts off in use (ODS
operates).
A. Not enough fresh air is available. Open window and/or door for ventilation.
B. Low line pressure. Contact local gas company.
C. ODS/pilot is partially clogged. Clean ODS/pilot.
4. Gas odor even when control
knob is in “OFF” position.
A. Gas leak. See Warning statement on the front page. Locate and correct all leaks (see Checking Gas Connections, Page 9).
B. Control valve defective. Replace control valve.
5. When igniter button is
pressed, there is spark at
ODS/pilot, but no ignition.
A. Gas supply turned off or manual shut-off valve closed. Turn on gas supply or open manual shut-off valve.
B. Control knob not in “PILOT” position. Turn control knob to pilot position.
C. Control knob not pressed in while in “PILOT” position.
Press in control knob while in pilot position.
D. Air in gas lines when installed. Continue holding down control knob. Repeat igniting operation until air is removed.
E. ODS/pilot is clogged. Replace ODS/pilot assembly or get it serviced.
F. Gas regulator setting is not correct. Replace gas regulator.
6. ODS/pilot lights, but flame
goes out when control knob is
released.
A. Control knob not fully pressed in.
Press in control knob fully.
B. Control knob not pressed in long enough. After ODS/pilot lights, keep control knob pressed in 30 seconds.
C. Manual shut-off valve not fully open.
Fully open manual shut-off valve.
D. Thermocouple connection loose at control valve.
Hand tighten until snug, then tighten 1/4 turn more.
E. Pilot flame not touching thermocouple, which allows
thermocouple to cool, causing pilot flame to go out. This
problem could be caused by one or both of the follow-
ing:
1). Low gas pressure
2). Dirty or partially clogged ODS/pilot
1). Contact local gas company.
2). Replace ODS/pilot assembly or get pilot serviced.
F. Thermocouple damaged. Replace thermocouple.
G. Control valve damaged. Replace control valve.
7. Burner does not light after
ODS/pilot is lit.
A. Burner orifice is clogged. Clean burner or replace burner orifice.
B. Burner orifice diameter is too small. Replace burner orifice.
C. Inlet gas pressure is too low. Contact local gas company.
8. Delayed ignition of burner. A. Manifold pressure is too low. Contact local gas company.
B. Burner orifice is clogged. Clean burner or replace burner orifice.
9. Burner backfiring during
combustion.
A. Burner orifice is clogged or damaged. Clean burner or replace burner orifice.
B. Burner damaged. Replace burner.
C. Gas regulator defective. Replace gas regulator.
10. Slight smoke or odor during
initial operation.
A. Vapors from paint or curing process of logs. Problem will stop after a few hours of operation. Superior recommends running the
heater with the excess ventilation for the first few hours.
11. Heater produces a whistling
noise when burner is lit.
A. Turning control knob to “HI” position when burner is
cold.
Turn control knob to “LO” position and let warm up for a minute.
B. Air in gas line. Operate burner until air is removed from line. Have gas line checked by local gas
company.
C. Dirty or partially clogged burner orifice. Clean burner or replace burner orifice.
Remove 3 0" log set note Fig 10 (done 8-24-07)


