


31
Section 6: Maintenance & Lubrication
10/08/14
SB1051, SB1064, SB1574, & SB2584 with S/N 881640- Snow Blowers 370-027M
Table of Contents
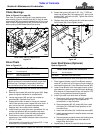
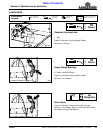
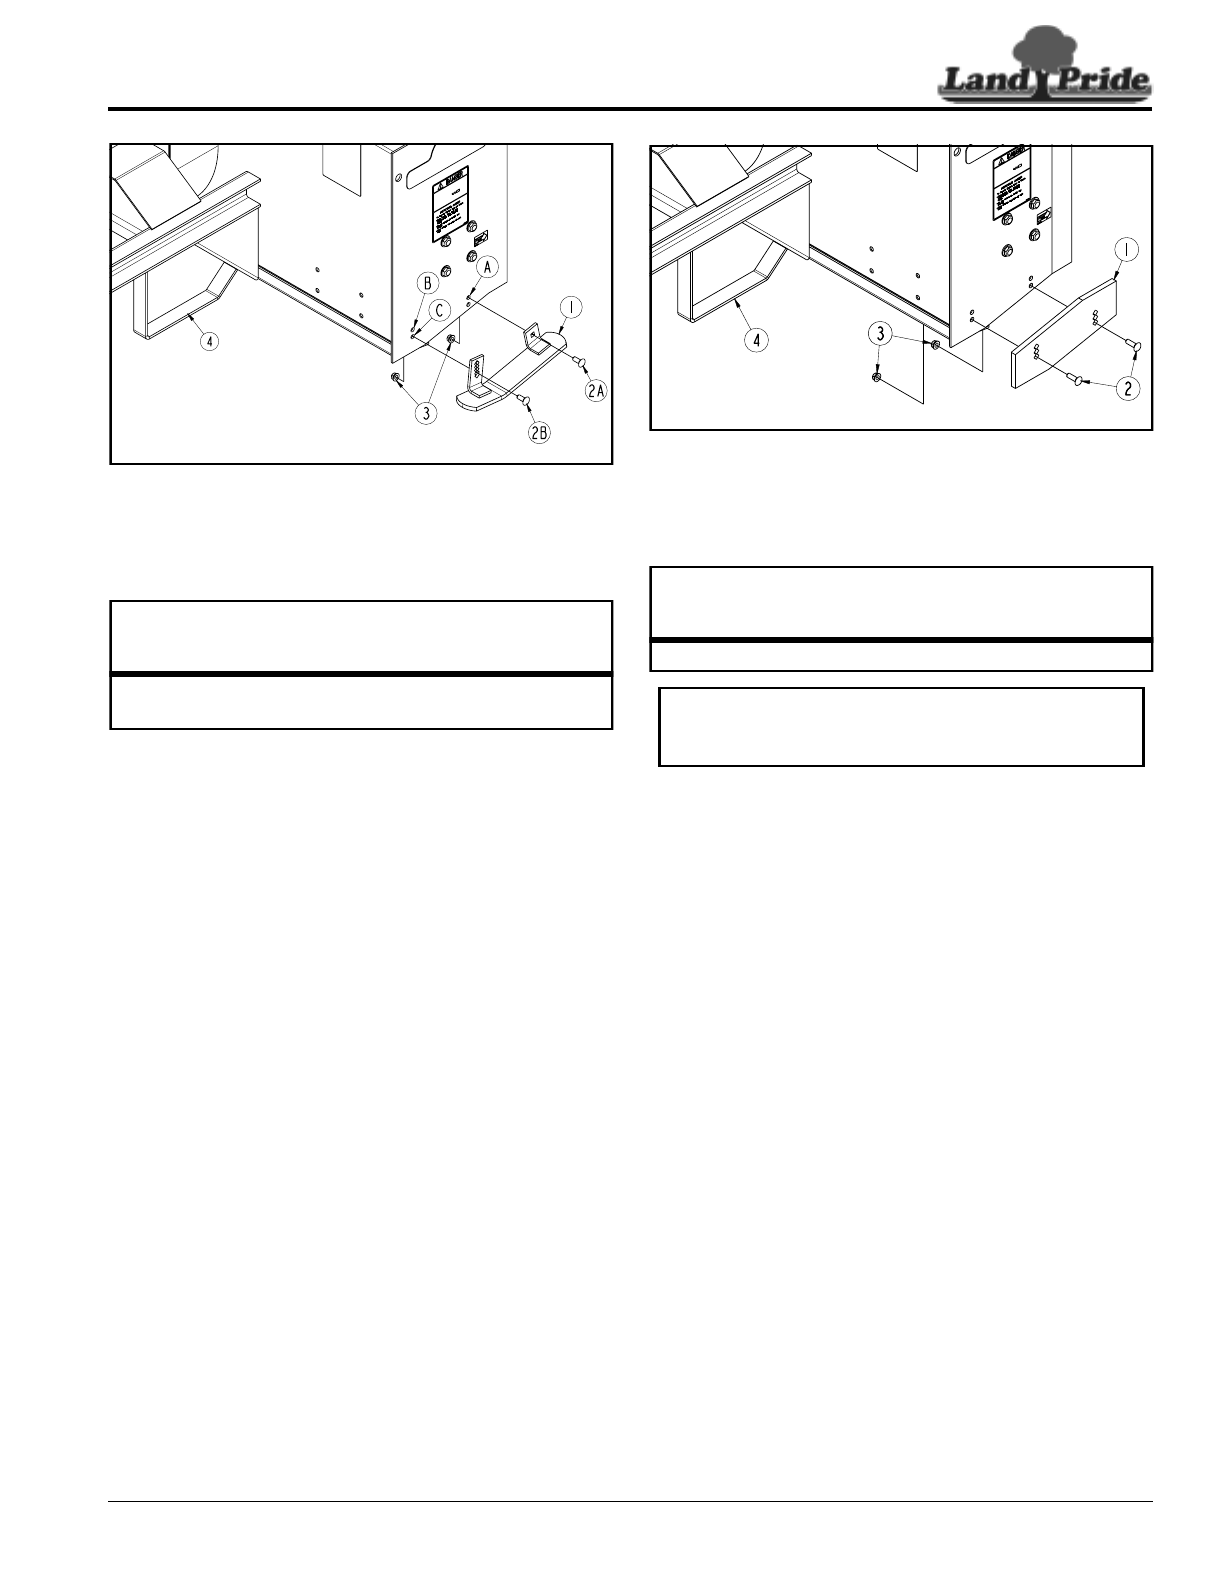
Outer Skid Shoe Replacement
Figure 6-7
Outer Skid Shoes (Optional)
Refer to Figure 6-7:
Inspect outer skid shoes for wear and replace as needed.
1. Place support blocks under Snow Blower support
rests (#4) to hold unit off the ground high enough to
remove skid shoes (#1).
2. Lower Snow Blower onto the support blocks, place
gear selector in park or in neutral with park brake set,
shut engine off, remove switch key, and wait for PTO
to stop running before dismounting tractor.
3. Remove carriage bolts (#2A & #2B) and right-hand
skid shoe (#1). Discard skid shoe and save hardware
for reattachment of new skid shoe.
4. Attach right-hand skid shoe (#1) to upper hole “A”
with 3/8"-16 x 1" GR5 carriage bolt (#2A) and hex
flange lock nut (#3).
5. Attach right-hand skid shoe (#1) to hole “B” or “C”
with 3/8"-16 x 1" GR5 carriage bolt (#2B) and hex
flange lock nut (#3).
6. Tighten lock nuts (#3) to the correct torque.
7. Repeat steps 3 to 6 above for left-hand skid shoe.
33241
Outer Skid Shoe Part Numbers
Part No. Part Description
370-013H OUTER LEFT-HAND SKID SHOE
370-014H OUTER RIGHT-HAND SKID SHOE
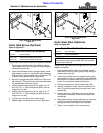
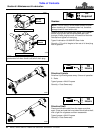
Outer Wear Bar Replacement
Figure 6-8
Outer Wear Bars (Optional)
Refer to Figure 6-8:
Inspect outer wear bars and carriage bolts for wear and
replace as needed.
1. Place support blocks under Snow Blower support
rests (#4) to hold unit off the ground high enough to
remove wear bars (#1).
2. Lower Snow Blower onto the support blocks, place
gear selector in park or in neutral with park brake set,
shut engine off, remove switch key, and wait for PTO
to stop running before dismounting tractor.
3. Remove carriage bolts (#2) and wear bars (#1).
4. Inspect hardware for wear. Save if hardware is not
worn. Discard hardware and purchase new if worn
excessively.
5. Inspect wear bars. Save wear bars if they can be
turned over and reused. Discard wear bars if worn
excessively.
6. Rotate and reattach existing wear bars or new wear
bars (#1) to the side panels with existing/new
carriage bolts (#2) and flange lock nuts (#3).
7. Tighten lock nuts (#3) to the correct torque.
33242
Outer Wear Bar Part Numbers
Part No. Part Description
370-212D OUTER WEAR BAR
NOTE: When outer wear bars (#1) are worn
excessively, they can be rotated 180
o
and reused to
extend their wear life.